The Payment Forms plugin is the most versatile Paystack plugin. All the other Paystack plugins are built for specific WordPress themes/plugins like WooCommerce or WHMCS, but Payment Forms allow you to use Paystack on any WordPress site.
It's literally a simple form that you embed to a page to be able to receive payments. You can use Payment Forms to receive one-time and recurring payments, you can use it to sell products, receive donations, sell event tickets, etc.
Installation and Configuration
Follow this link to the plugin page to download the Payment forms plugin and install it on your plugin. Instructions for installing the plugin are on the page. After installing the plugin, you will find a tab on your WordPress dashboard named "Paystack Forms".
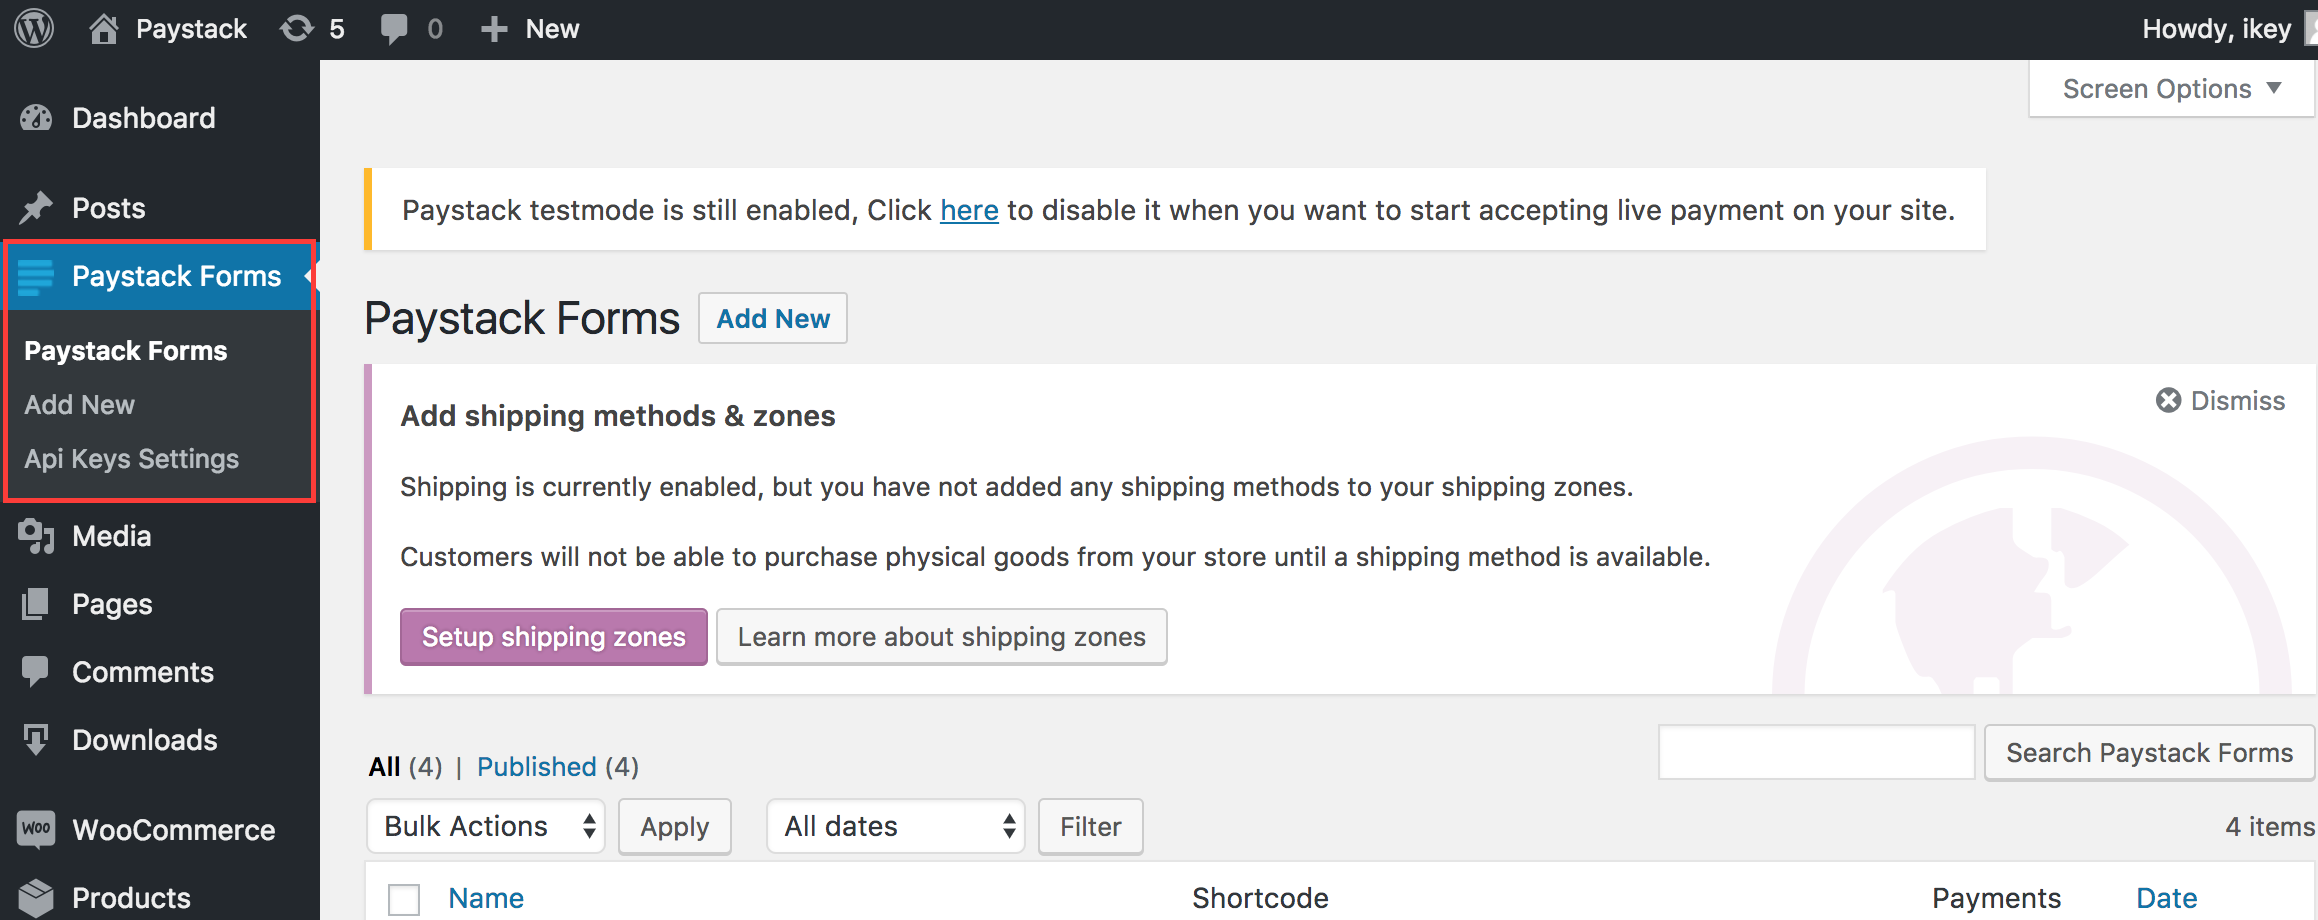
Next, you will need to enter your Paystack API keys. Click on the API Keys Settings link under the Payment Form tab. Please follow this link to get your API keys from your Paystack Dashboard. After that, you are ready to start receiving payments using Payment Forms.
How to get your Test and Live API Keys
There are 2 states on your dashboard: Live Mode and Test Mode. You'll see the Test Mode/Live Mode toggle on the top right corner of your dashboard after your business has been activated.
When you go to the Settings Page to get your API keys, please note the mode that your dashboard is in, as that will determine the keys that will be displayed. So if the dashboard is on Test Mode, you can only see the Test API Keys and vice versa. To see the other Keys, switch the toggle from one mode to another.
If there is no toggle and it's just Test Mode, this means that your Paystack account has not been activated. Please follow this link to activate your account
Using Payment Forms
To receive payment using Payment Forms, you need to create a new Form.
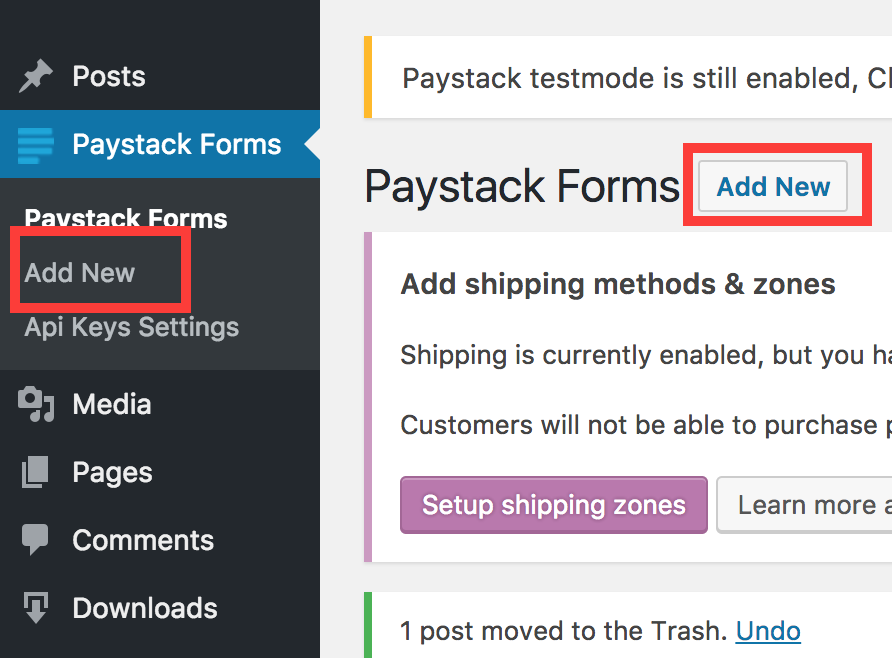
- Create a new form: to create a new form, click on any of the Add New links on the menu tab or beside the title. This will lead to the New Payment Form page
- Fill the Add Payment Form fields according to your need. In the next section, we will explain all the features on the Form and how/when to use them.
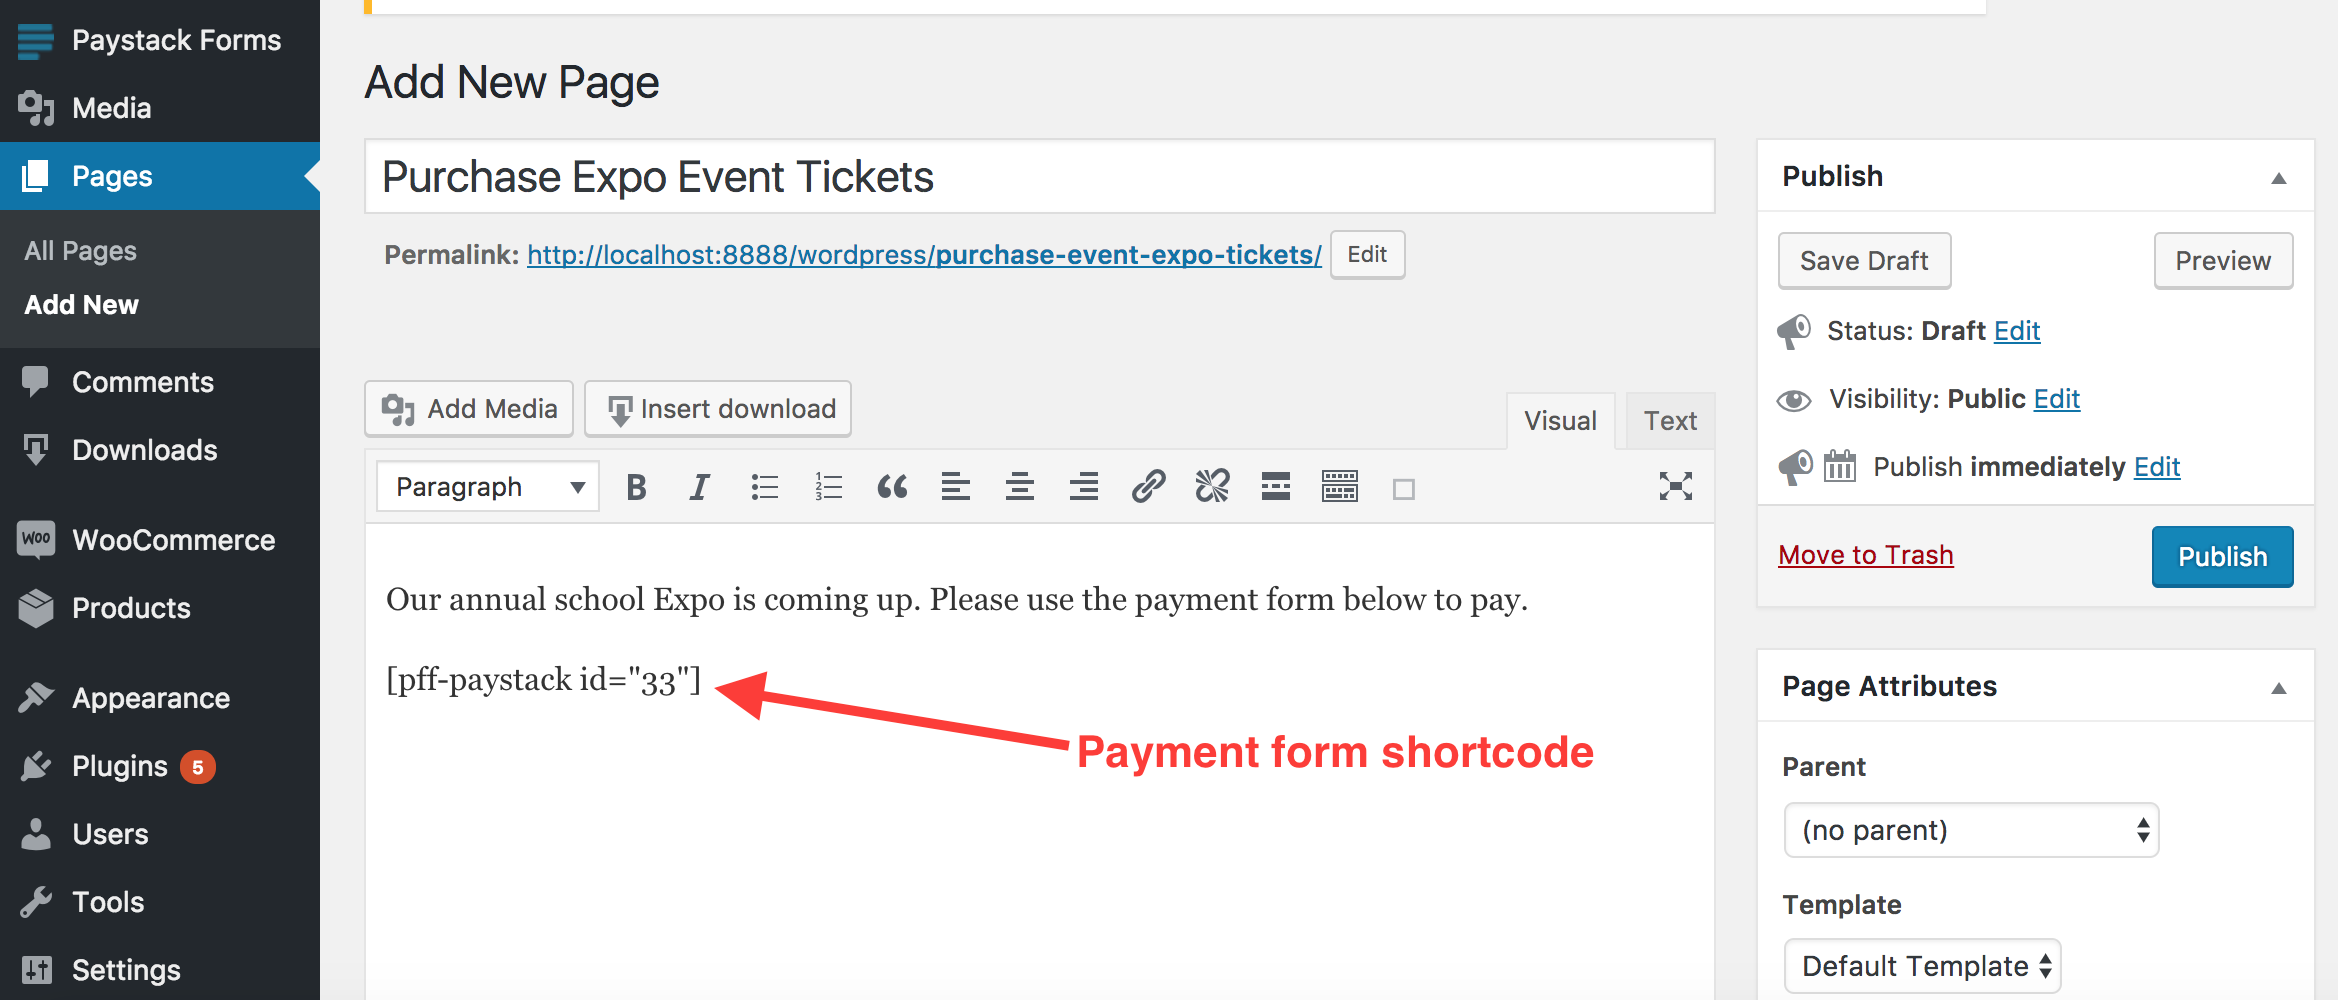
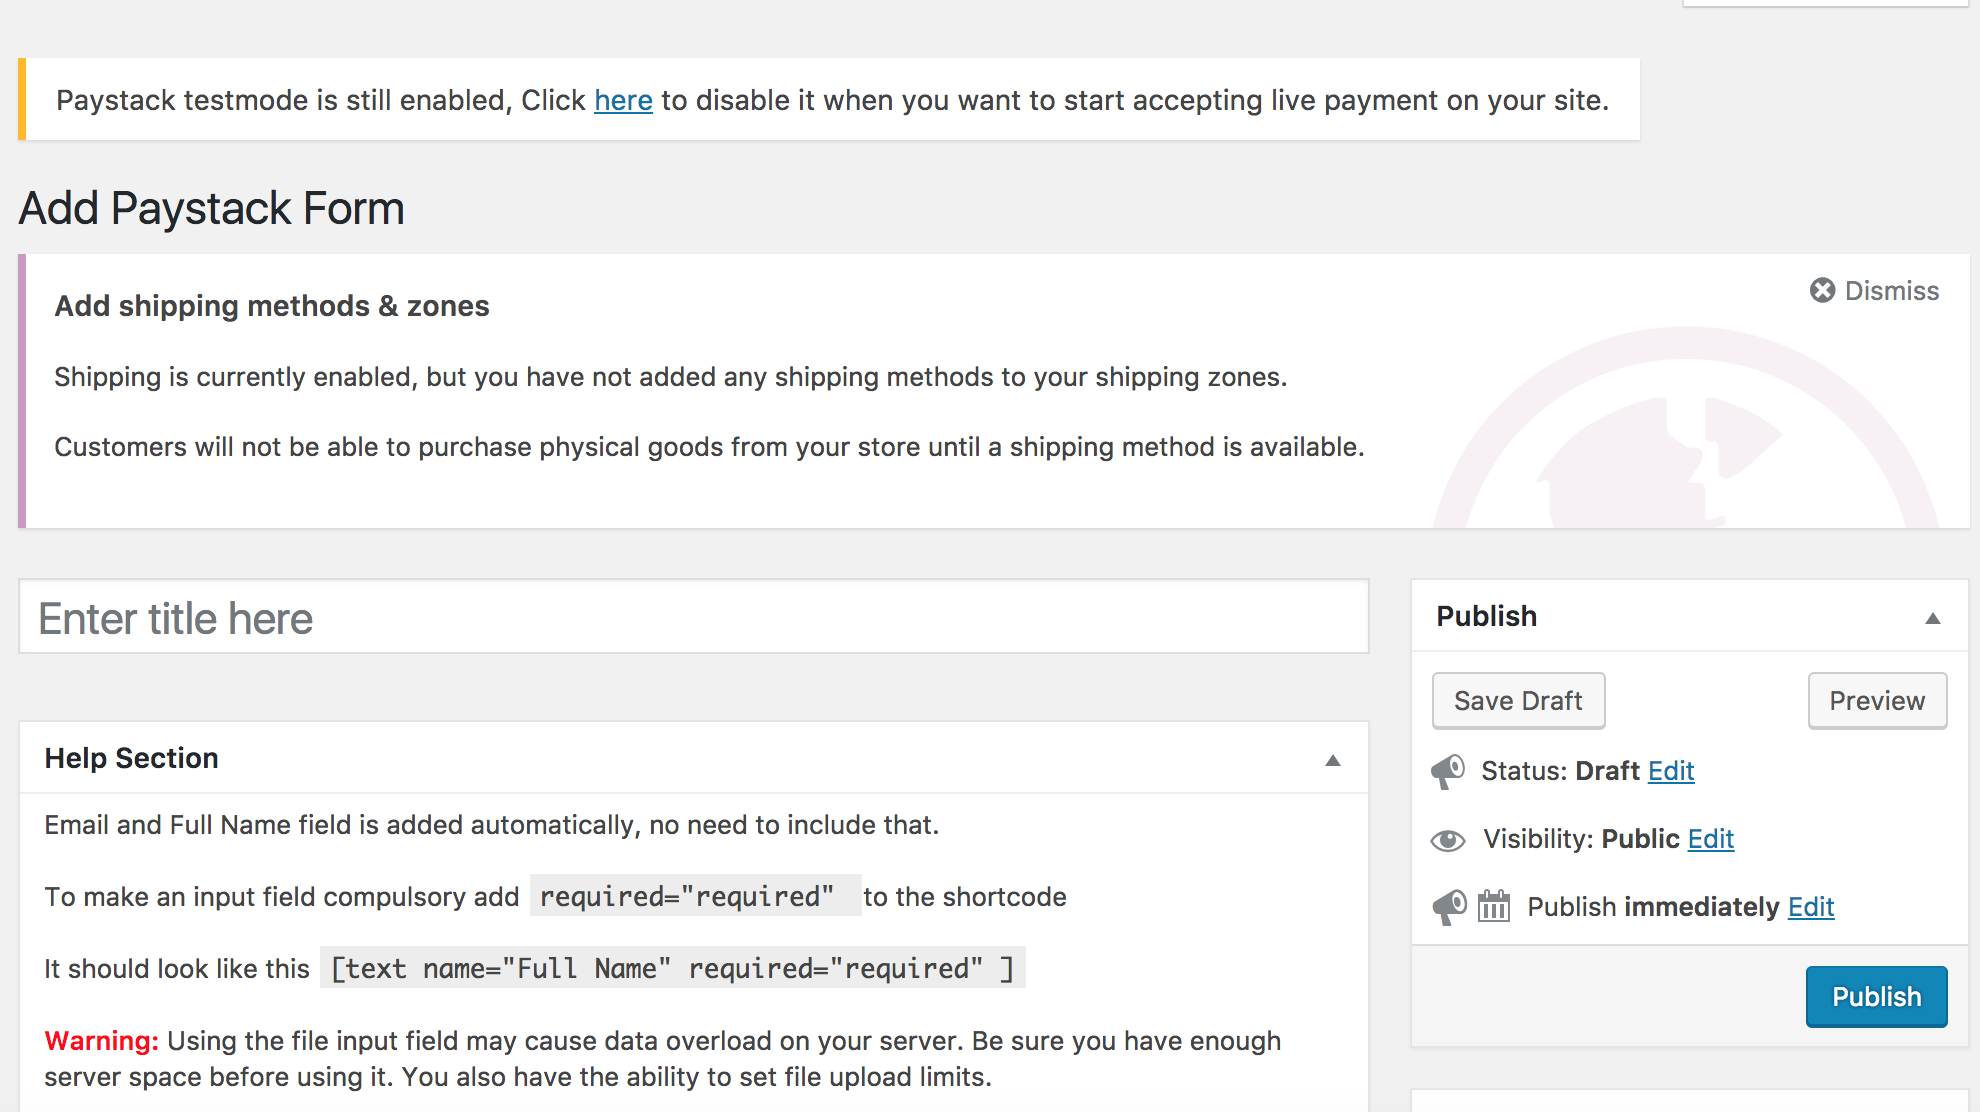 After you create the payment form and publish, a shortcode will be generated for that Payment Form. The shortcode will look something like [pff-paystack id="01"]
 You then copy this code and paste it in the WordPress page where you want to receive the payments.
When you publish the page, it should look like this: (the form below the text is loaded into the page by the Payment form shortcode)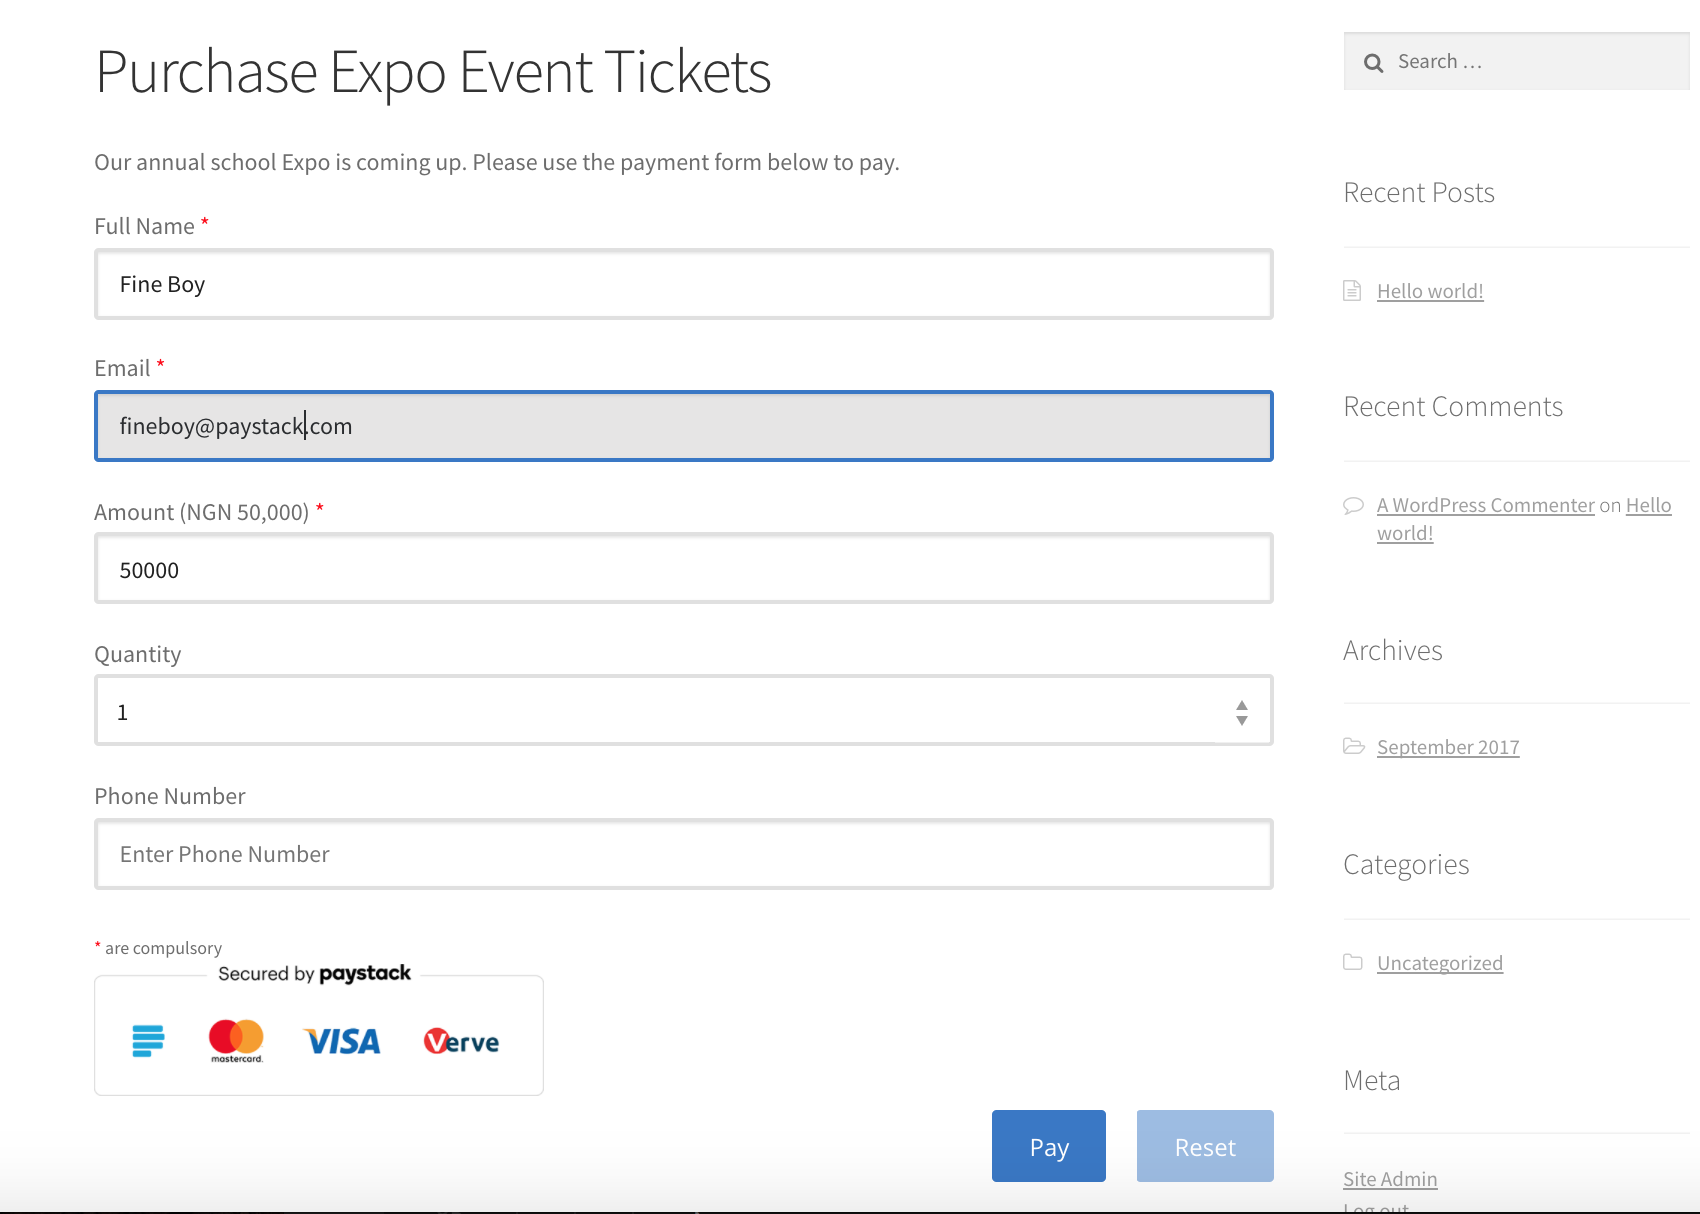
Features of Paystack Payment Forms
Here we will discuss all the settings you see when you're creating a Payment Form and when to use them. 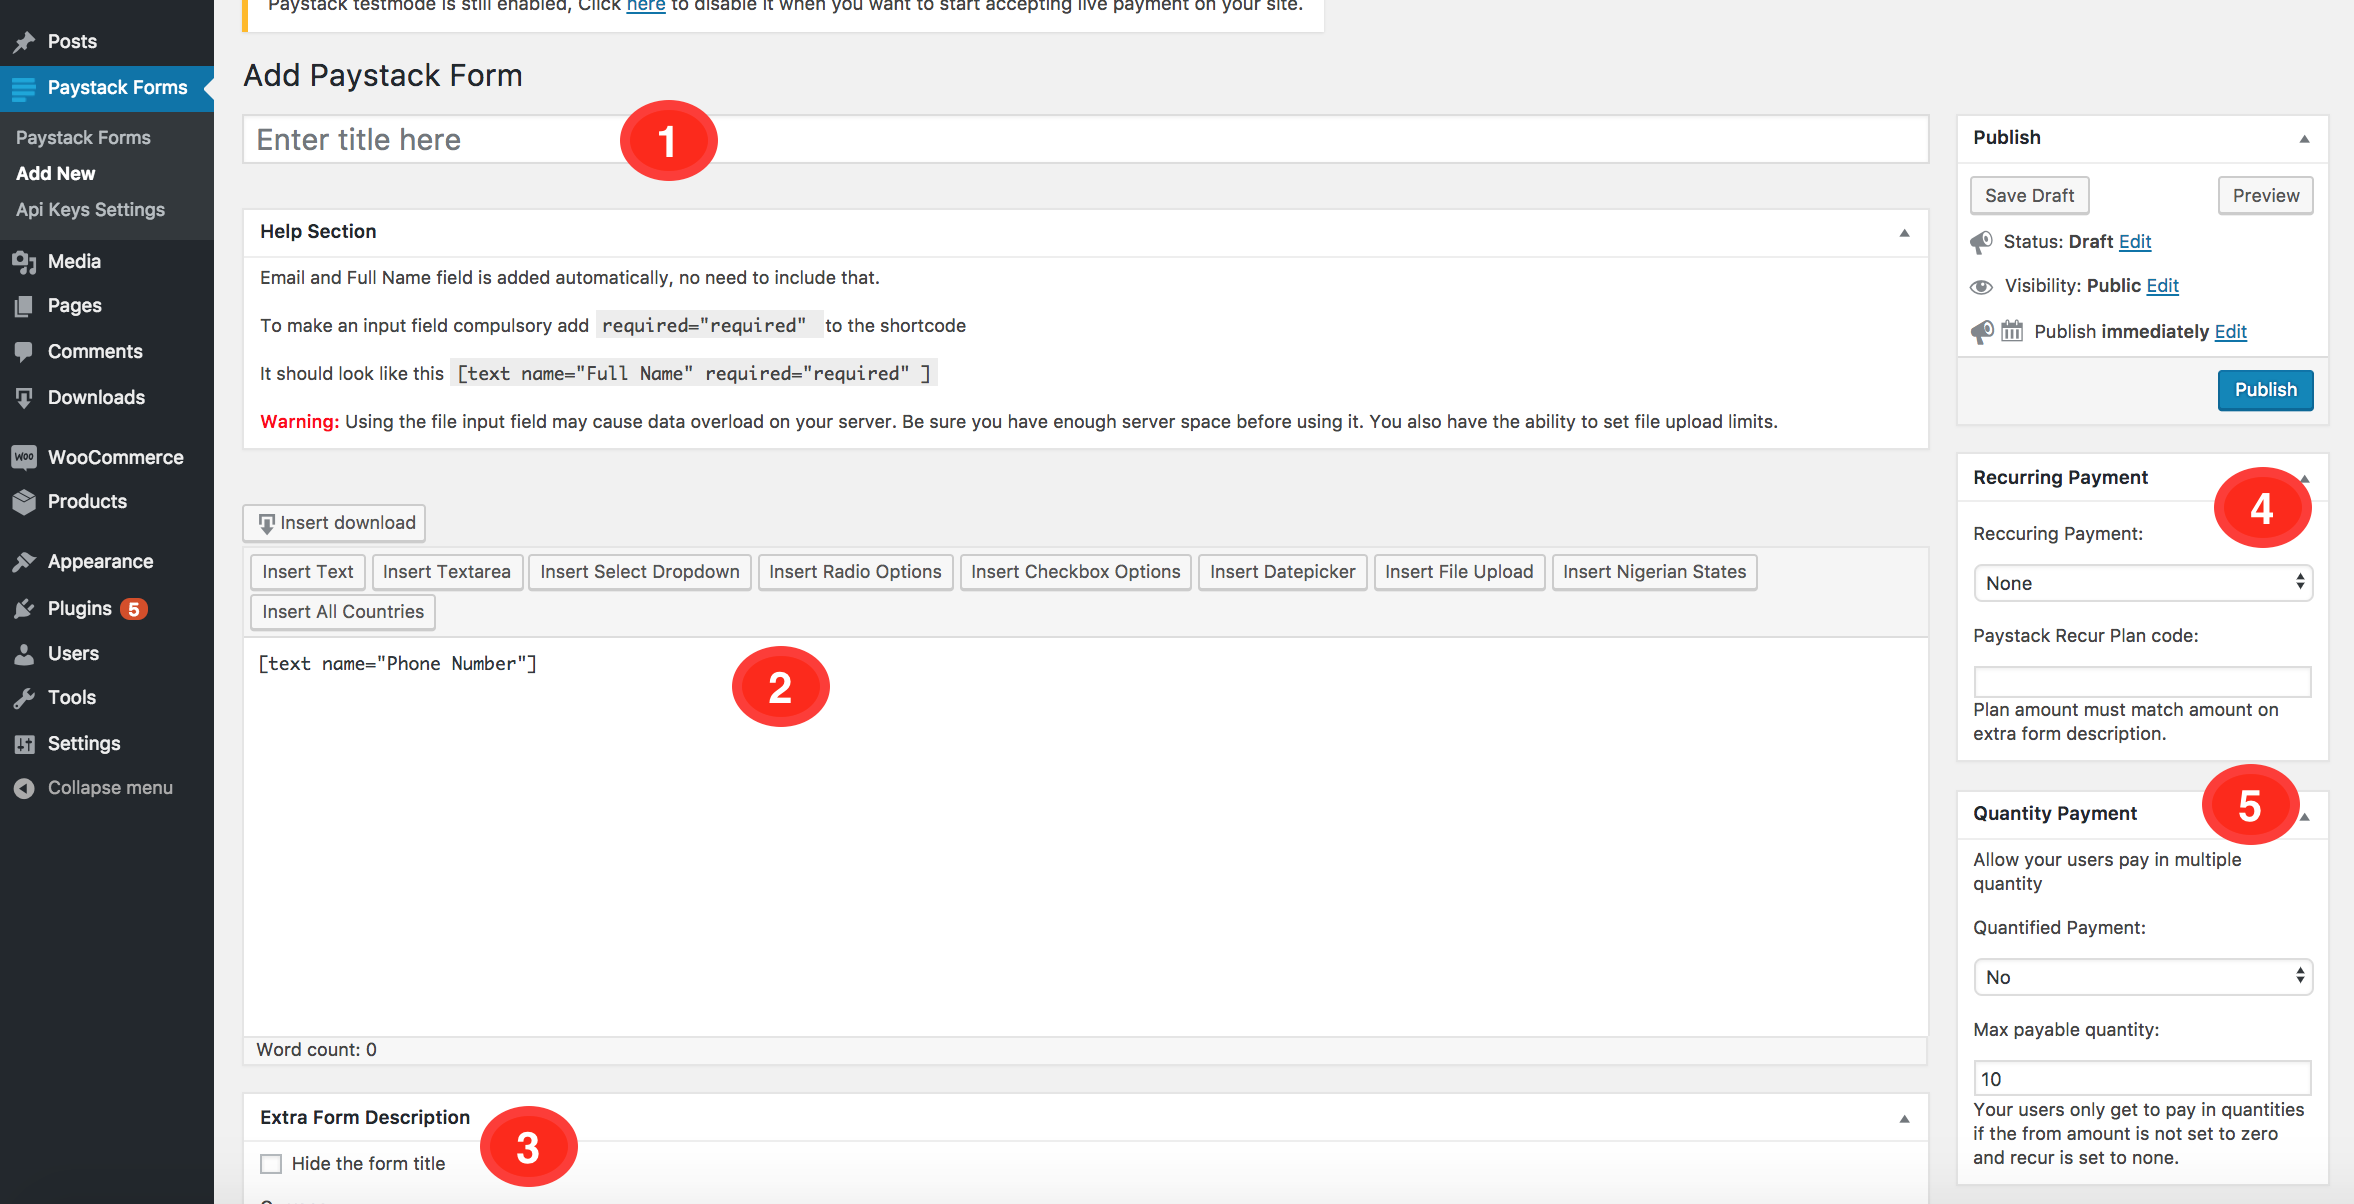
- Form Title: This is where you set the title of the Payment form. This will be the name you'll use to identify this particular Payment Form from in your list of Payment forms.
- Extra Fields: If want to have extra fields on the form (address, mother's maiden name, etc), this is where you set it. They are defined within square brackets. You can click on any of the INSERT buttons on top of the field to select the type of input field you want (text fields, select dropdown, checkboxes, etc), and name the field appropriately. They should look like: [text name="Address"] [select name="Gender" options="Male ,Female, Not sure"] etc.
- Hide Form Title: If you check that box, the title of the form will not be shown on the page where the form will be displayed. This comes in handy when the form displays very close to the top of the page and the page title is already displayed, and you don't want 2 big bold headings showing together.
- Recurring Payment: Payment form allows you to receive Recurring Payments. This is perfect for when you want to receive payment that needs to be renewed at recurring interval example monthly membership dues, annual subscription payments, monthly tithe collection, etc.
After the first payment, the user is billed automatically for subsequent payments.
The recurring payment has 2 options:- Optional Recurring - here the user chooses the interval they want to be paying. This works well if you are receiving recurring donations, where the users input the amount they want to pay and the interval the want to be paying
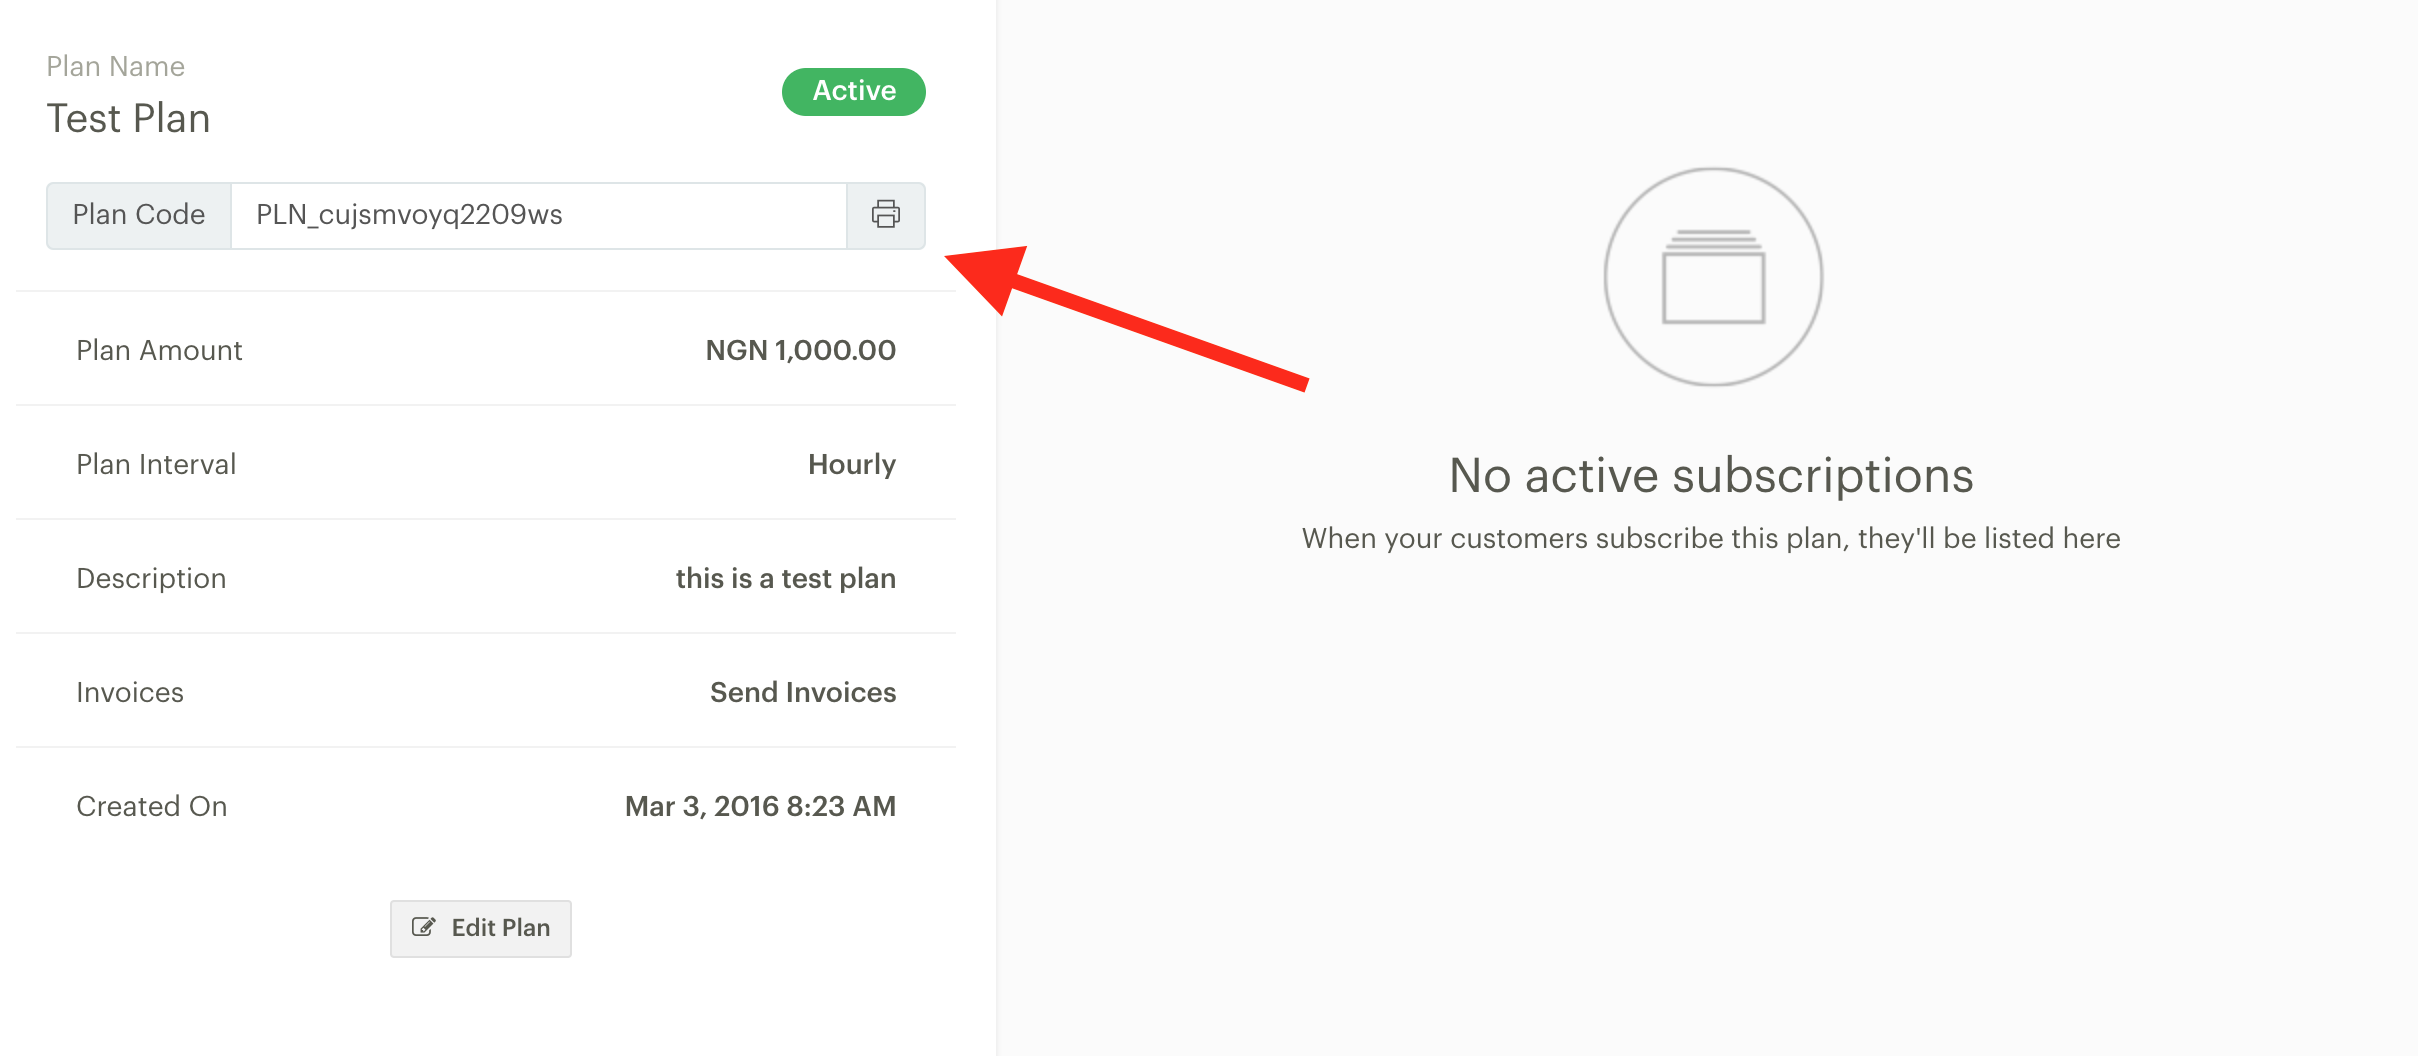
- Paystack Plan - You can create a Plan on your Paystack dashboard, then paste the plan code generated in the Paystack Recur Plan Code field below the Recurring option dropdown.
- Quantity Payment: If you're collecting payment for a quantifiable product (tickets, shoes, etc) you can set Quantified Payment to Yes. In the field below it, you can set maximum quantity that a user can buy in one payment.
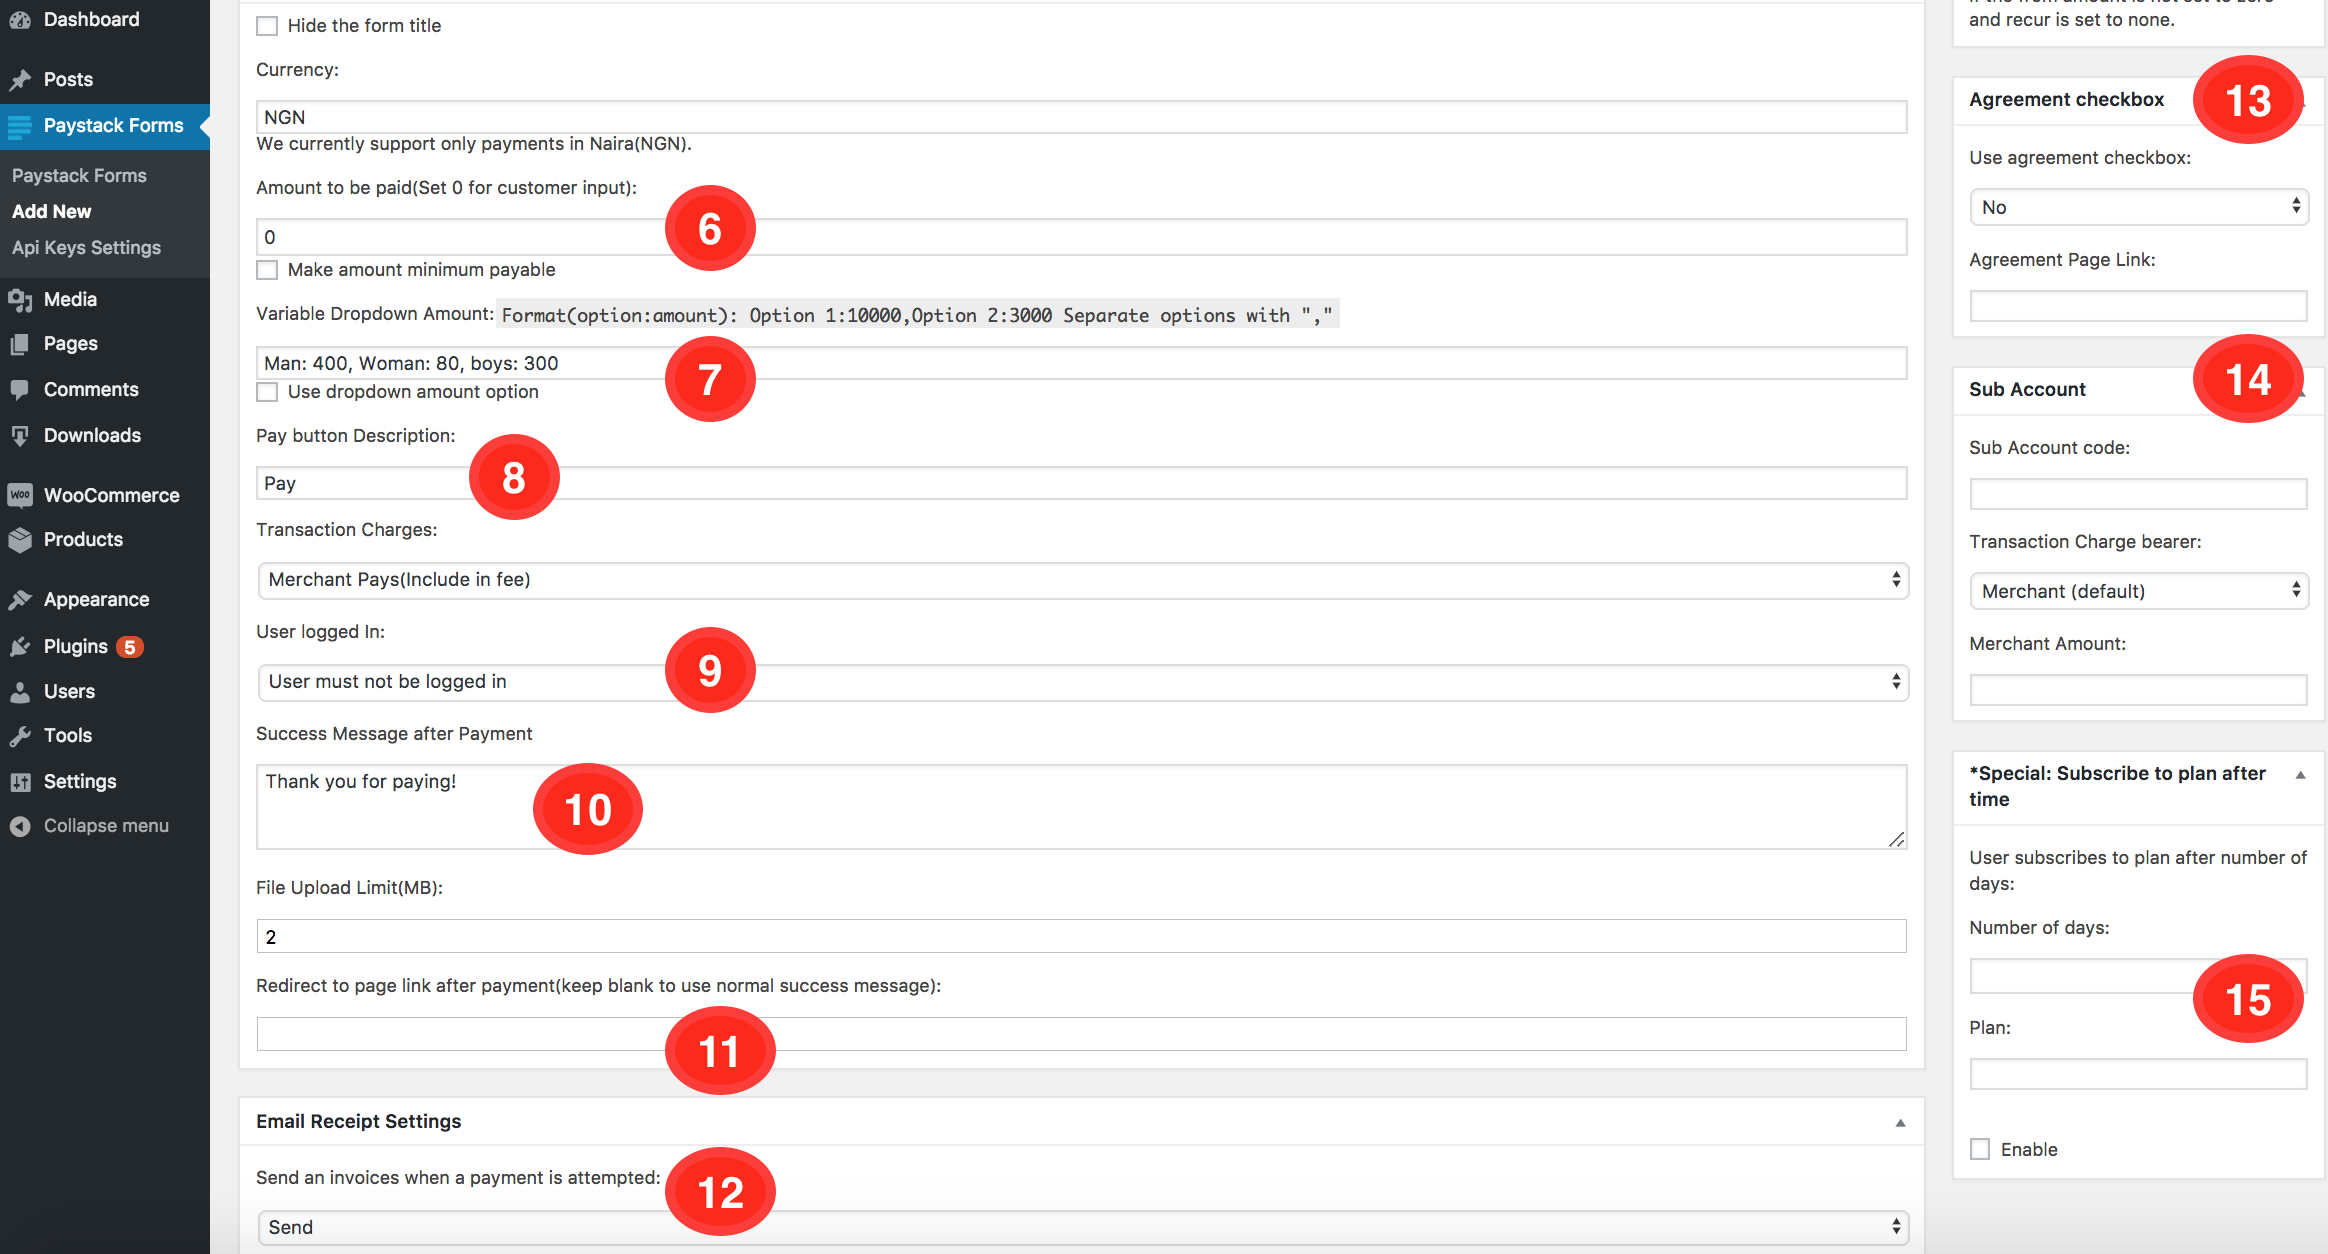
- Amount: This is where you set the amount you want to receive. If you leave it on 0, this means that the user can enter any value they want, this is useful for donations. If you check the Make Amount Minimum Payable checkbox below the amount field, this means that user can enter any amount they want but it must not be less than the value in the input field.
- Variable Dropdown Amounts: if you are selling different classes or variation of a product or service with different prices, instead of creating different payment pages, you can create variable amounts so the users can select the package they want to pay for and the price will be reflected upon checkout. To do this, you fill the options in the input field. The format is " product_variation_1: price_1, product_variation_2: price_2,...", example "VIP Ticket: 5000, Regular Ticket: 2000". Next, you check the "Use dropdown amount option" box.
- Pay Button Description You can change the text that shows on the pay button to fit the purpose of the Payment form. So you can change the text to Buy, Donate, etc.
Transaction Charges: This lets you choose whether to add include the transaction charges to the amount you want to charge. When a user pays, Paystack takes their transaction charges from the amount that was paid and remit the rest to you. With this option, if you need to get the full Payment Form amount in your bank account (N5000 for example), you can add the transaction charges to the amount so that after it is taken out, what is left will be the full amount you want. - User Logged in: This option lets you choose whether or not to restrict the payment form to only logged in user. By default, the User must not be logged in.
- Thank you message: Here you can change the thank you message that is displayed to the user upon successful payment.
- File Upload limit: With payment form, users can upload files to the payment form to you. Here you can set the maximum size of each file to be uploaded.
Redirect URL: If you want the user to be redirected to another page after a successful payment, you add the URL here. If you leave blank, the Thank you message will be displayed
- Send email receipt: This option allows you to choose whether or not to send a receipt to the user after Payment
- Agreement Checkbox: If your user needs to agree to some terms and conditions before paying, you can set the option to yes, and enter the link to the terms and conditions page.
- Sub-accounts: If you have a sub-account that you want to split the payment of the product/service here with, you can add the sub-account code in the input field. You can choose who bears the transaction charges. If you want the main account to take a fixed amount of the payments (as opposed to a percentage), you can enter the fixed amount in the Merchant Amount box.
- Subscribe to Plan After Date: Recall from number 4 that you can use this payment form to collect payments for recurring billings and subscription plans. This feature allows you to subscribe users to a particular payment plan after a set number a days. This means that if you set that number to 7, after 7 days, the customer is automatically subscribed to whatever plan's code you entered in the field below. The Plan field is should be a plan code from your Dashboard. Learn more about Plans and Subscription here.
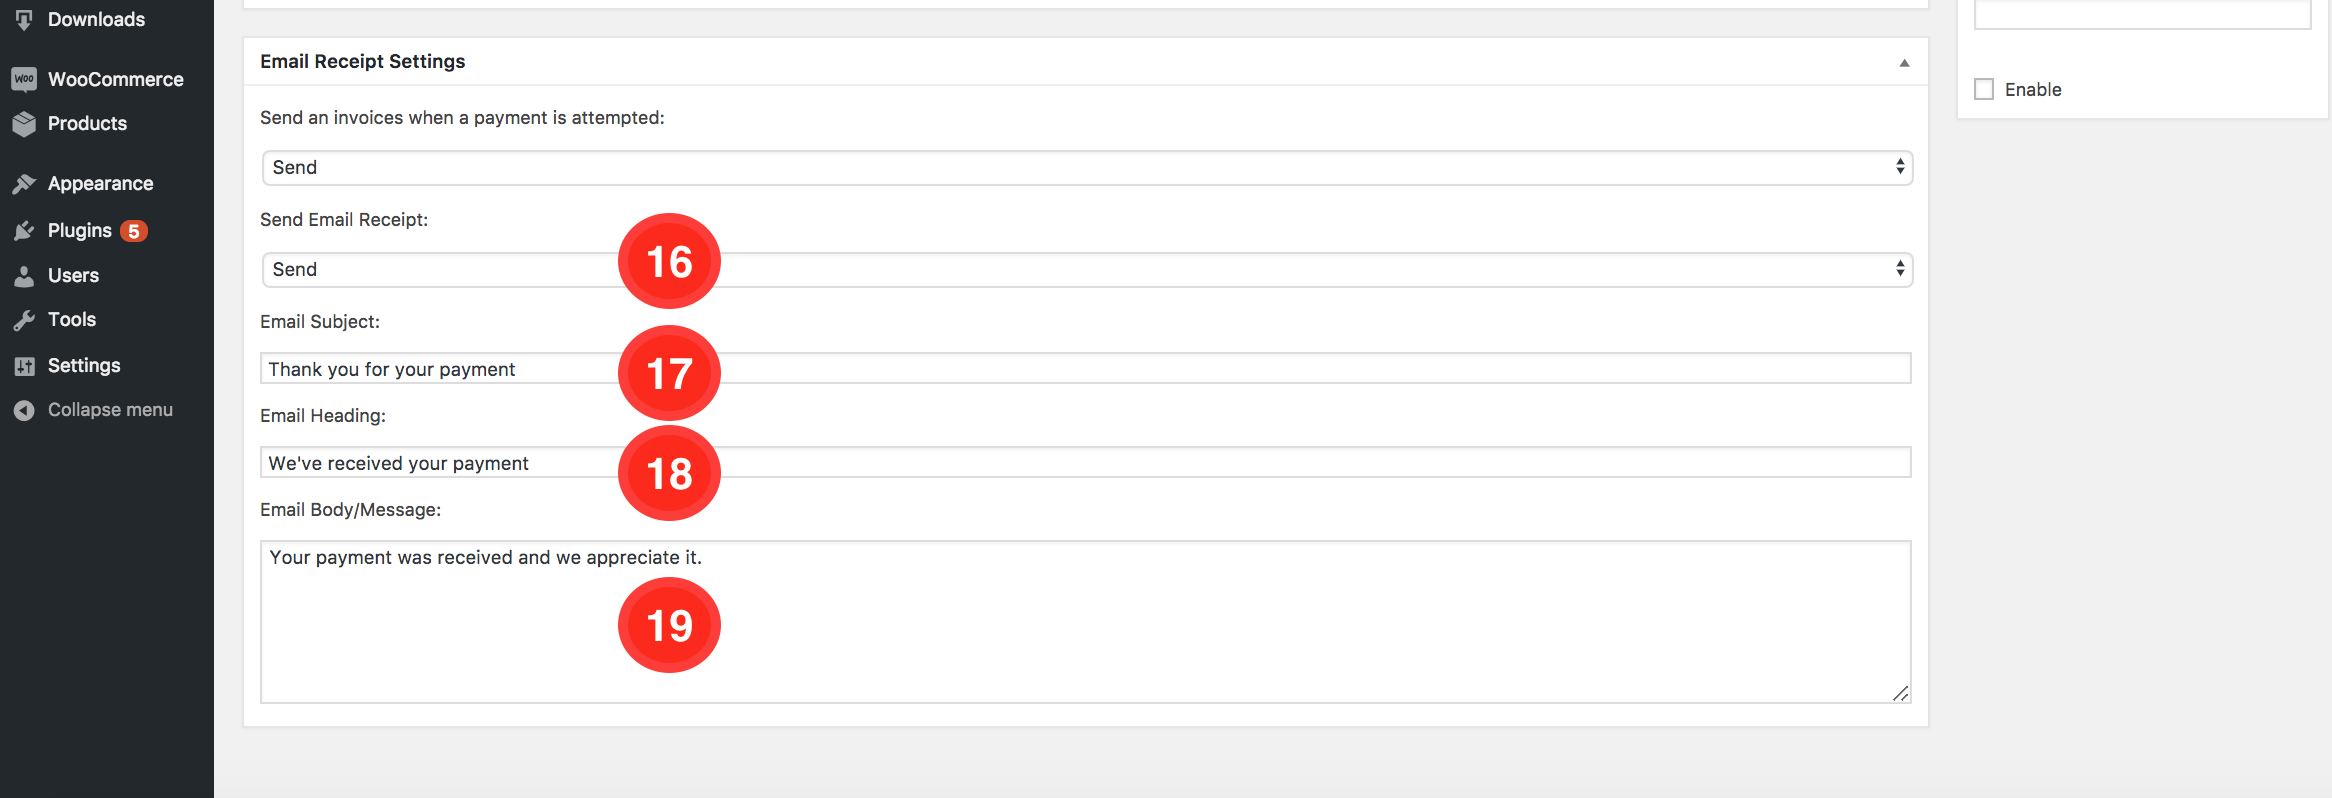
- Email Receipt Settings
16 through 19 are settings for the email that can be sent to the customer upon successful payment. Edit them to your needs.

Comments
1 comment
Please how do i add a file attachment to the email receipt being sent to customers or is there a way to generate pdf receipt for the customer?
Please sign in to leave a comment.