
Paystack allows you to receive payment on your Joomla site using our Joomla extensions. To get started, you need to find the right Paystack extension for your Joomla site. At the moment, we have extensions for Virtuemart, Icejoomla, and BreezingCommerce.
In this article, we'll discuss how to setup Paystack on Virtuemart, but please note that the process is similar for all the other extensions.
Installing the Plugin
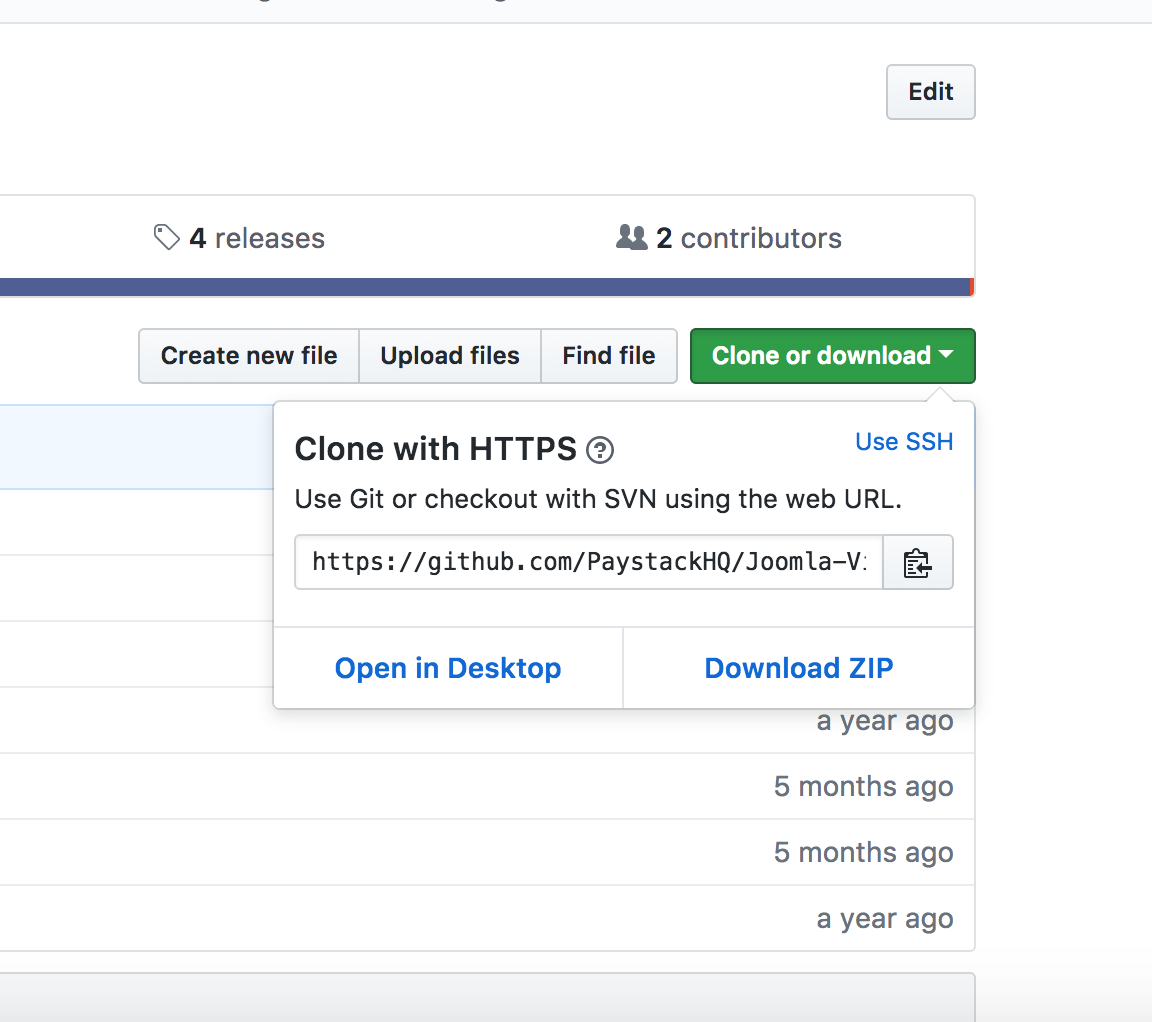
To get started, please follow this link to the Virtuemart Paystack plugin from Github. Click on the Clone or Download button and click Download Zip button that shows in the pop-out.
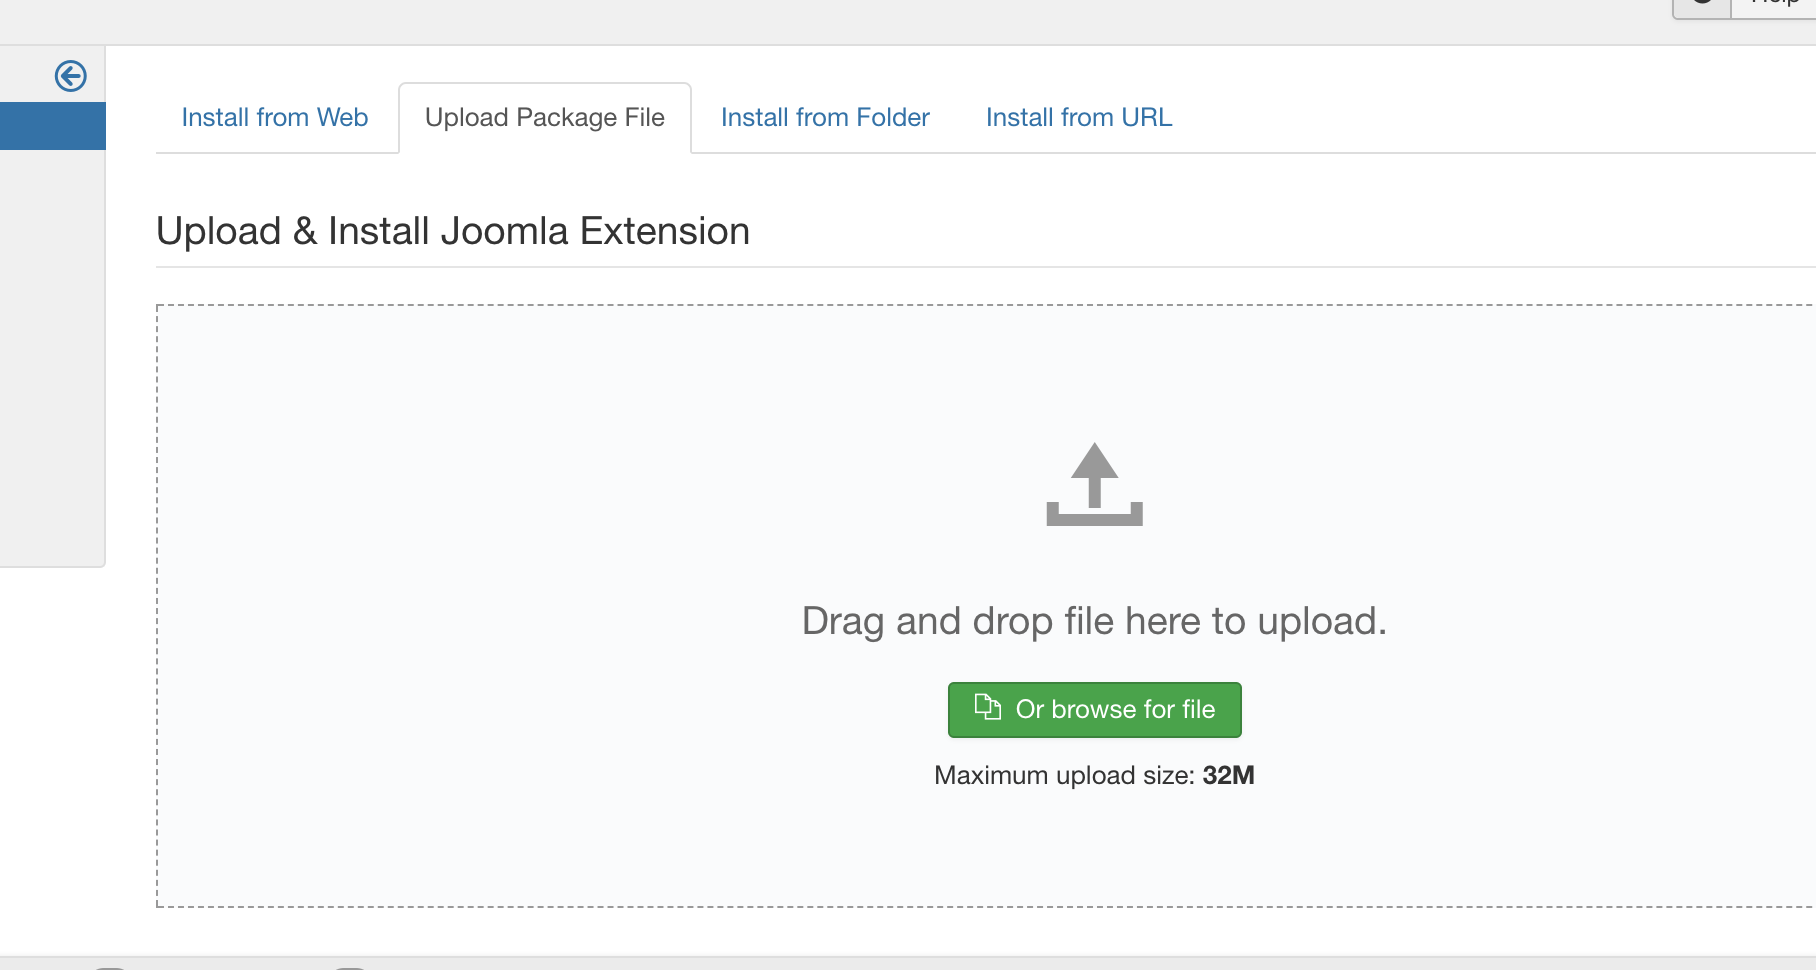
Next, go to your Joomla Dashboard >> Extensions >> Manage >> Install. On the the tab on the Install page, select Upload Package File and upload the downloaded zip file. This would install and configure the plugin.
Install Virtuemart before Paystack plugin
Please ensure you have installed Virtuemart on your Joomla site before installing the Paystack Virtuemart plugin. The Paystack Virtuemart plugin cannot work without Virtuemart.
Configure Paystack on Virtuemart
To setup Paystack, on your Joomla Settings, click on Virtuemart and select Payment Methods.

On the page that opens, you'll see the list of Payment methods available on your Virtuemart Plugin. To add Paystack, click on the New button at the top and fill the form that follows.
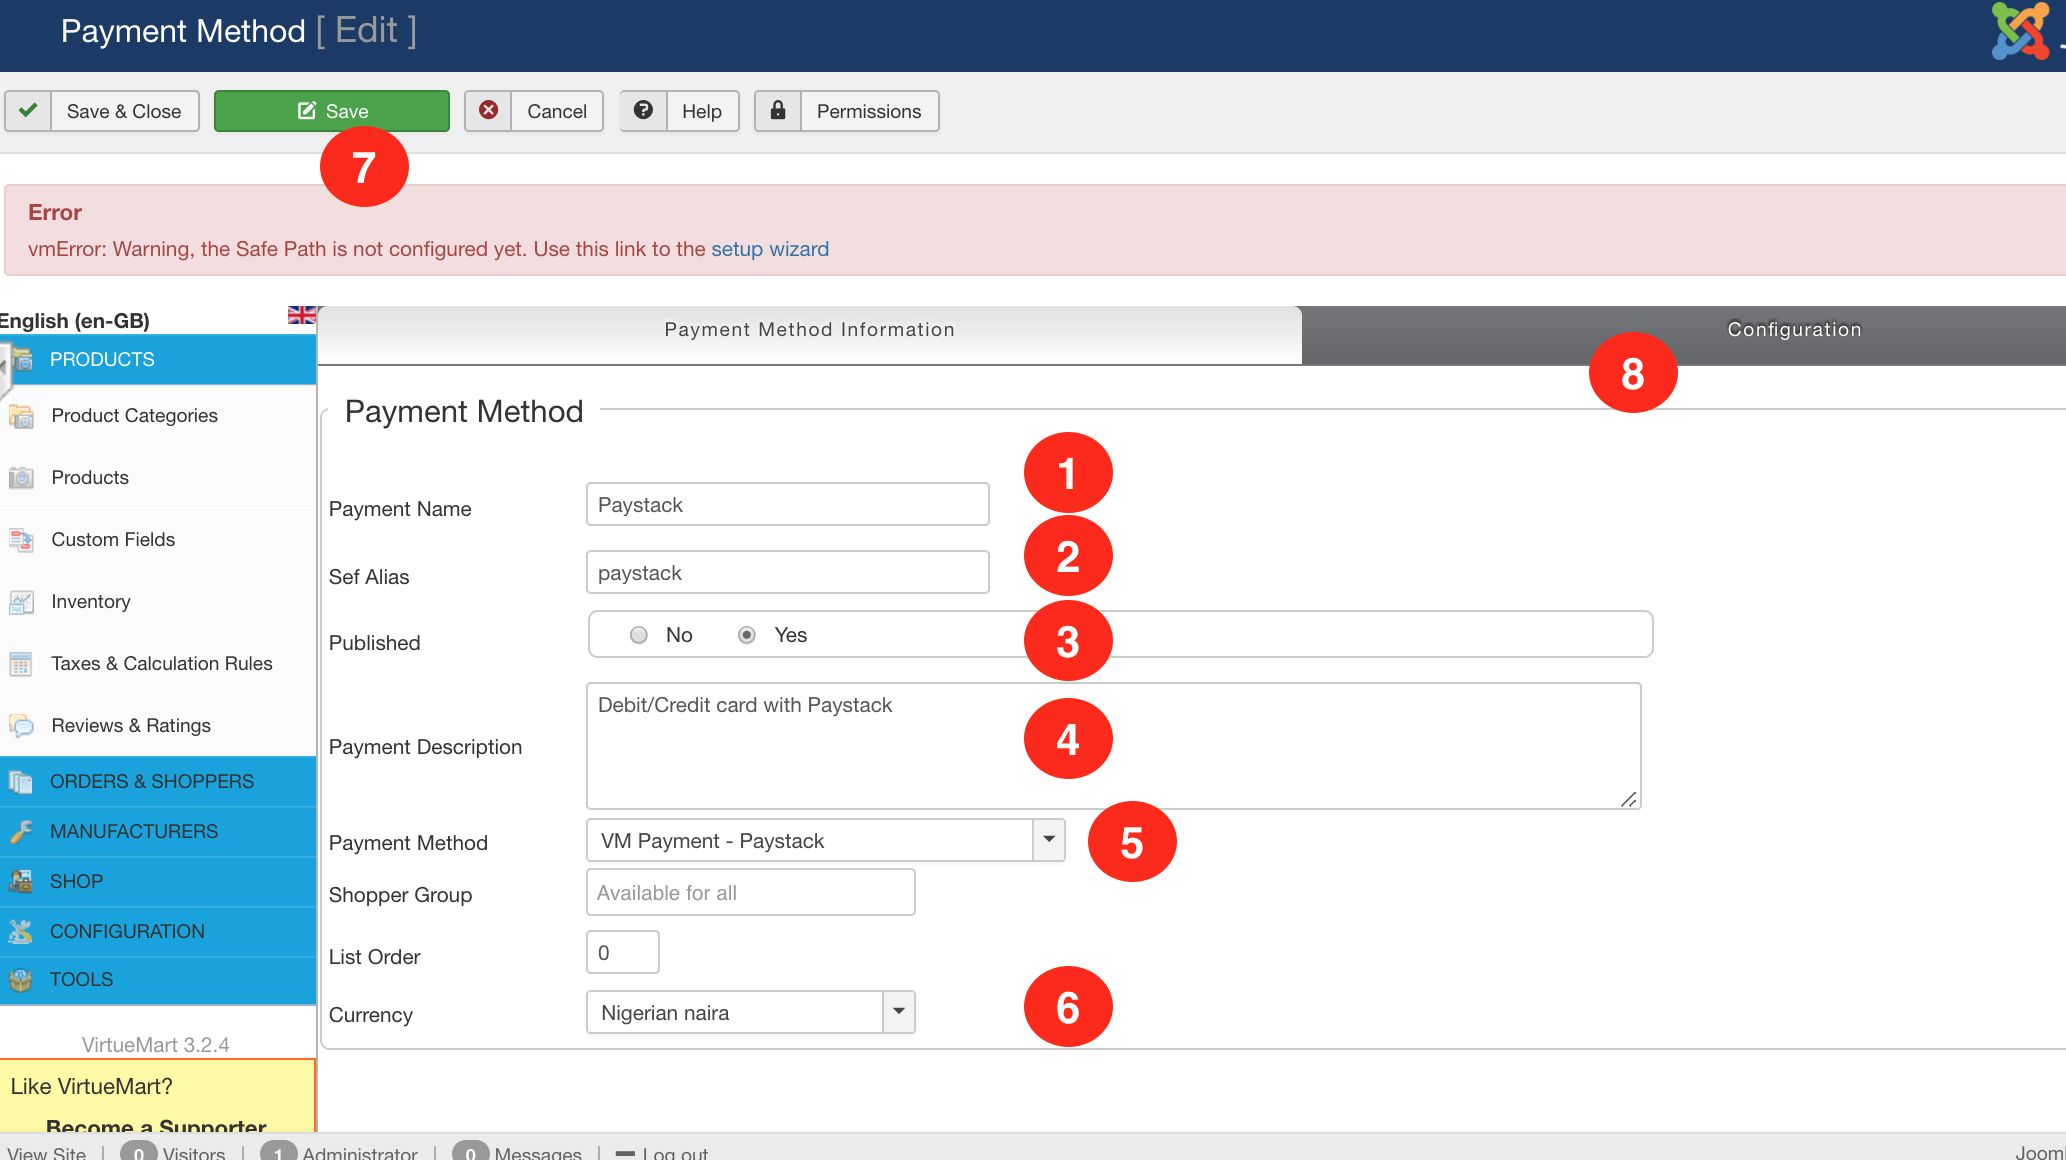
Below are the fields that you need to filled in the form:
- Payment Name: Simply fill in the name "Paystack"
- Set Alias: Also enter "Paystack"
- Published: Set to Yes
- Payment Description: This is the text that describes this Payment option to the user on checkout. You can just enter "Pay with your Debit/Credit Card"
- Payment Method: Click on the dropdown and select VM Payment - Paystack from the options.
- Currency: Select Naira from the list in the dropdown
After that click on Save (7) on the top of the page. When the page saves, click on the Configuration tab (8). It will open the configuration page where you will be required to enter your API keys.
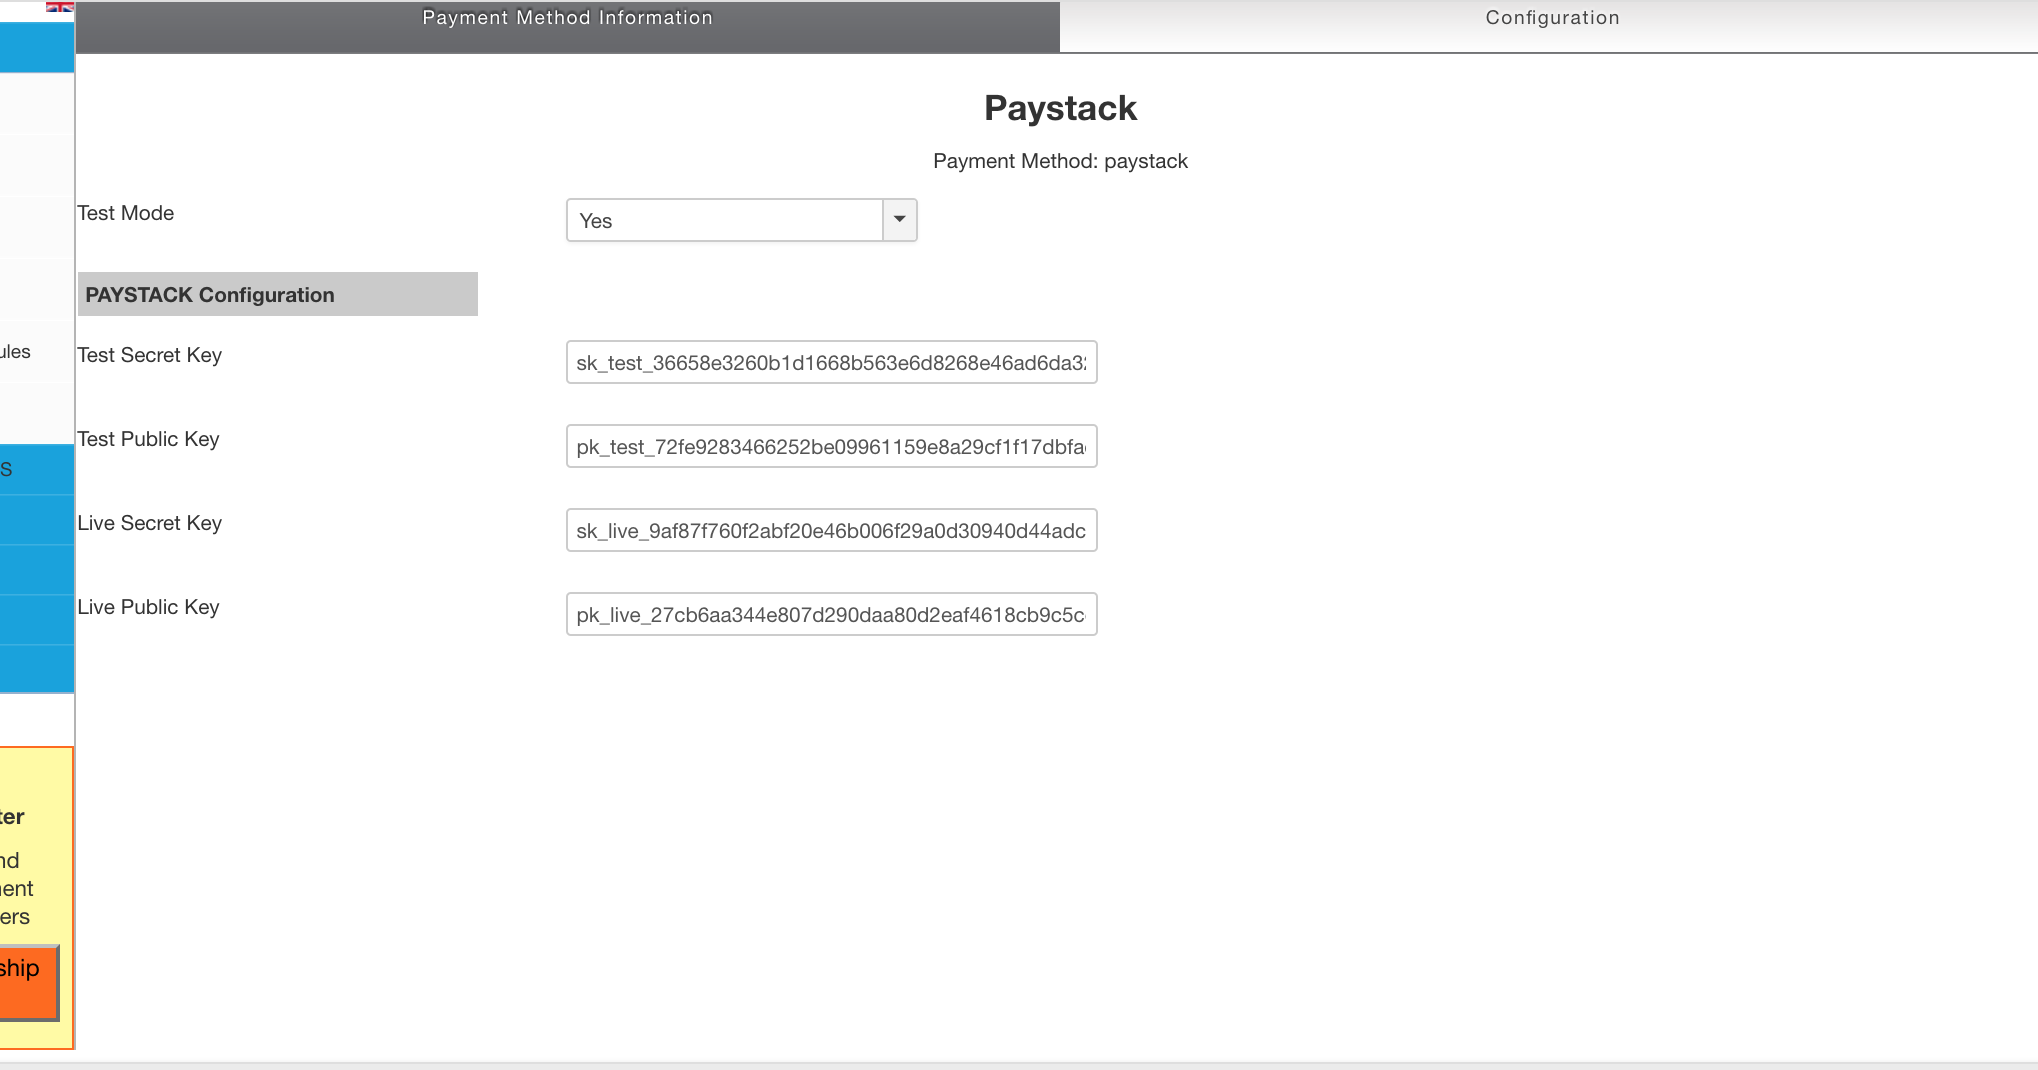
Please go to your Paystack Dashboard >> Settings >> API keys, copy your API keys and fill them in the appropriate fields.
How to get your Test and Live API keys
There are 2 states on your dashboard: Live Mode and Test Mode. You'll see the Test Mode/Live Mode toggle on the top right corner of your dashboard.
If there is no toggle and it's just Test Mode, this means that your Paystack account has not been activated. Please follow this link to activate your account
When you go to the Settings Page to get your API keys, please note the mode that your dashboard is in, as that will determine the keys that will be displayed. So if the dashboard is on Test Mode, you can only see the Test API keys and vice versa. To see the other Keys, switch the toggle from one mode to another.
At the top of this tab is the Test Mode dropdown. Paystack provides test parameters that allows you to simulate a transaction without using real money. If you select Yes, Paystack will be using your Test API keys to parse the payments, meaning that the orders processed then will be done with test cards, no real money is exchanged therefore no real value should be delivered.
If you do these things correctly, you should see Paystack in the list of payment options on checkout.
Comments
0 comments
Please sign in to leave a comment.