Here's how to start receiving payment with Paystack on your OpenCart store.
Install Paystack
To get started, follow this link to download the Paystack OpenCart plugin. When you extract the downloaded zip file, it should contain 2 folders: Admin and Catalog. Upload both folders to the root of your OpenCart website, which also has its own Admin and Catalog folders. Merge the Paystack plugin folders with the root folders, so that the contents of the Plugin Admin and Catalog folders are contained in the root Admin and Catalog folders
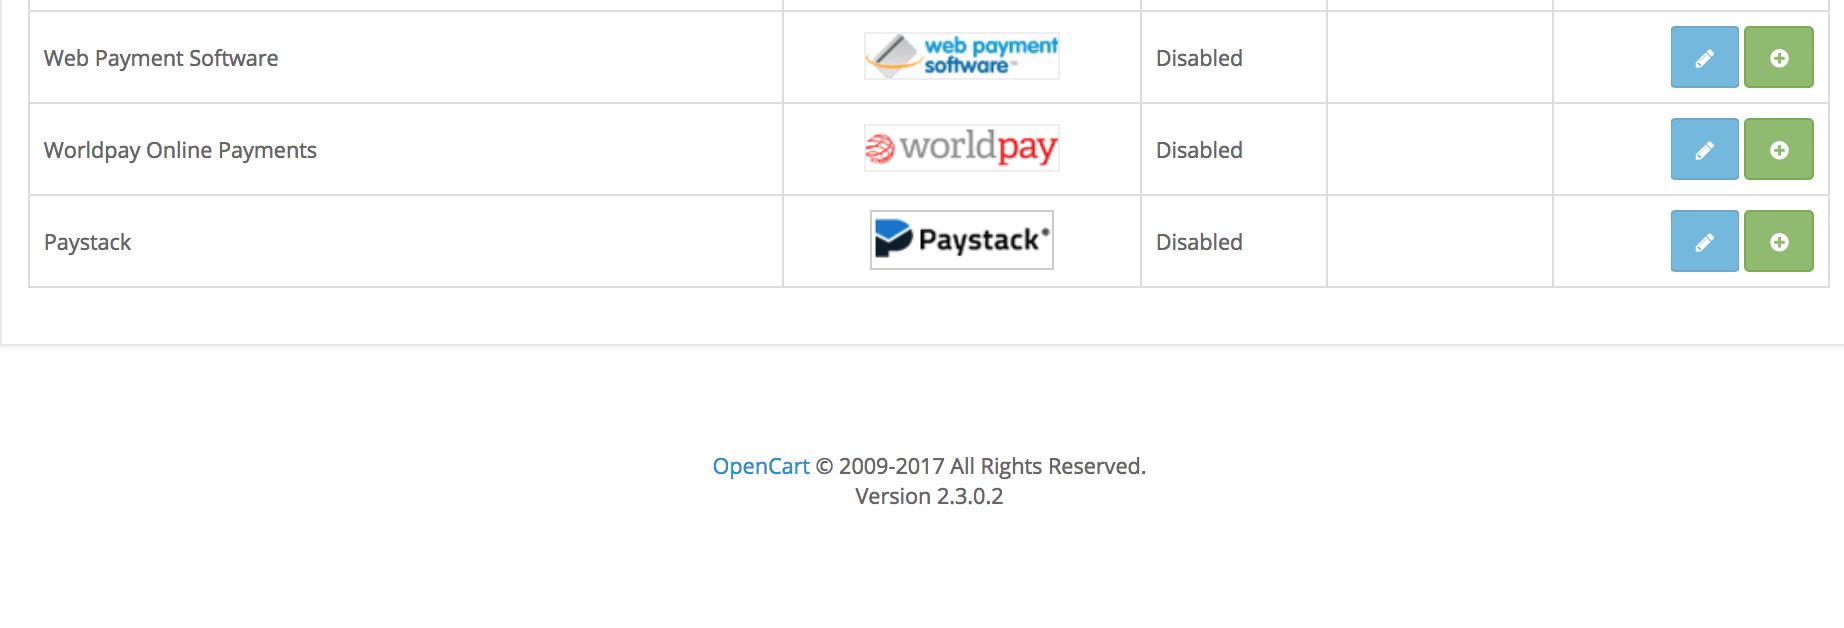
Next, go to your OpenCart dashboard menu and select the Extensions, then select Extensions on the submenu to see your list of extensions. Click on the Choose Extension Type dropdown and select Payments. This will show a list of Payments extensions available on your site.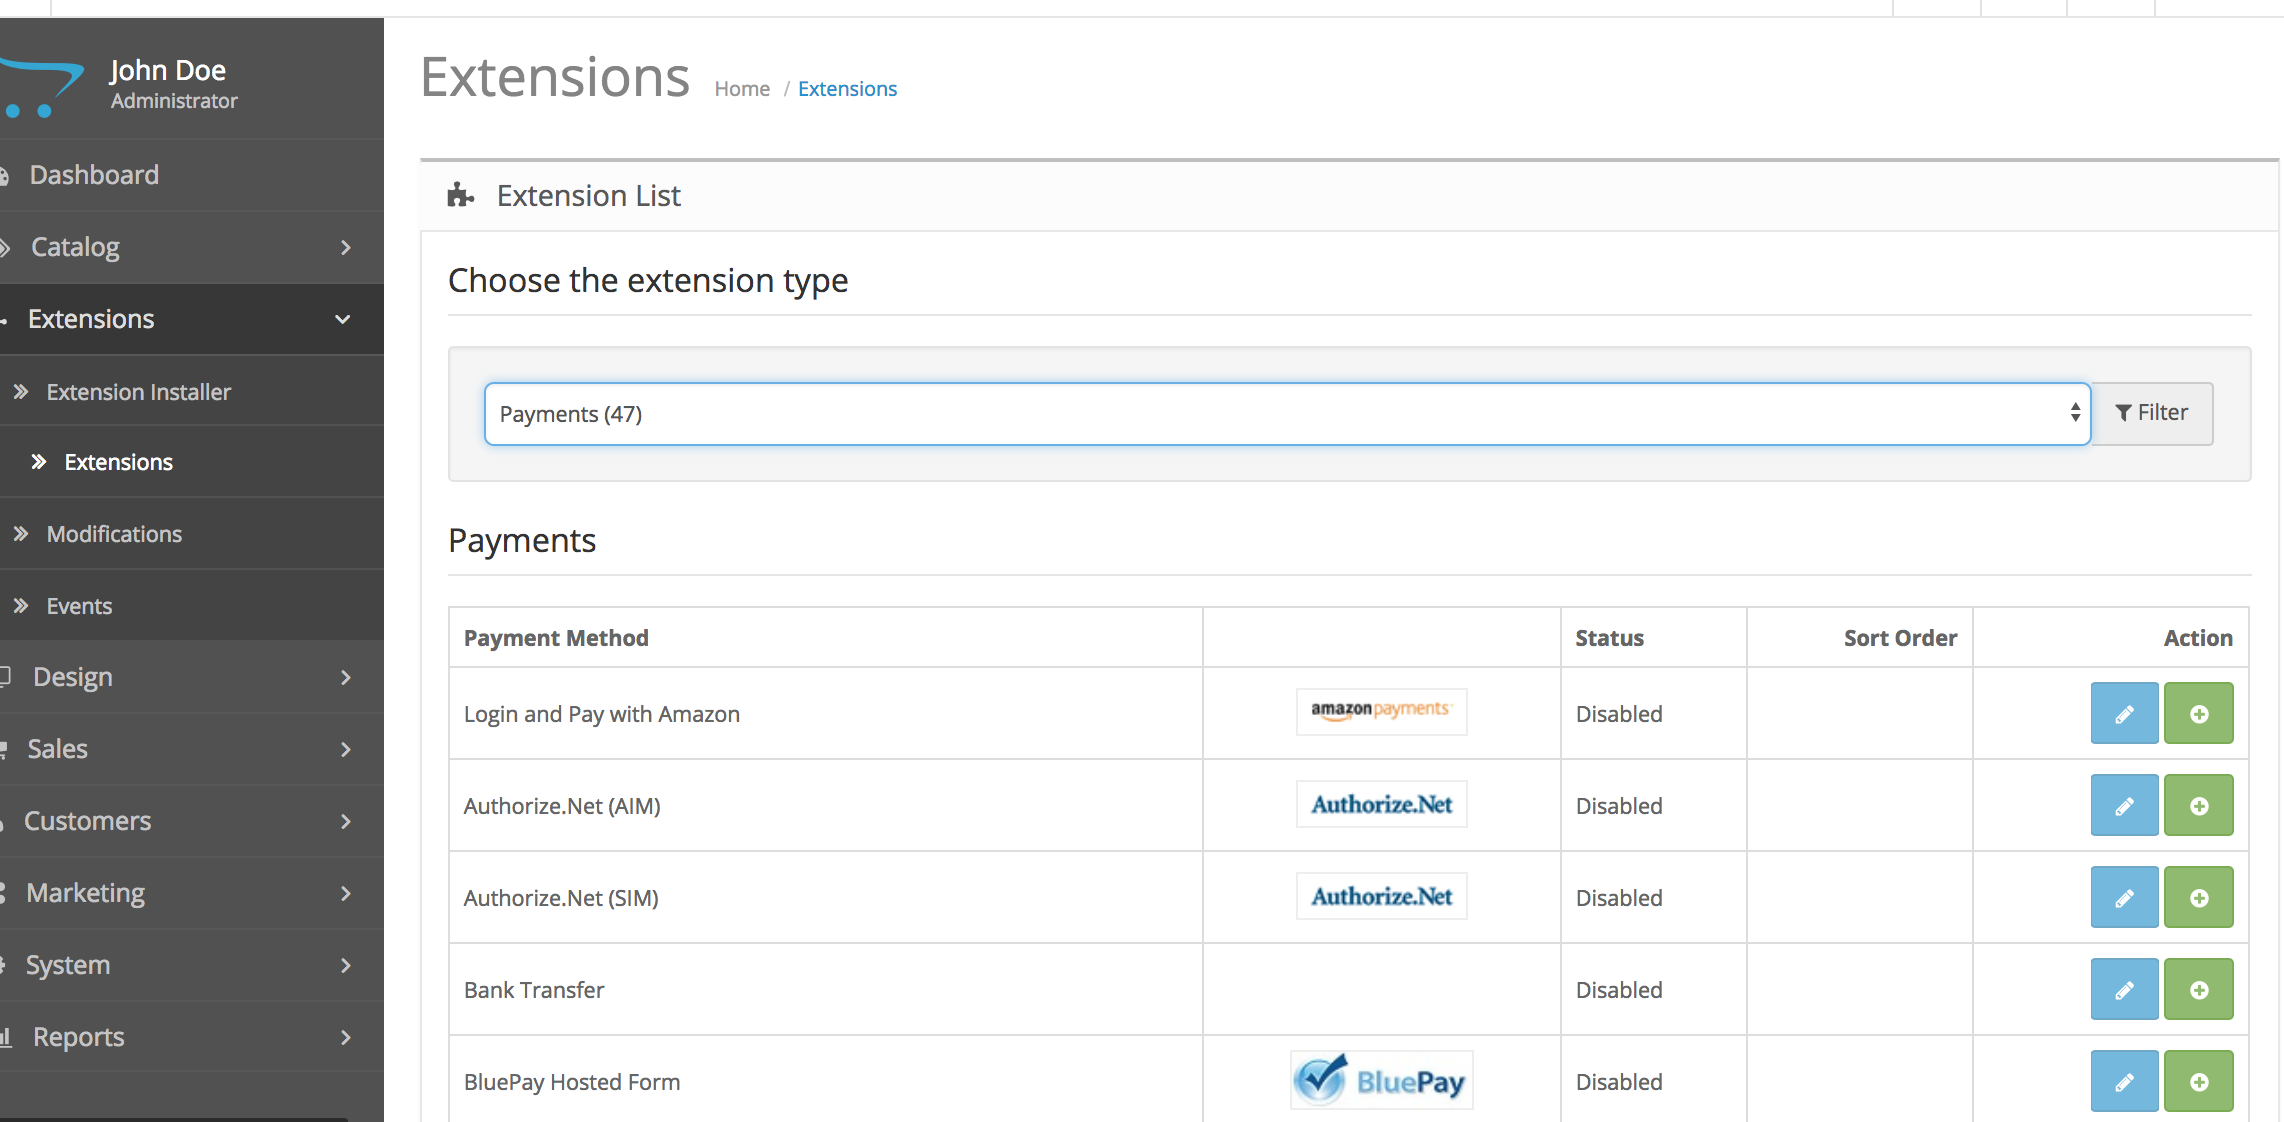 Scroll down till you find Paystack. You can see that it hasn't been installed on the site and it is still Disabled. If you don't find Paystack on this list, you probably didn't install the files properly or you installed the wrong version.
Click on the green + button beside Paystack to install it. This should take a few seconds. After that click on the blue Edit button to configure and enable Paystack.
 Configure Paystack
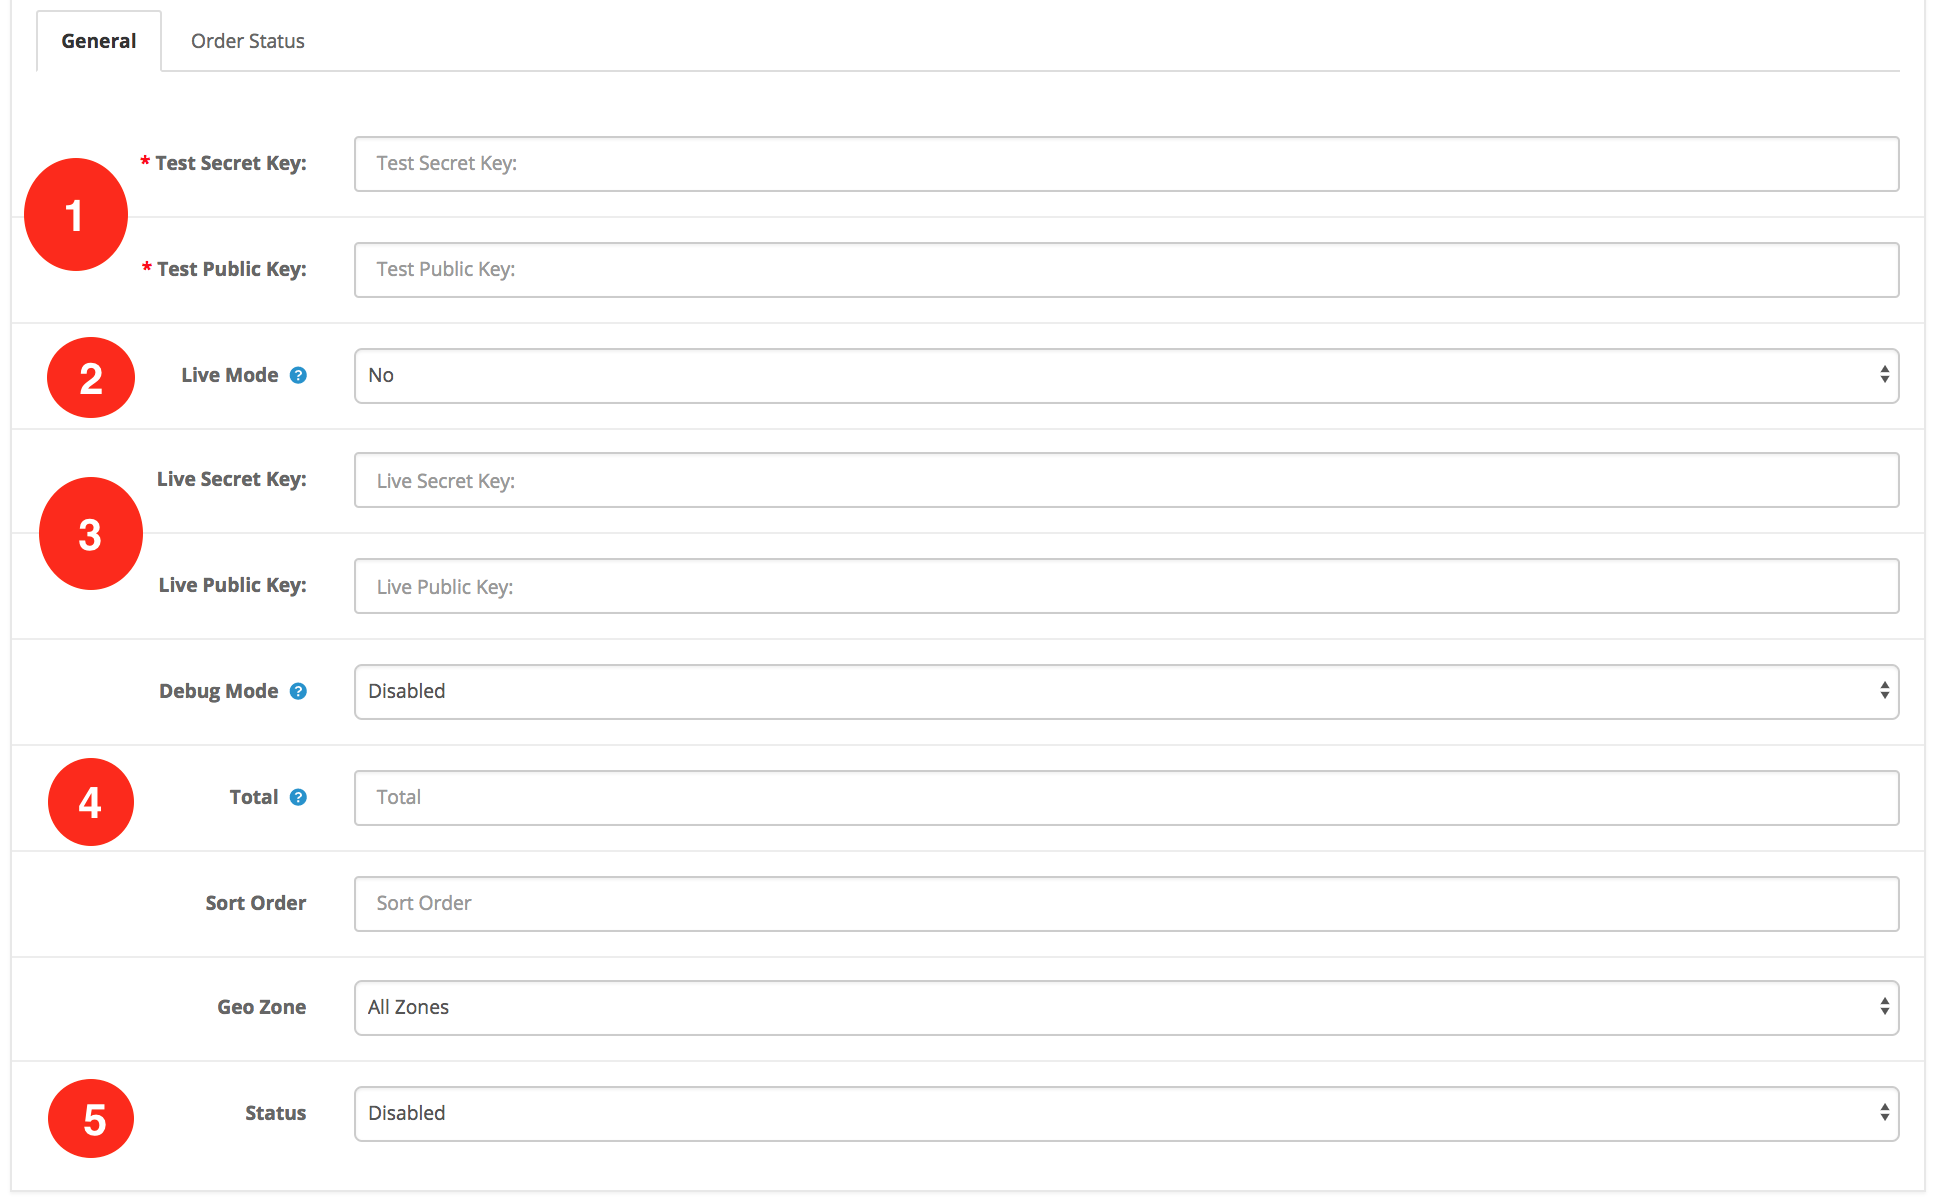
The only settings you need to edit are:
- Test Keys: Follow this link to your Paystack Dashboard >> Settings >> API keys to retrieve your API keys (the secret key and public key) and paste them in the appropriate fields. Make sure your account is on Test Mode so you can see the test keys.
How to get your Test and Live API keys
There are 2 states on your dashboard: Live Mode and Test Mode. You'll see the Test Mode/Live Mode toggle on the top right corner of your dashboard.
If there is no toggle and it's just Test Mode, this means that your Paystack account has not been activated. Please follow this link to activate your account
When you go to the Settings Page to get your API keys, please note the mode that your dashboard is in, as that will determine the keys that will be displayed. So if the dashboard is on Test Mode, you can only see the Test API Keys and vice versa. To see the other Keys, switch the toggle from one mode to another.
- Live Mode: Live Mode allows your site process live payments. Paystack allows you to switch the Live Mode on or off so that your site can use the Test Keys. The Test Parameters allow you simulate a transaction without using real money. If you set the Live Mode dropdown to No, Paystack will be using your Test API keys to parse the payments, meaning that the orders processed then will be done with test cards, no real money is exchanged therefore no real value should be delivered. When you are ready to start receiving live payment, switch the Live Mode to Yes.
- Live Keys: Just like with the Test Keys, Follow this link to your Paystack Dashboard >> Settings >> API keys to retrieve your Live API keys (the secret key and public key) and paste them in the appropriate fields. Make sure your account is on Live Mode so you can see the Live Mode.
- Total: This field allows you to set the minimum amount an order has to have before it can be processed using Paystack. It's very important that you leave this field empty if you want to use Paystack to process all payments on your site.
- Status: Switch this to Enabled
Change The Store Default Currency to Naira
The Paystack plugin currently on works when the default currency is in Naira. If you haven't done this already, go to your OpenCart dashboard >> System >> Localisations >> Currencies and click the blue + button to open the Add Currency form. Fill and save the form to create a new currency. 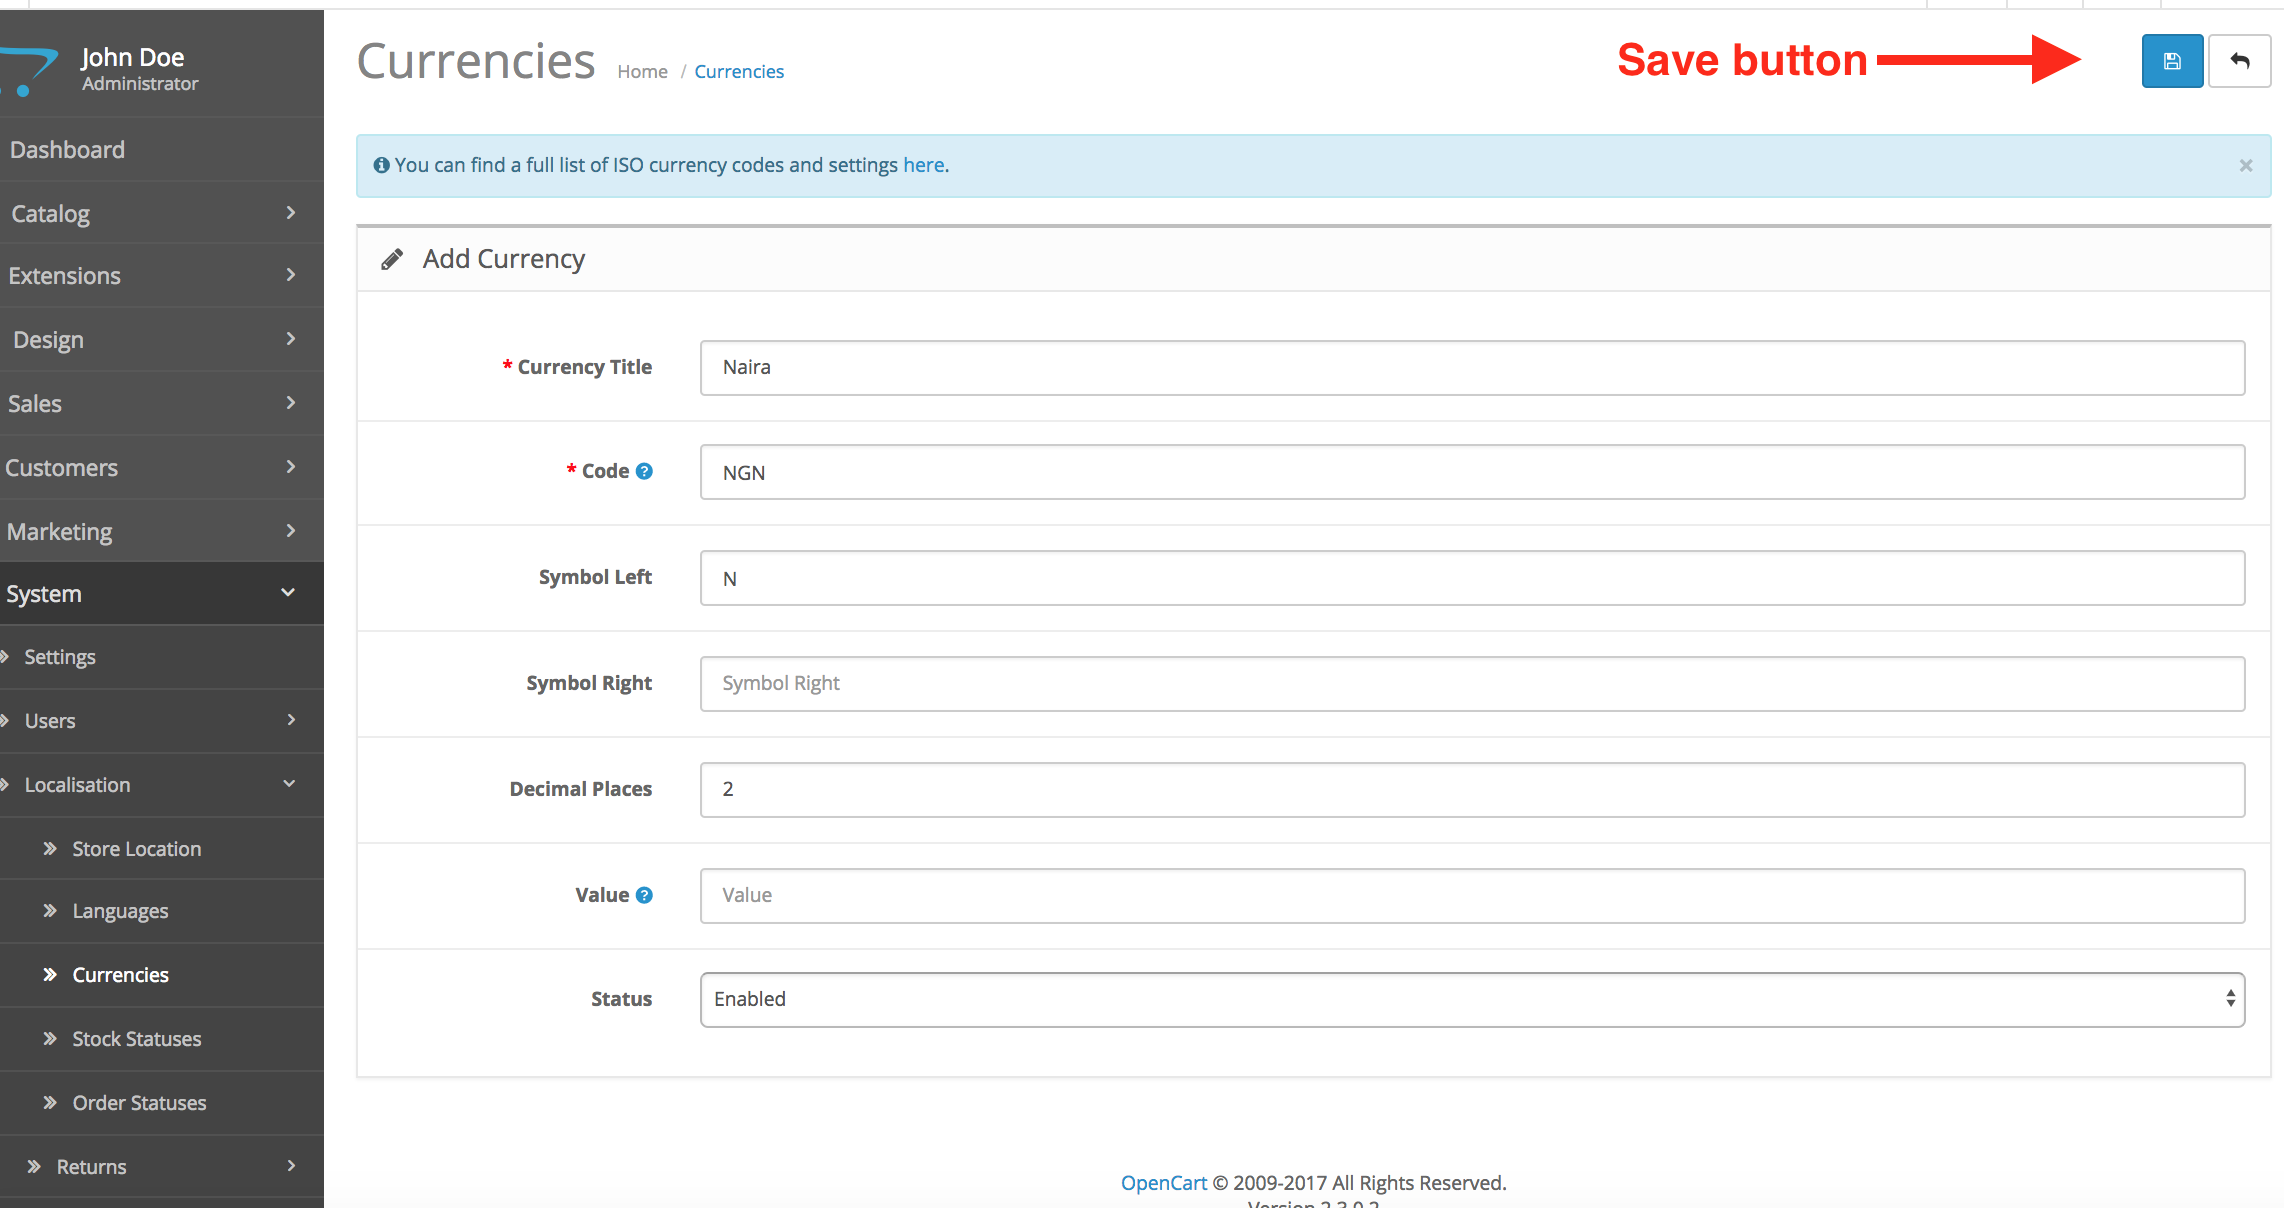
Next, go to System >> Settings to see your stores. Click the store edit button.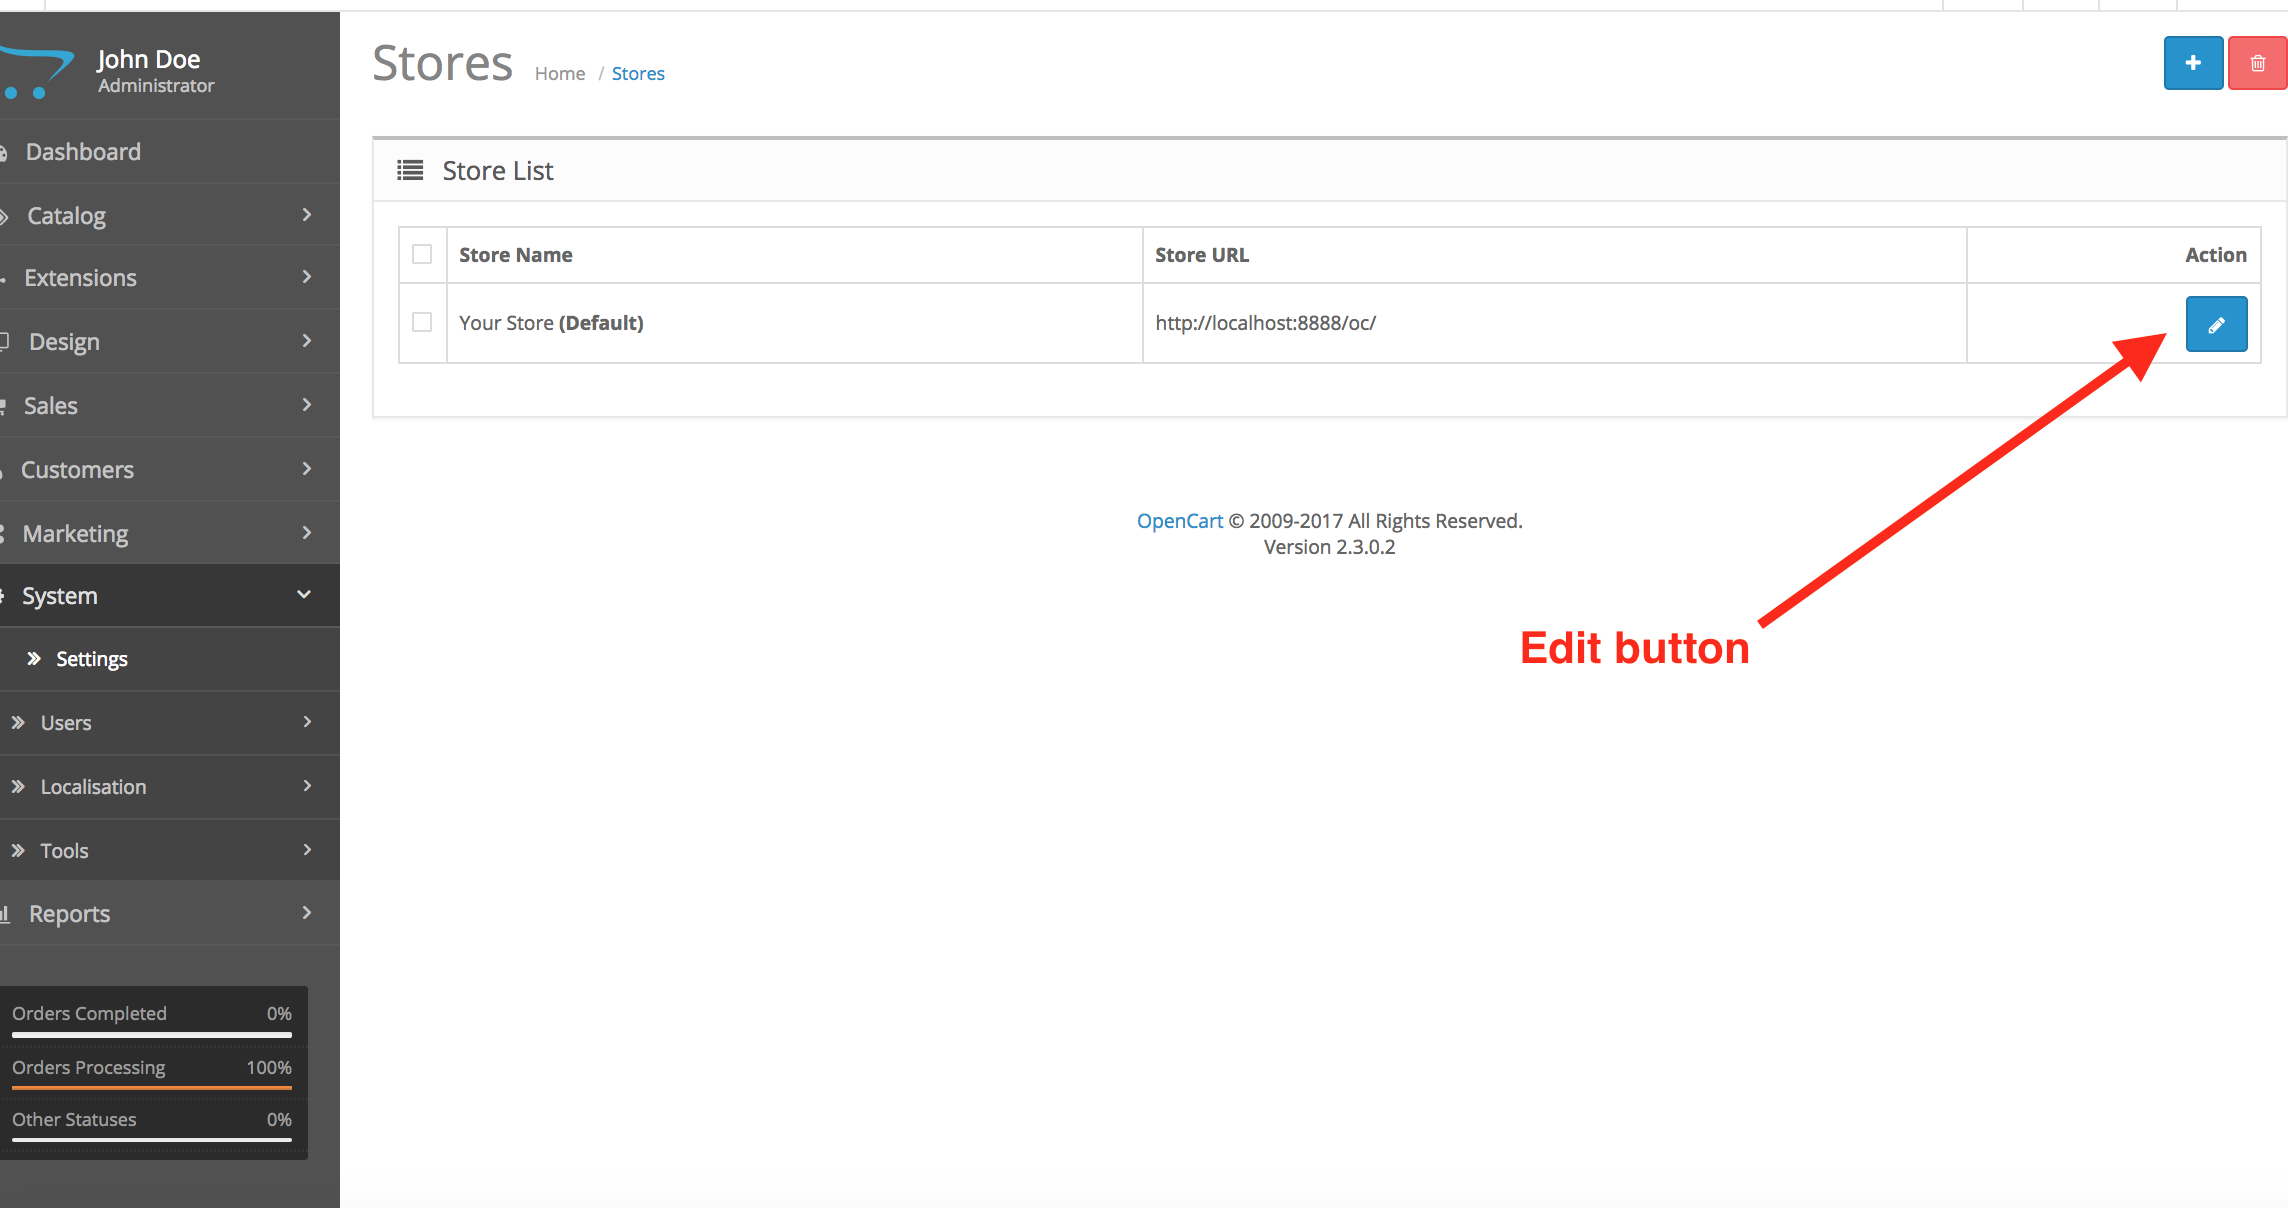
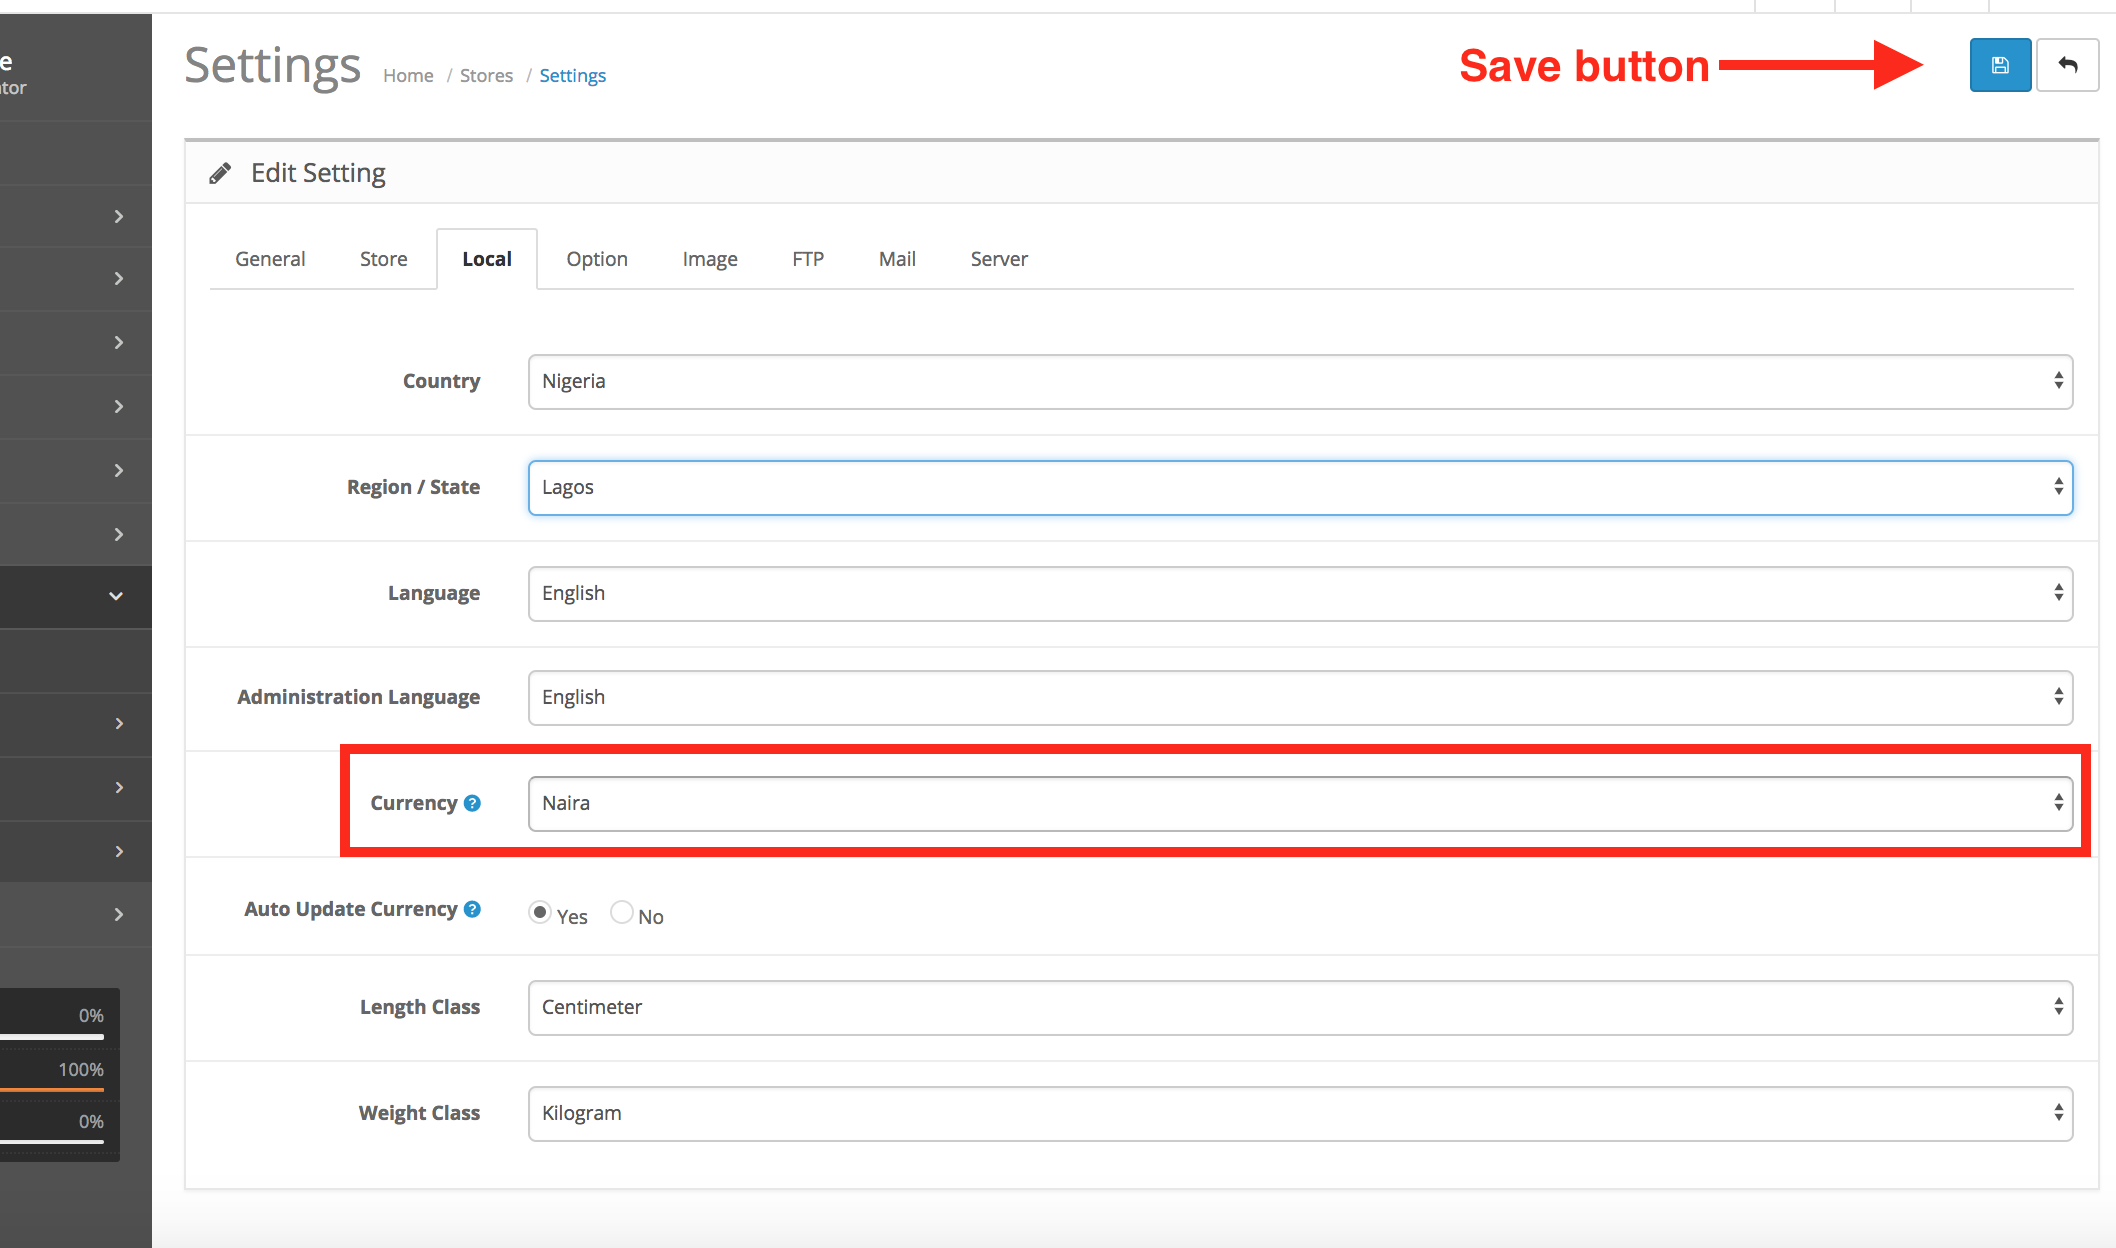
Go to the Currency section and change that Naira to make Naira your default currency.
Paystack on Checkout
If you've done all these, you should see Paystack option on the list of payment options on your checkout page. 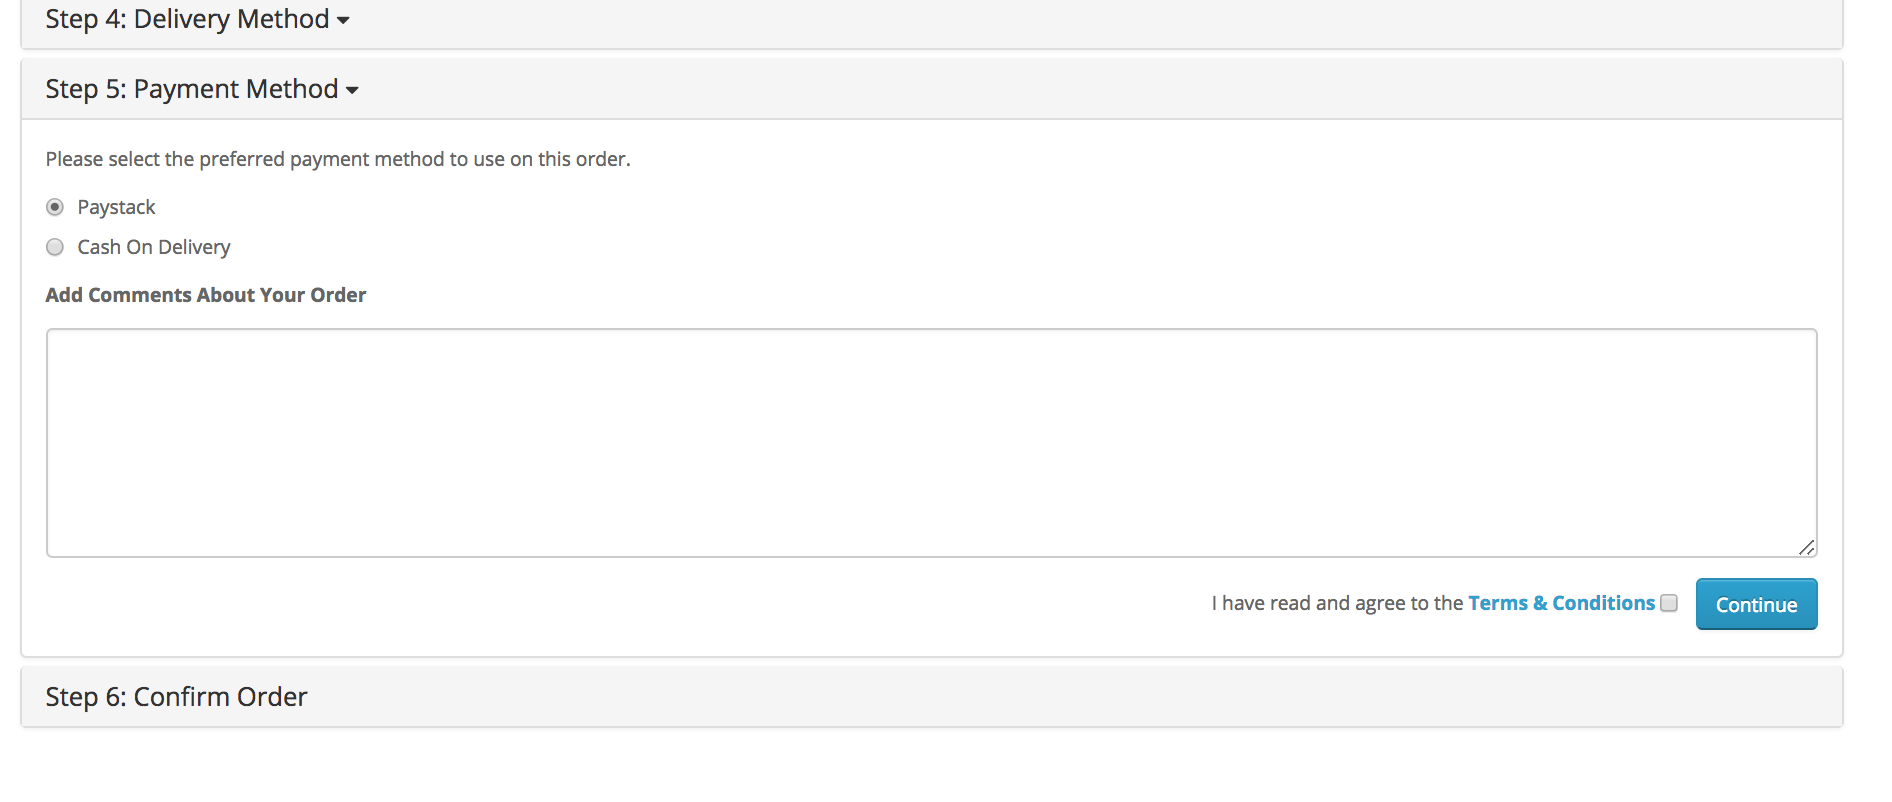

Comments
0 comments
Please sign in to leave a comment.