Payment Pages are the easiest way to collect payments with Paystack. Our Payment Pages allow you to create a simple payment form to collect either one-time or recurring payments. The page can be accessed by a link which you can share with your customers via email, WhatsApp, Twitter or any medium of your choice. This link is also unique to your business, and all your customer has to do is open it and pay you.
The Payment Pages menu
The first thing you will notice on the Payment Pages menu is a Summary Page. You can access it by going to the blue side panel on the left of your Paystack Dashboard and clicking 'Payment Pages'.
Here are the different ways you can interact with this page:
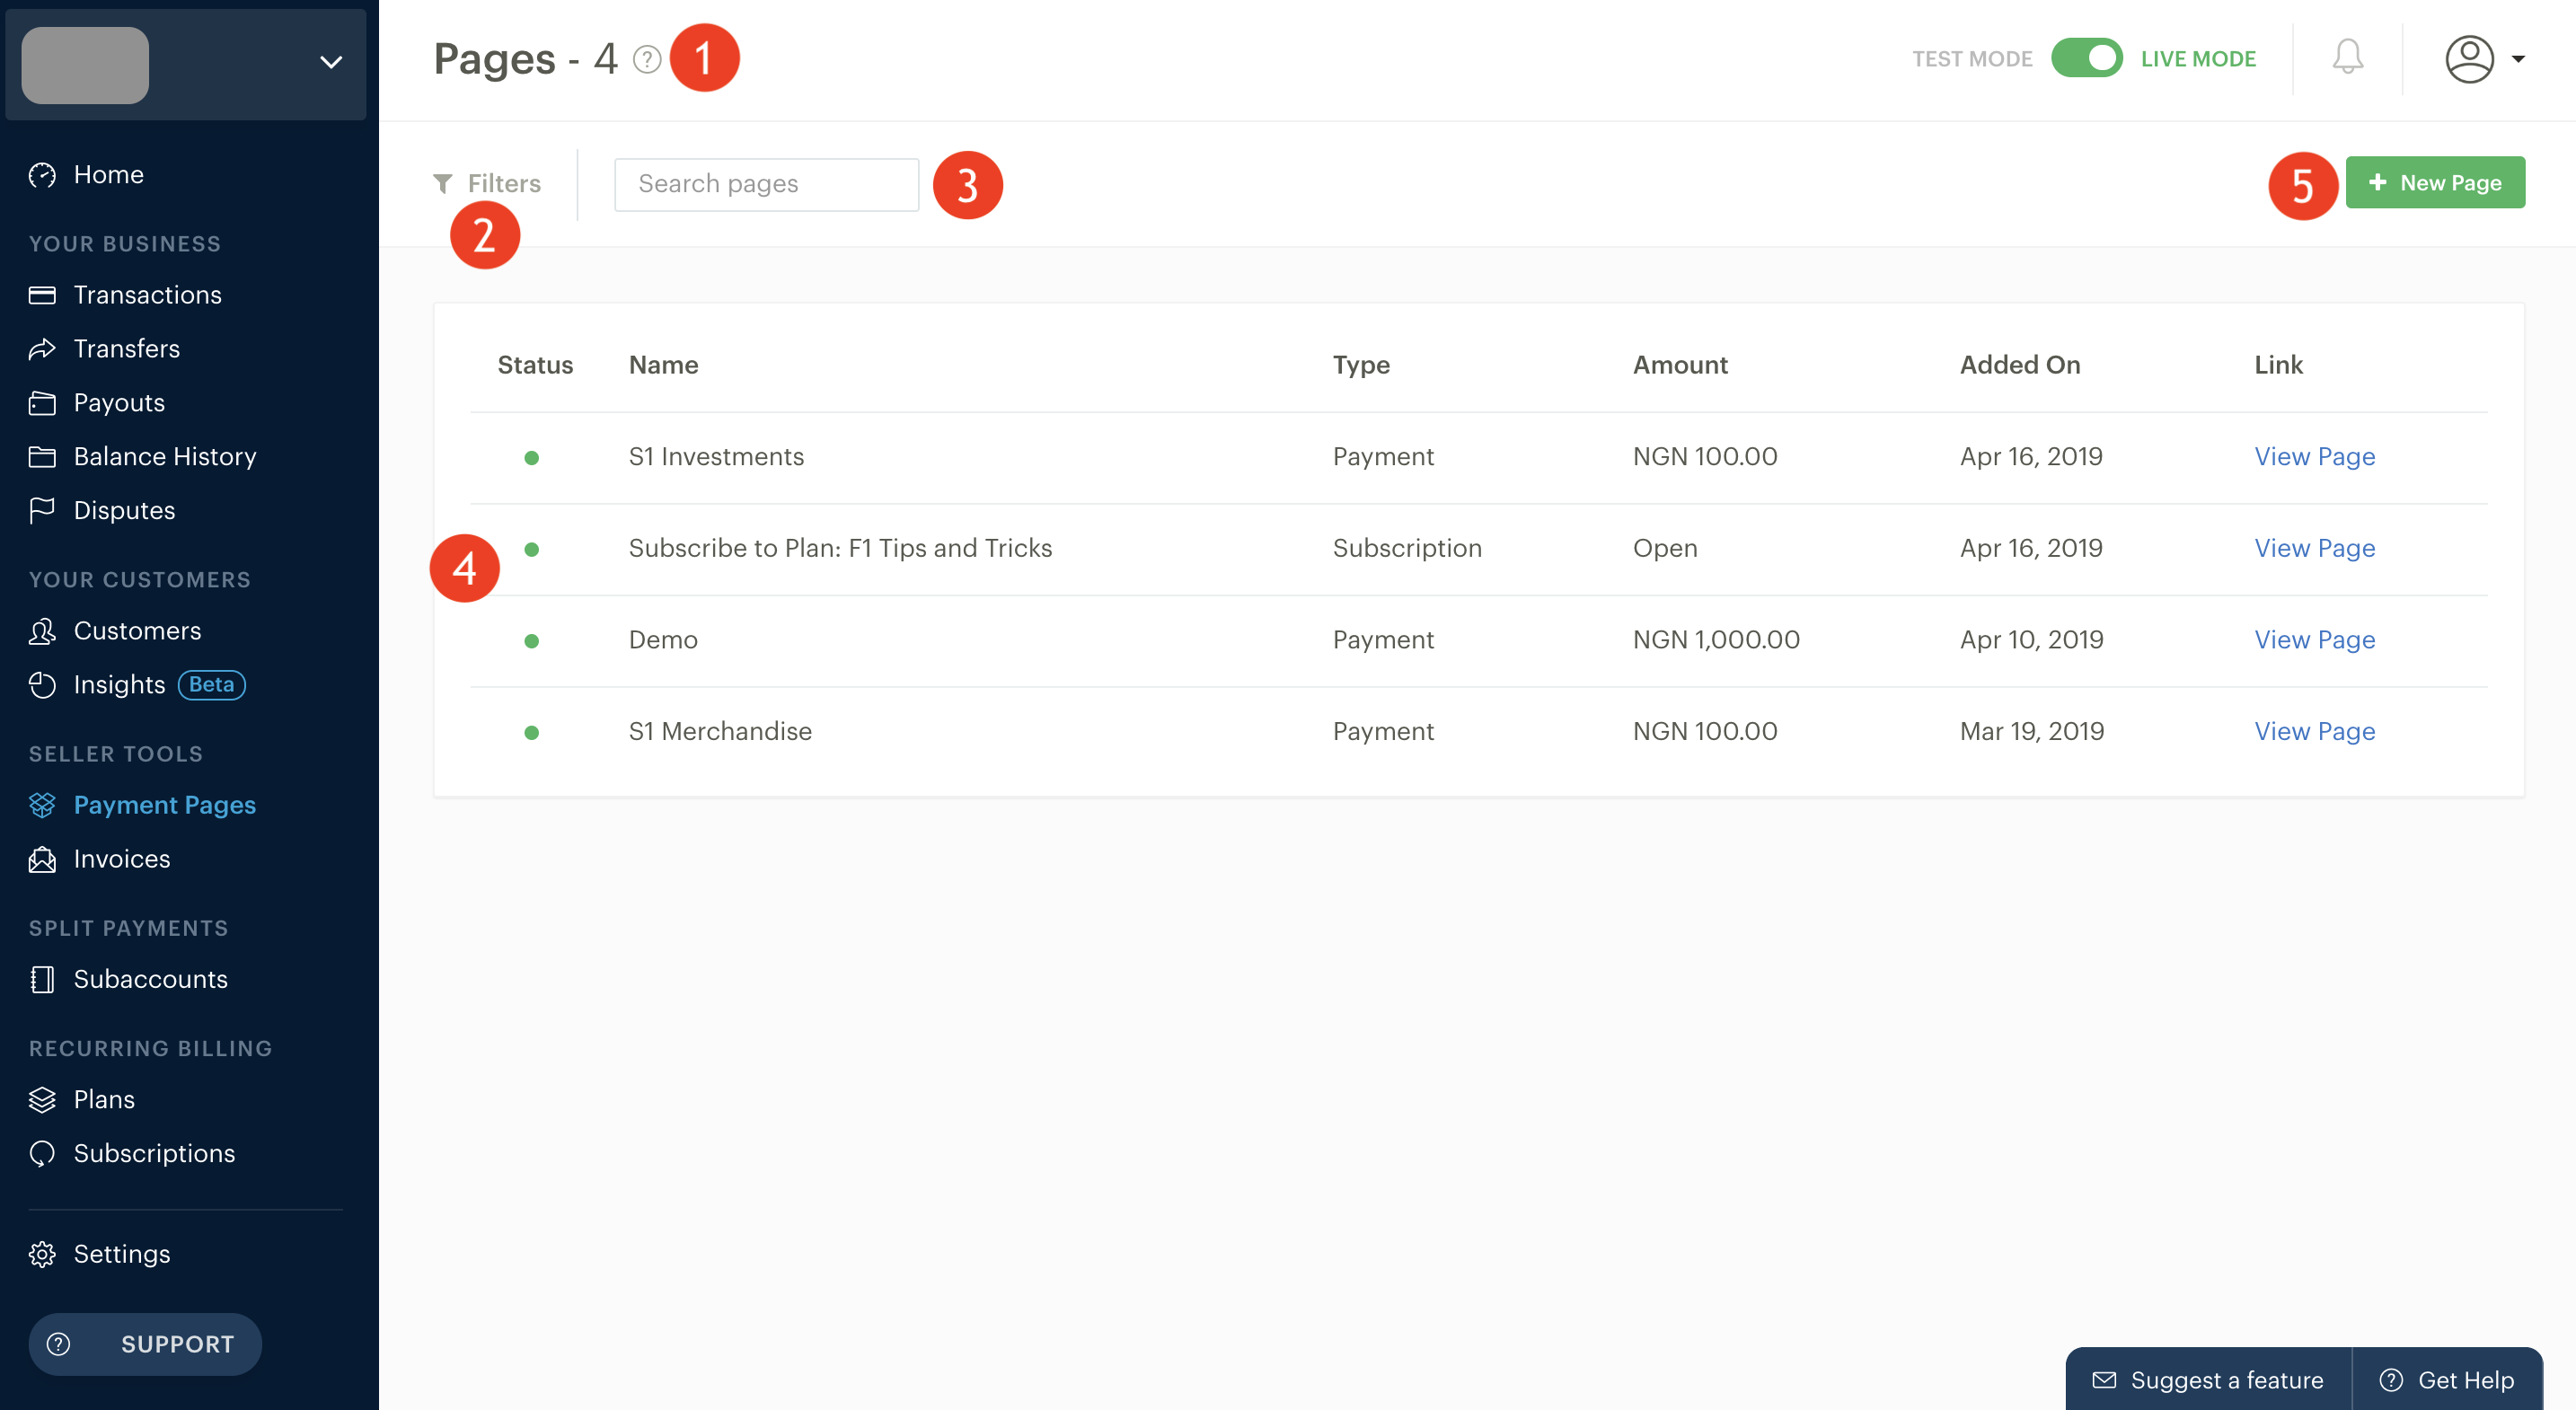
1. The pages count lets you know the number of Payment Pages you currently have.
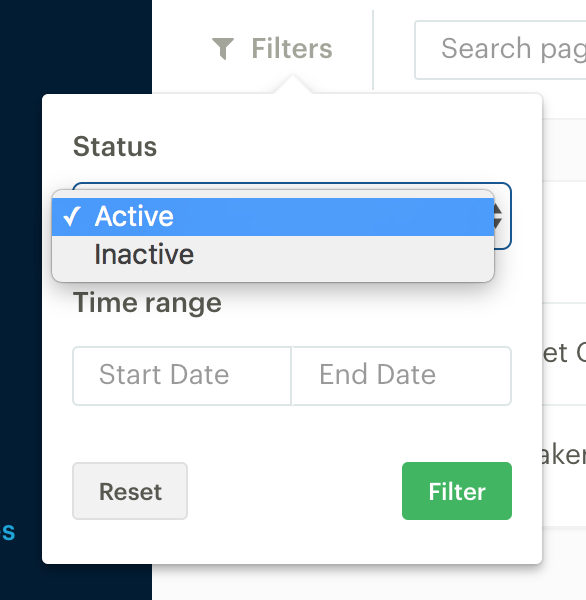
2. The filter button helps you view Payment Pages by whether they are active or inactive, as well as by the date they were created.
3. The search field allows you to search for a specific Payment Page by entering its name into the search field and pressing the enter key.
4. This is a table of your existing Payment Pages showing the following details:
- Status - The green dot means the page is active; a grey dot means it's inactive.
- Name - The name of the Payment Page
- Type - This indicates the type of Payment Page. Examples are: a Payment Page that accepts one-time payments (listed on the table as Payment), a Payment Page that accepts a recurring preset amount (listed on the table as Subscription), and a Payment Page that accepts a recurring amount and schedule that the user sets (listed on the table as Custom Plan)
- Amount - This indicates whether the Payment Page collects a set amount (and how much it is), or whether the customer is able to enter a custom amount (listed as Open).
- Added on - This is the date that the Payment Page was created.
- Link - This is a direct link to the Payment Page.
5. Click this button to create a new Payment Page
How to set up Paystack Payment Pages
The links below lead to comprehensive guides on setting up Payment Pages for one-time payments, recurring payments, and selling products. Please follow them to know more:
- How to collect one-time payments with Payment Pages
- How to collect recurring payments with Payment Pages
- How do I sell products on Paystack?
Payment Pages in detail
When you click on a Payment Page from the summary page, you can see more information about that particular payment page. Here is an illustration below:
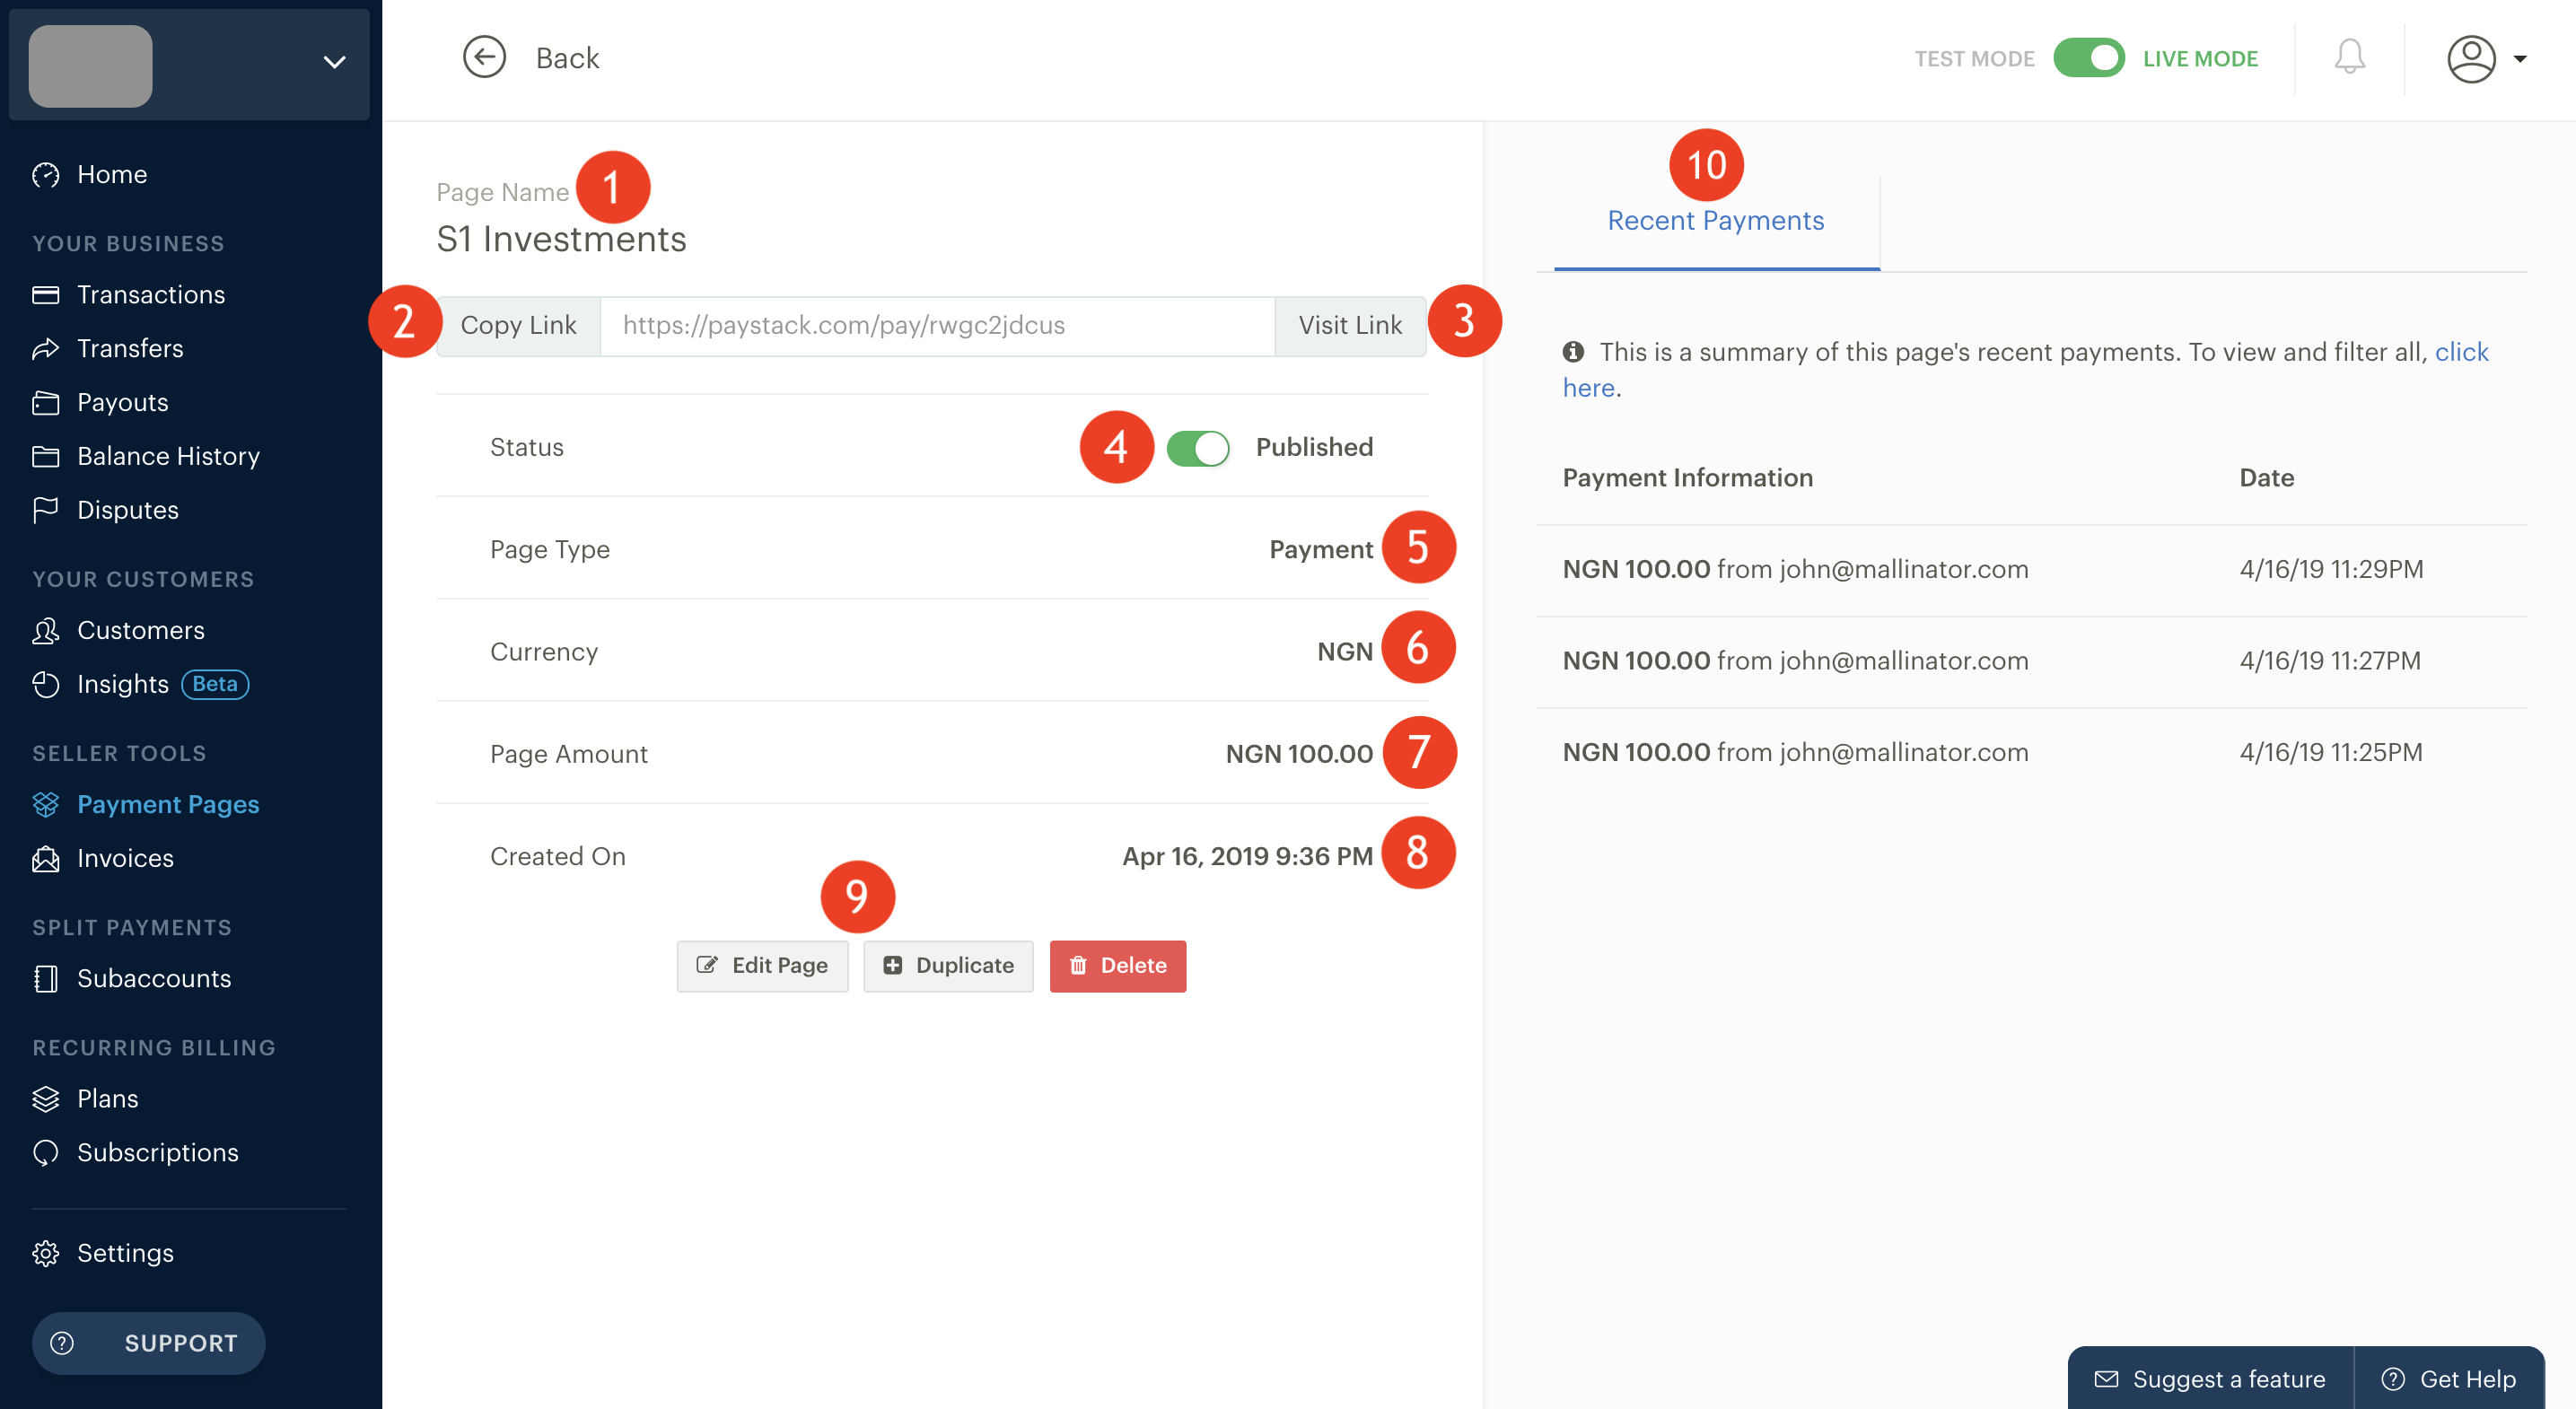
- This is the name of the Payment Page.
- The "Copy Link" button allows you copy the Payment Page link to paste it somewhere.
- The "Visit Link" button opens the Payment Page in a new tab.
- This toggle button publishes or unpublishes the Payment Page.
- This field indicates the Payment Page type.
- This field indicates the currency of the Payment Page.
- This field indicates the amount being charged on the Payment Page.
- This field shows the date and time that the Payment Page was created.
- If you click "Edit Page", you can make changes to any aspect of the Payment Page. You can also create a duplicate page or delete it from here.
- The "Recent Payments" section of the page shows the most recent payments received by this particular Payment Page. Clicking a transaction takes you to a Transaction Detail page with more info about the transaction. Learn more about Transactions.
The sole purpose of Test Payment Pages is to let you see how Payment Pages look and act before you show it to real customers. If you share the URL to real customers, they will be unable to pay real money. They can only simulate a payment using the test cards provided, and you might accidentally deliver value to the customer for a simulated payment.
Very Important: Do NOT share links to Test Payment Pages
Please pay careful attention to whether you create your Payment Pages while you are on Test Mode or on Live Mode.
Please note that Payment Pages created in Test Mode cannot receive real payments. Only Live Payment Pages can receive real payments.
How do I know if I'm dealing with a Test Payment Page?
1. If your business has not submitted an Activation Request, all Payment Pages associated with that business are 100% in Test Mode.
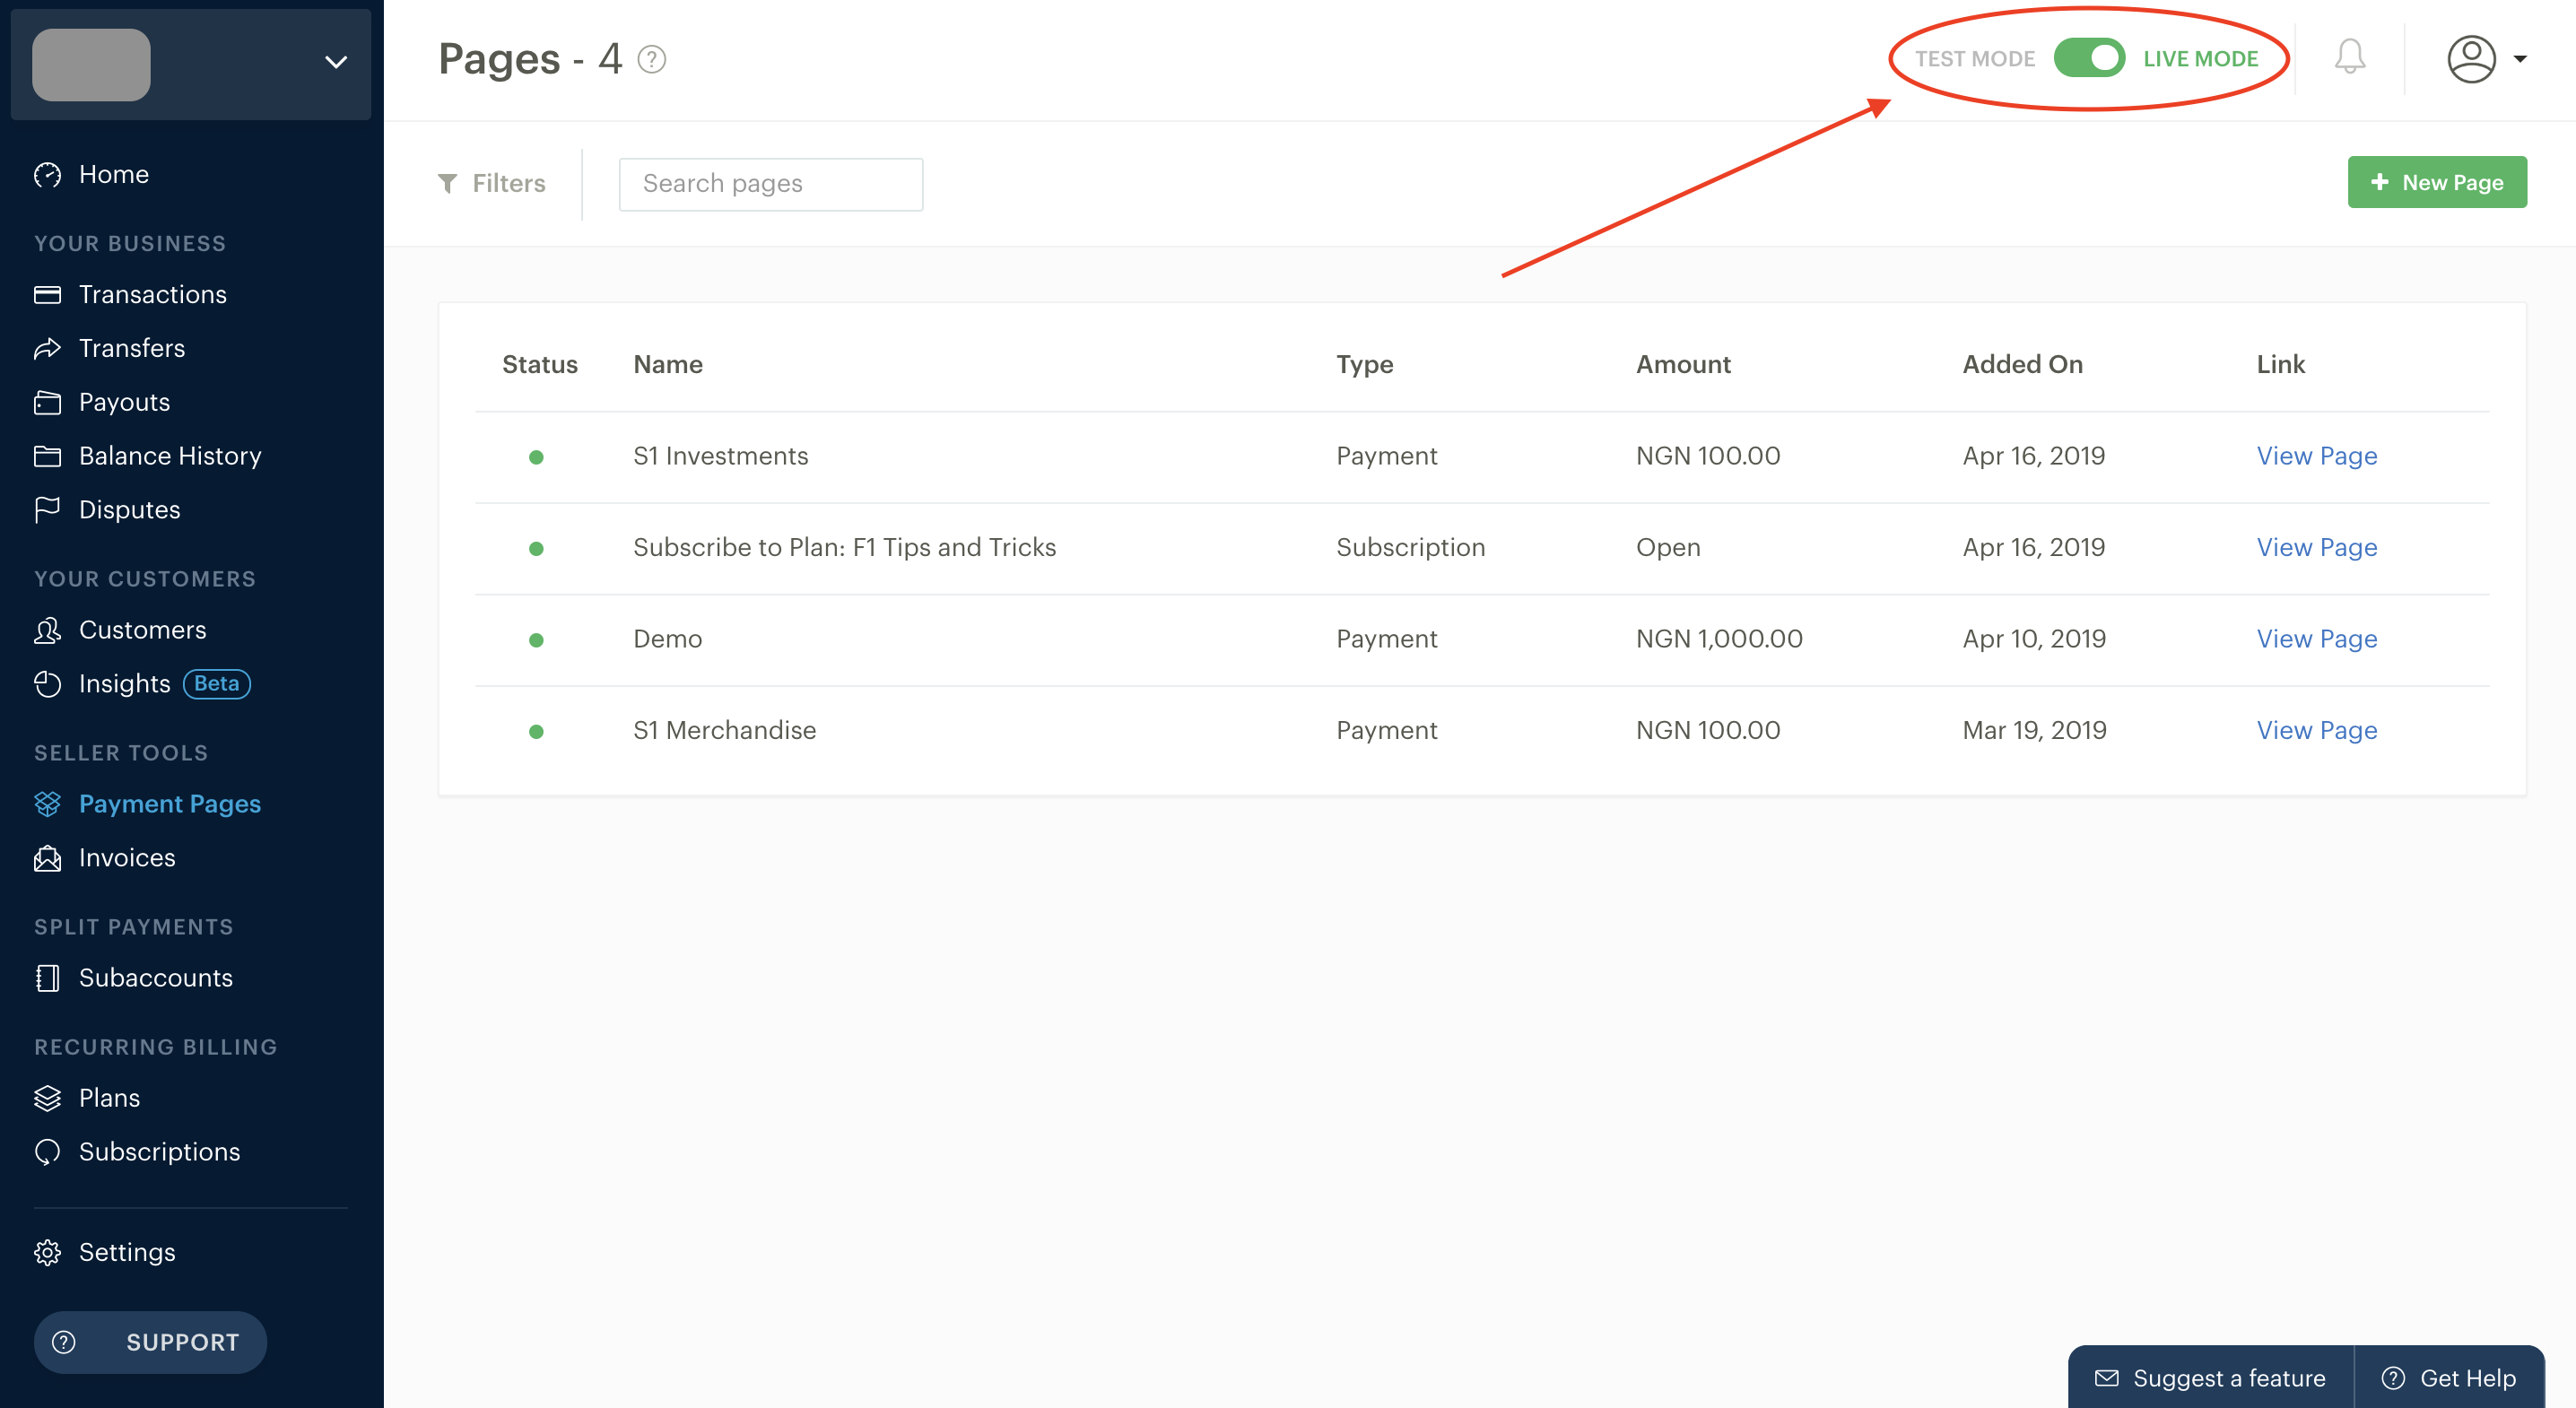
2. You can know if you are dealing with a Test Payment Page by checking what mode (Live or Test) that the Payment Page shows up on. From the Dashboard, go to the Payments Pages Summary page and look at the top right corner. If the Dashboard Mode is set to Test Mode, then all the Payment Pages on that page are Test Payment Pages.
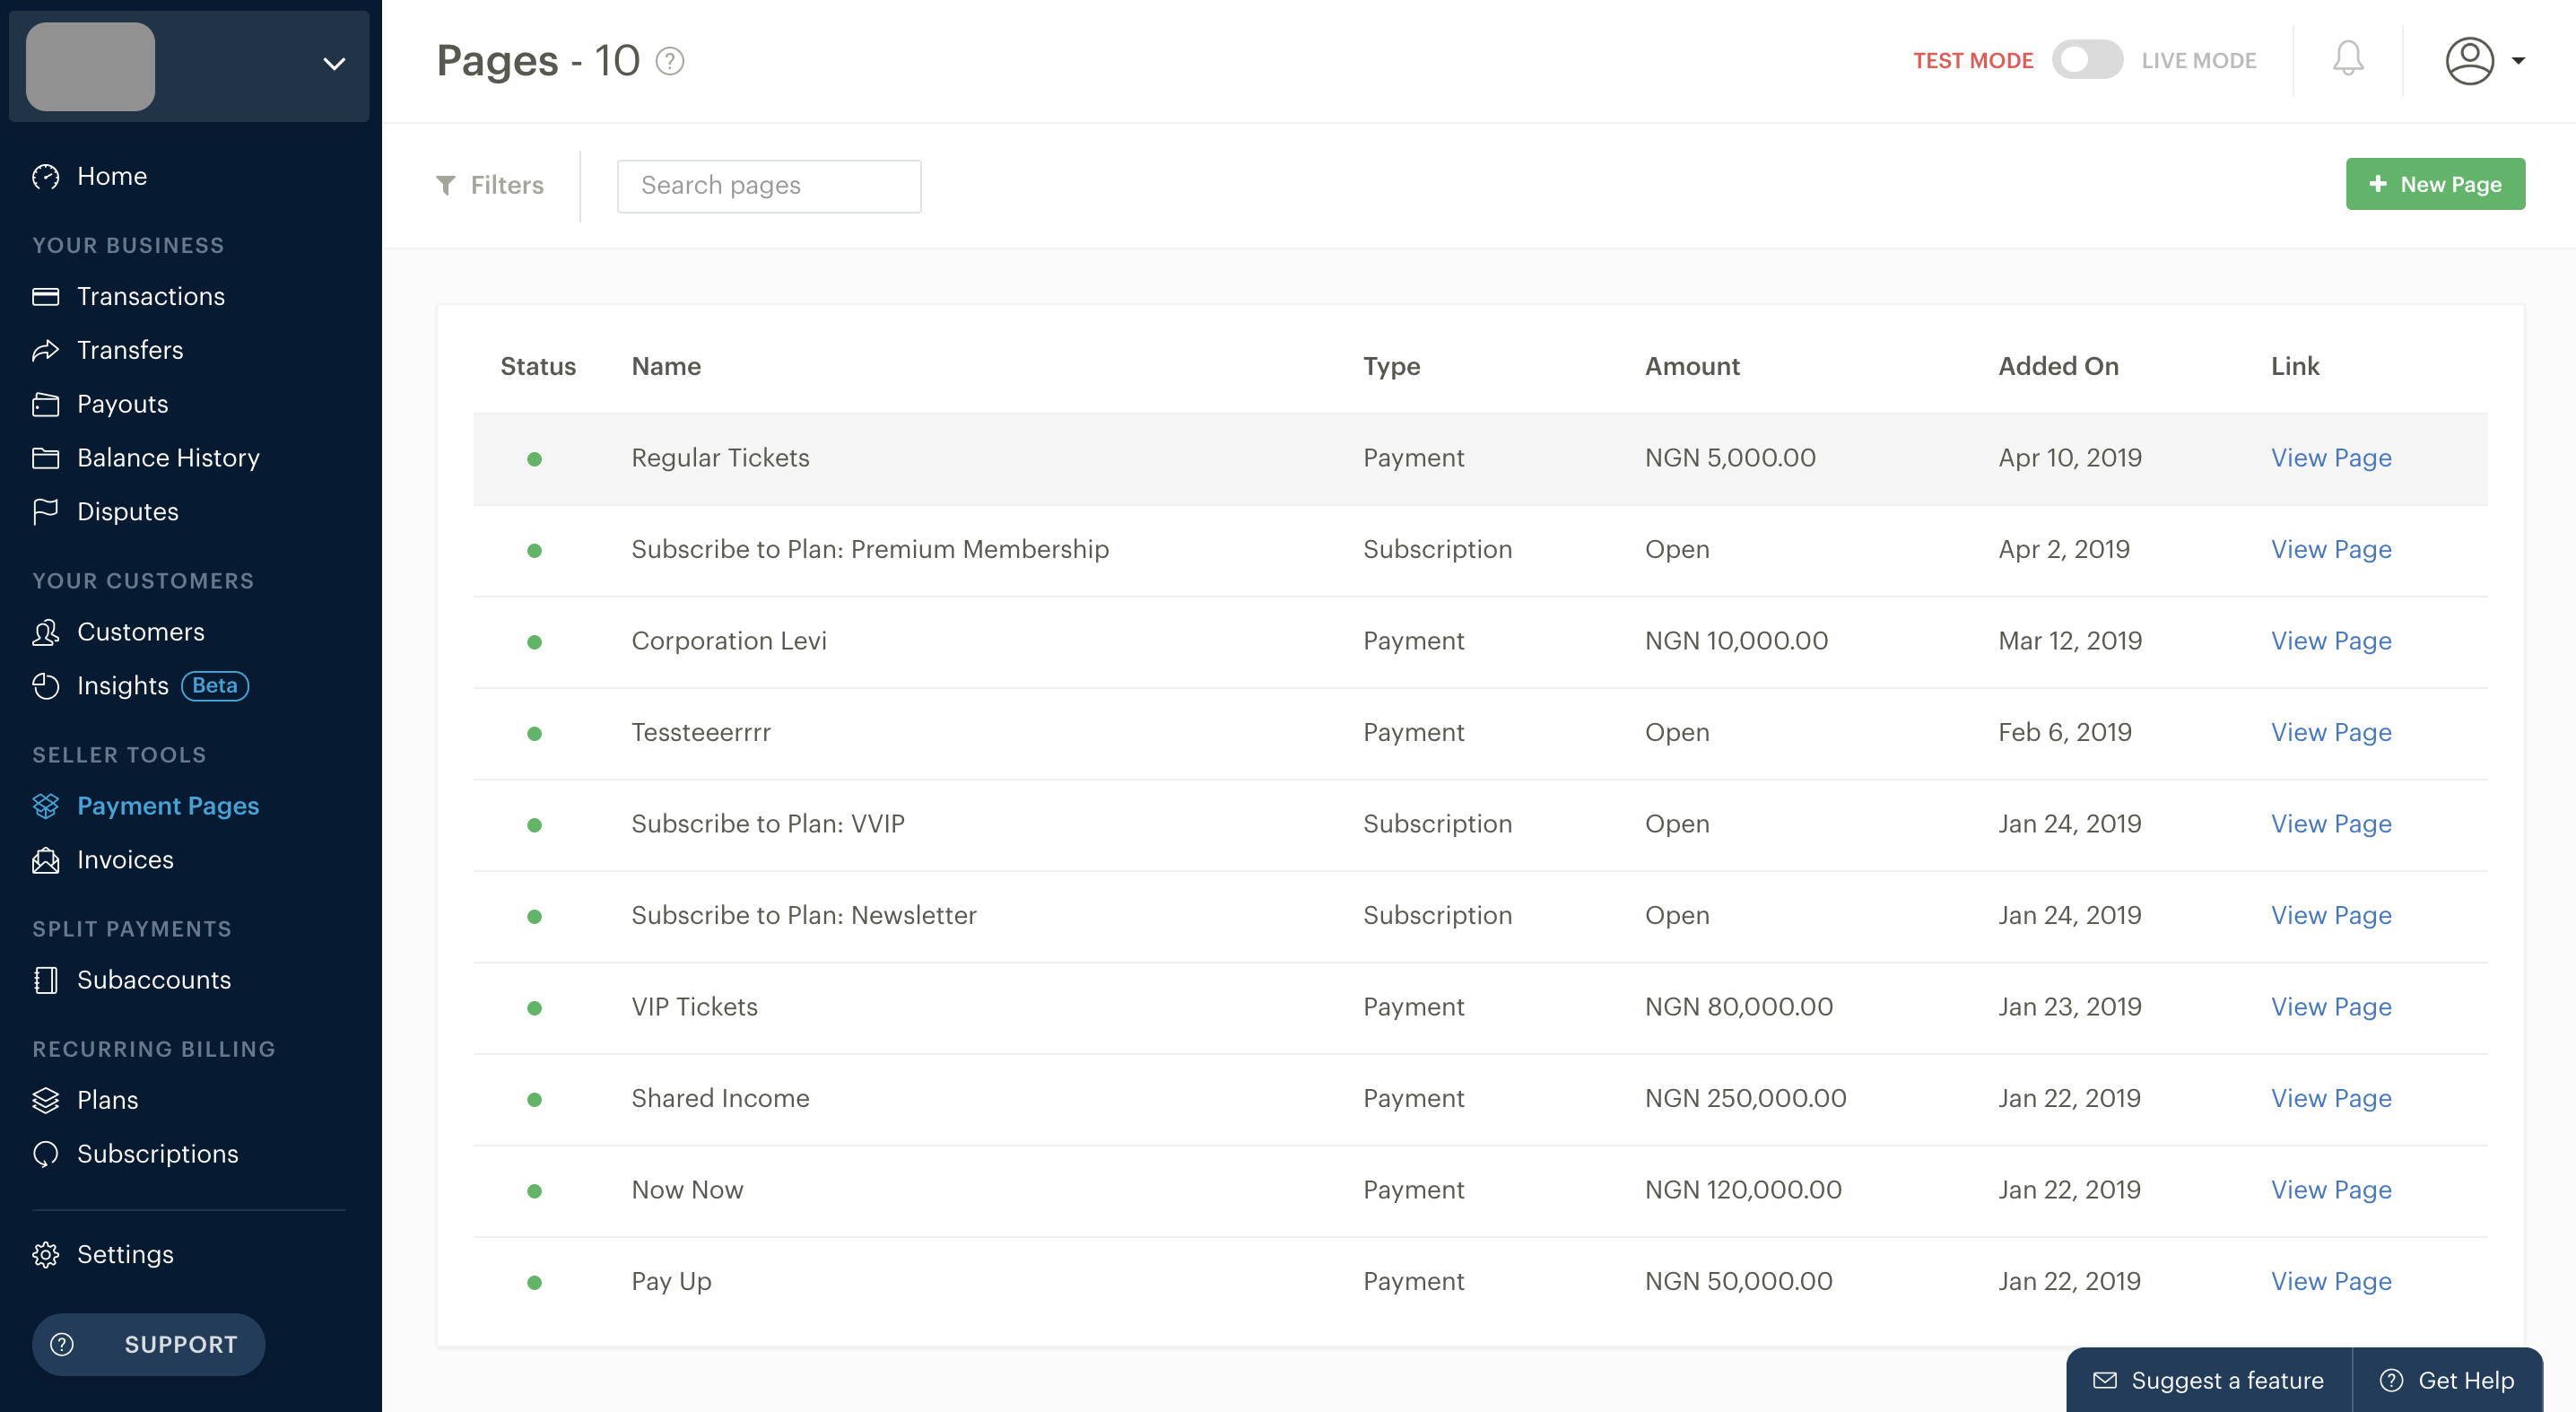
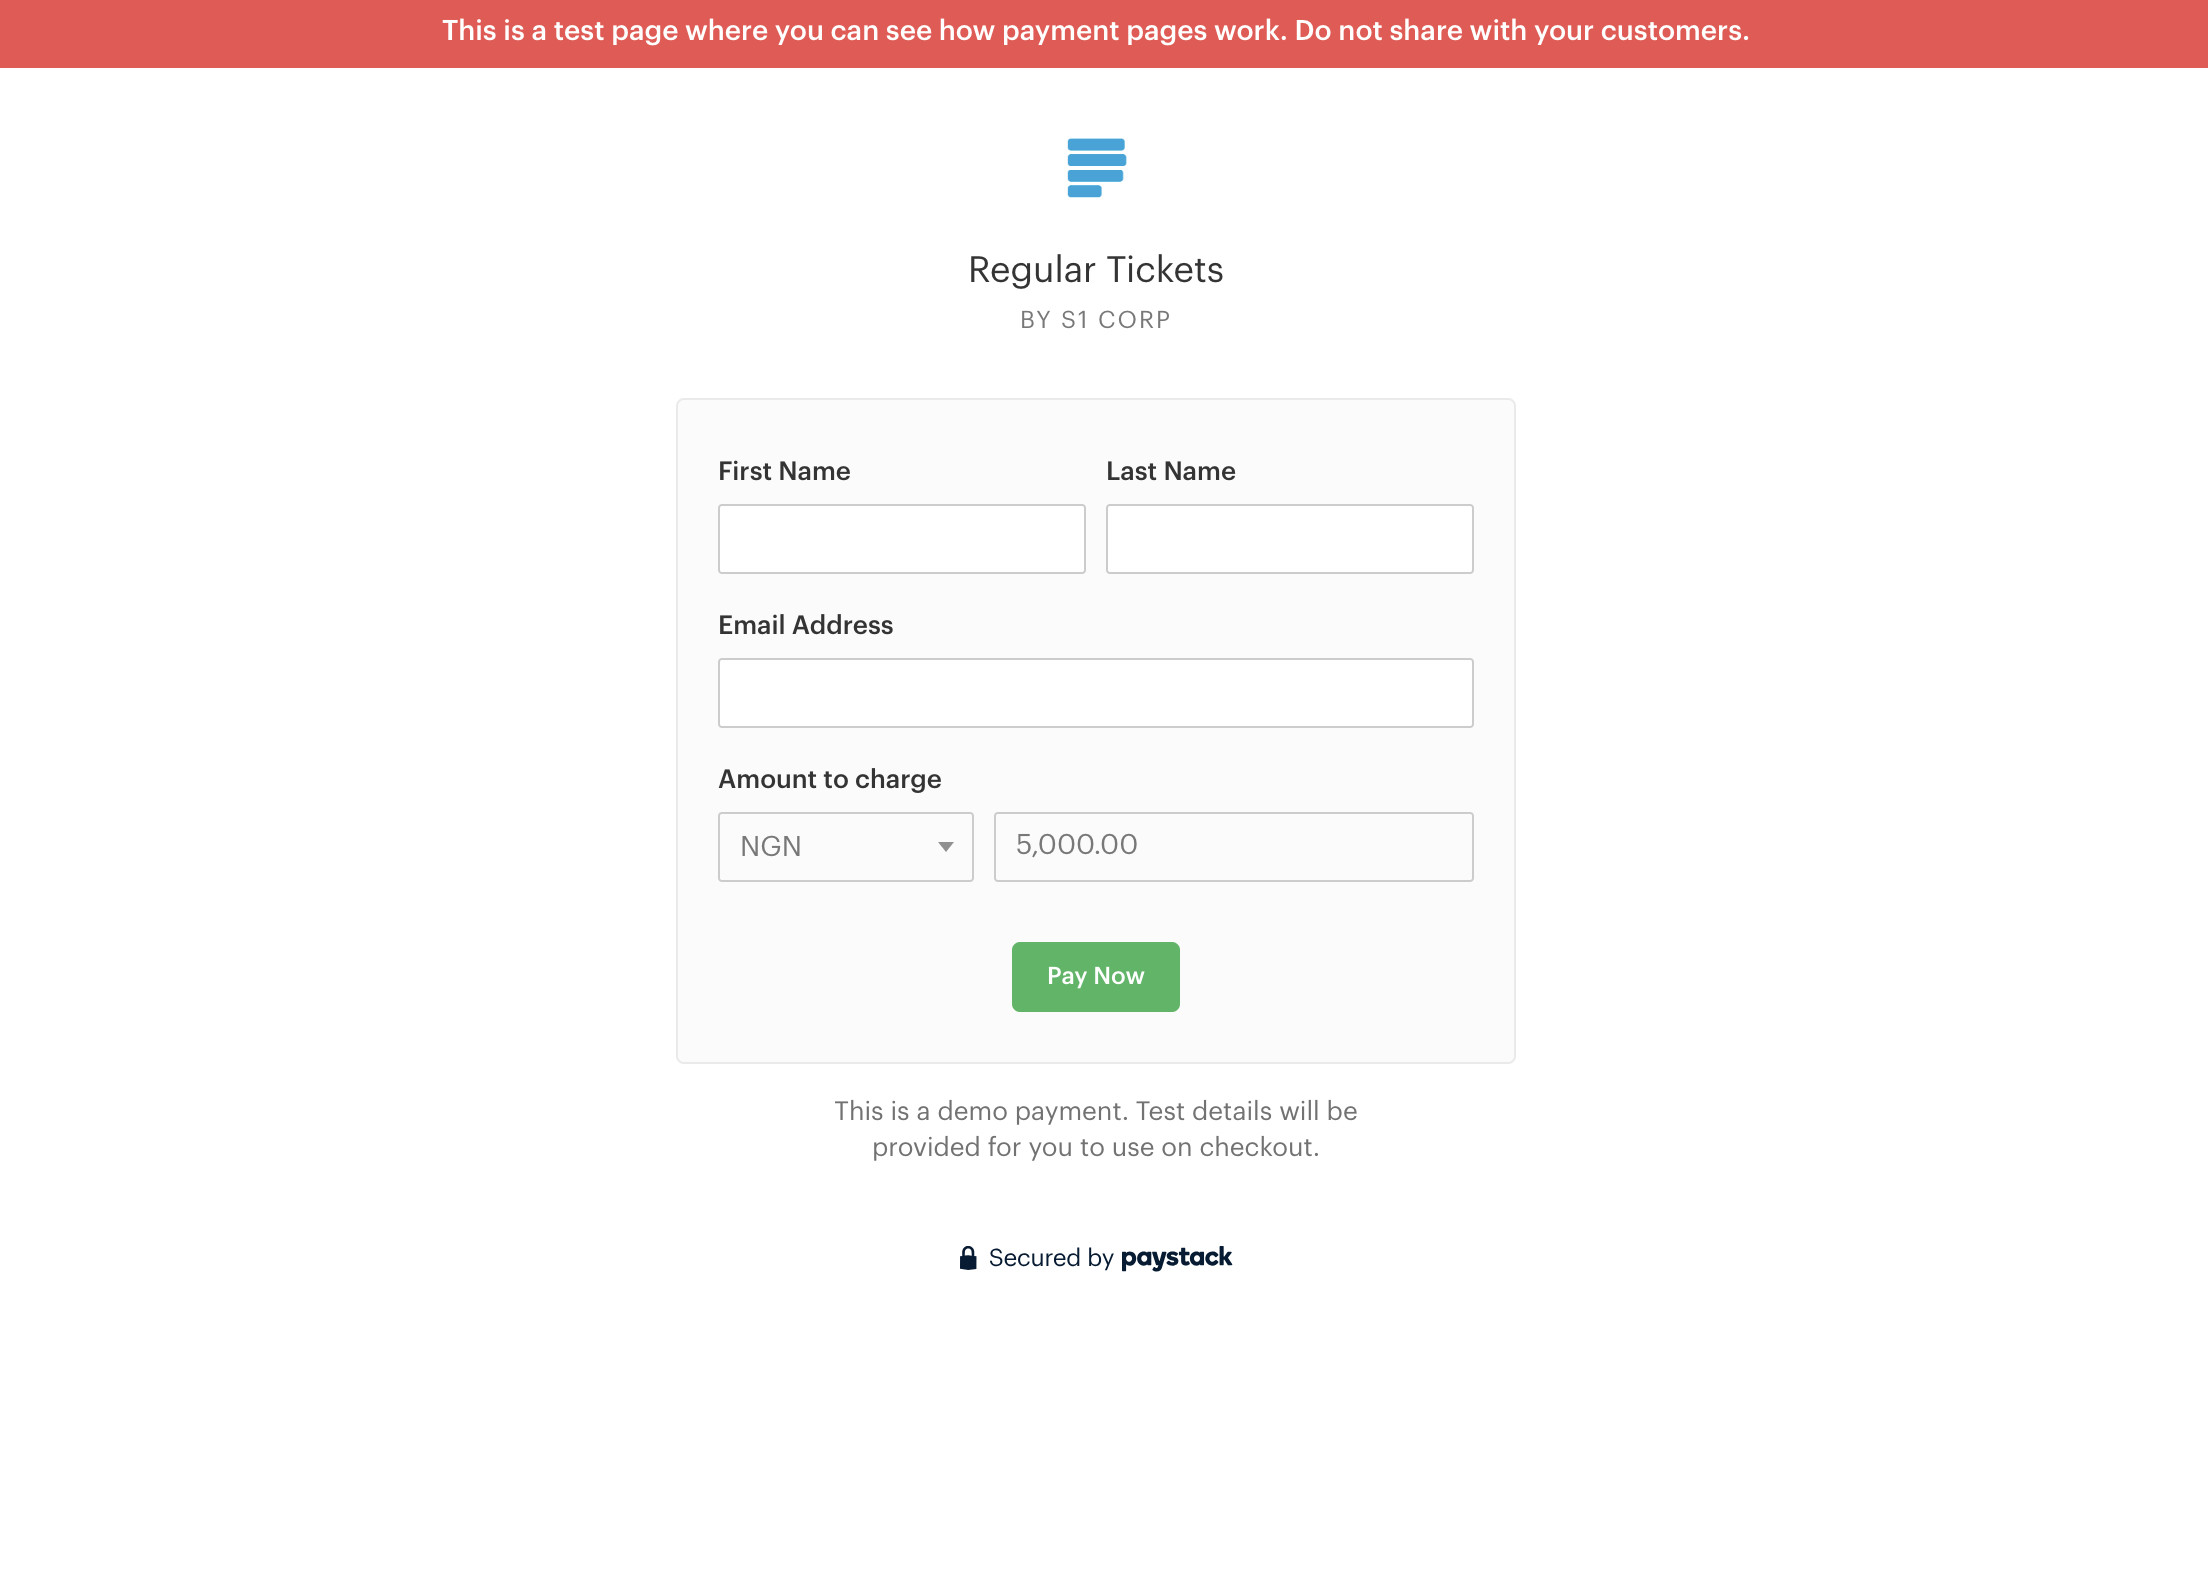
3. The easiest way to tell if a Payment Page is in Test Mode is to visit that Payment Page link. If it's in Test Mode, there'll be a bright red notification bar at the top of the Payment Page, as illustrated in the image below:
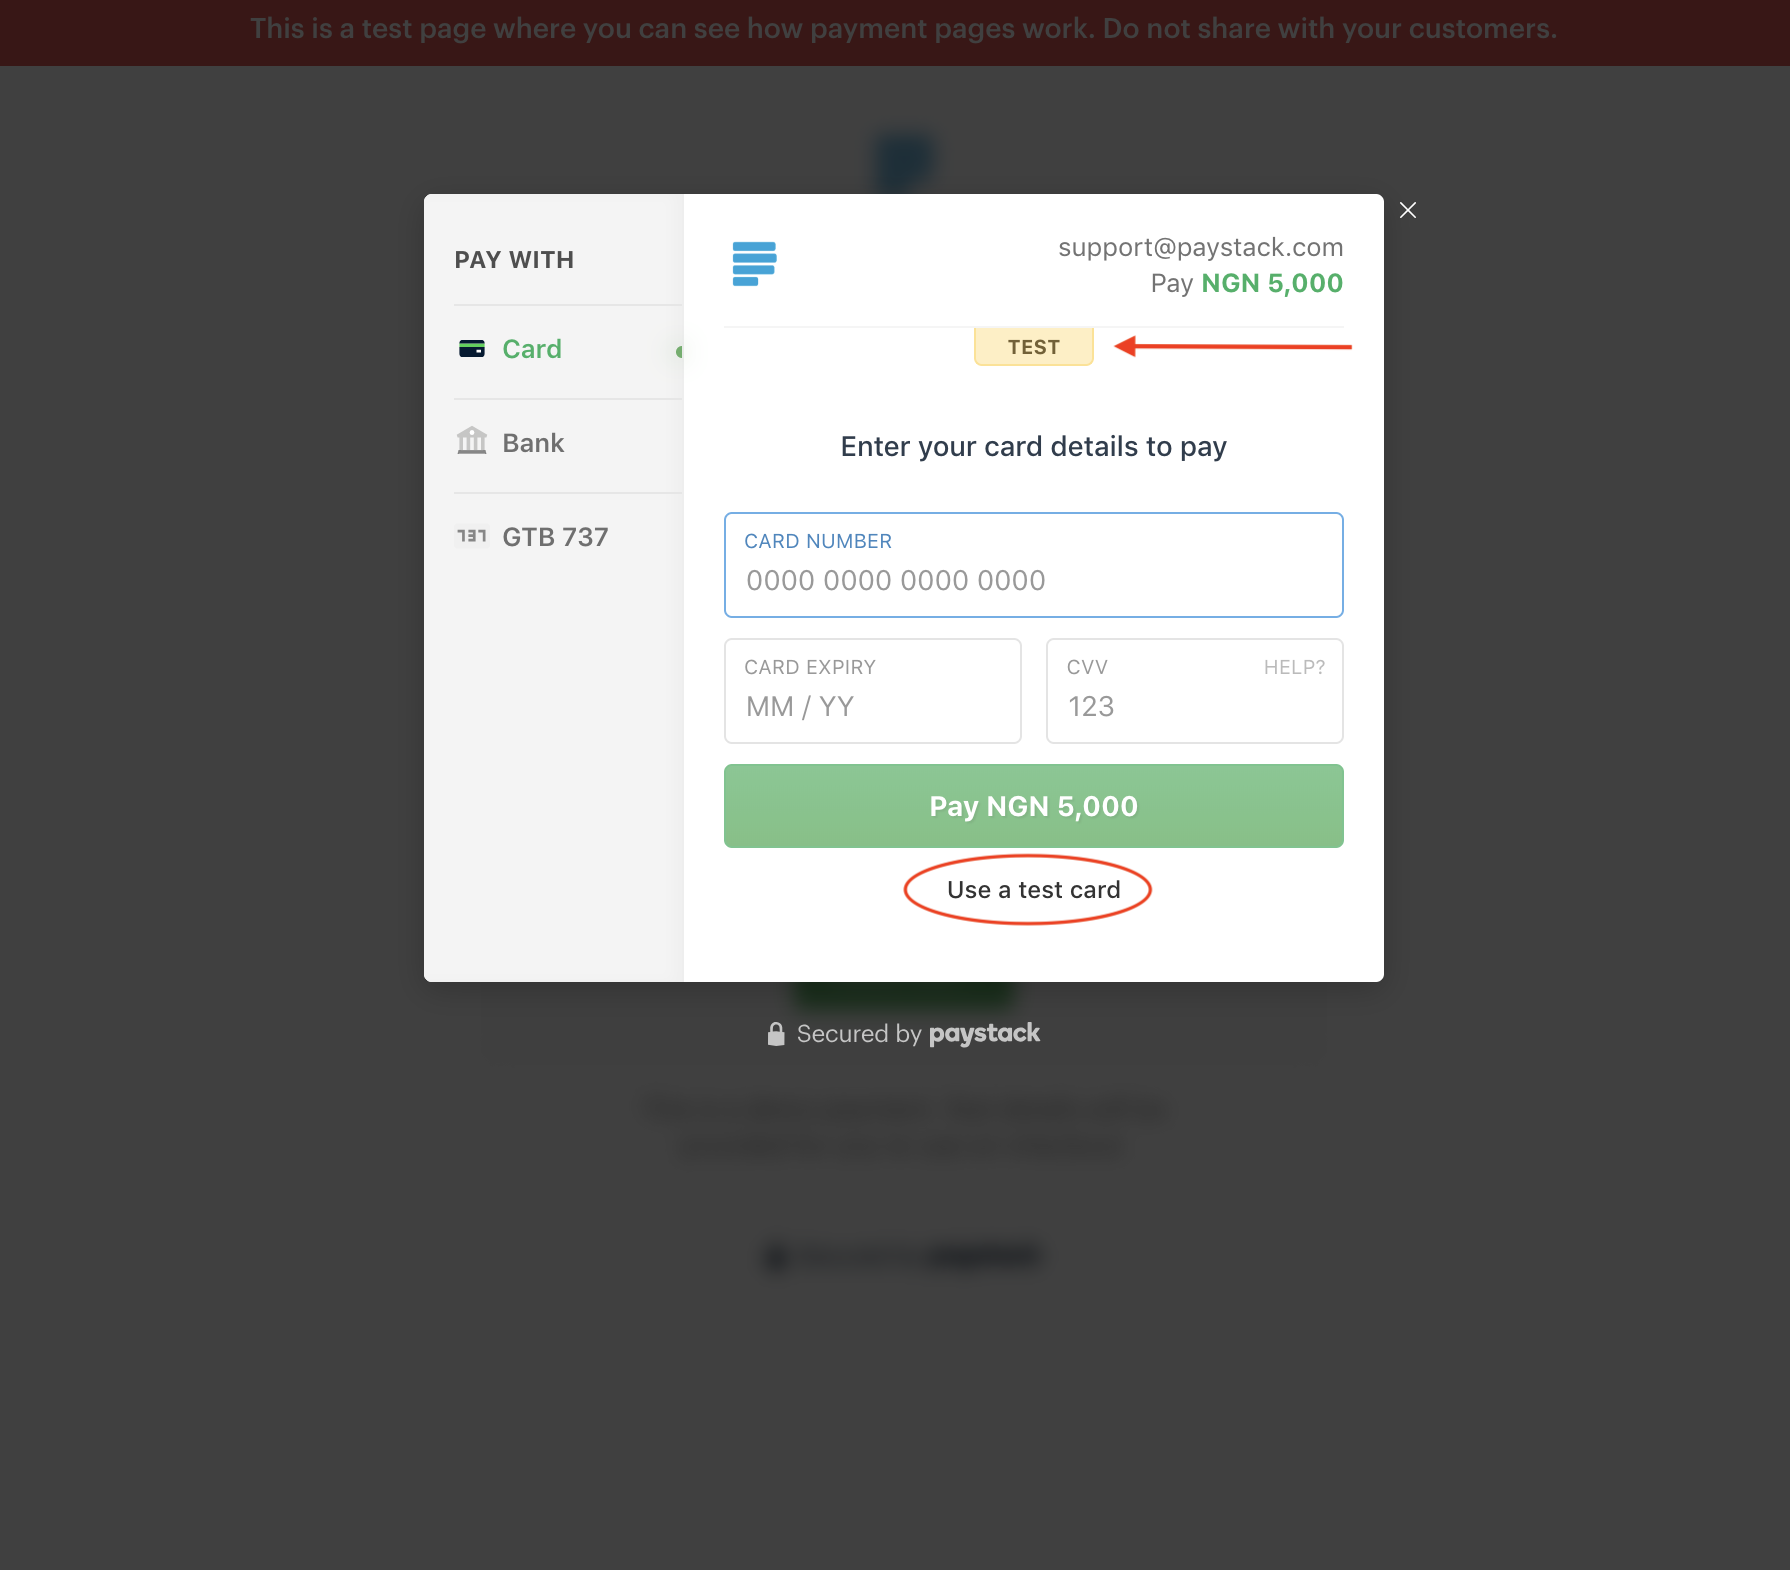
We will also indicate on the checkout form that the payment is a test; moreover, the option to use a " test card" will be present on the form. This is captured in the image below:
How do I switch from Test Mode to Live Mode?
If you would like to create Live Payment Pages, your Business has to be in Live Mode. The following are steps to take in order to be in Live Mode.
- First, you will need to make sure that you have sent in an activation request in the past. If you have not, here is a guide to activating your business:
How do I activate my Paystack Starter Business?
How do I activate my Paystack Registered Business? - If your business has been activated. You simply need to ensure that the toggle button near the top right corner is set to "Live Mode". When in Live Mode, the button will be green.

Comments
0 comments
Article is closed for comments.