Paystack Invoices is one of the ways you can accept payments directly from your Dashboard without the need of a website. With Paystack Invoices, you can quickly send a request for payment to anyone, and they'll be able to pay you instantly, online. Your walk-in customers can also pay for invoices offline using the Paystack Terminal.
The Invoices Summary Page
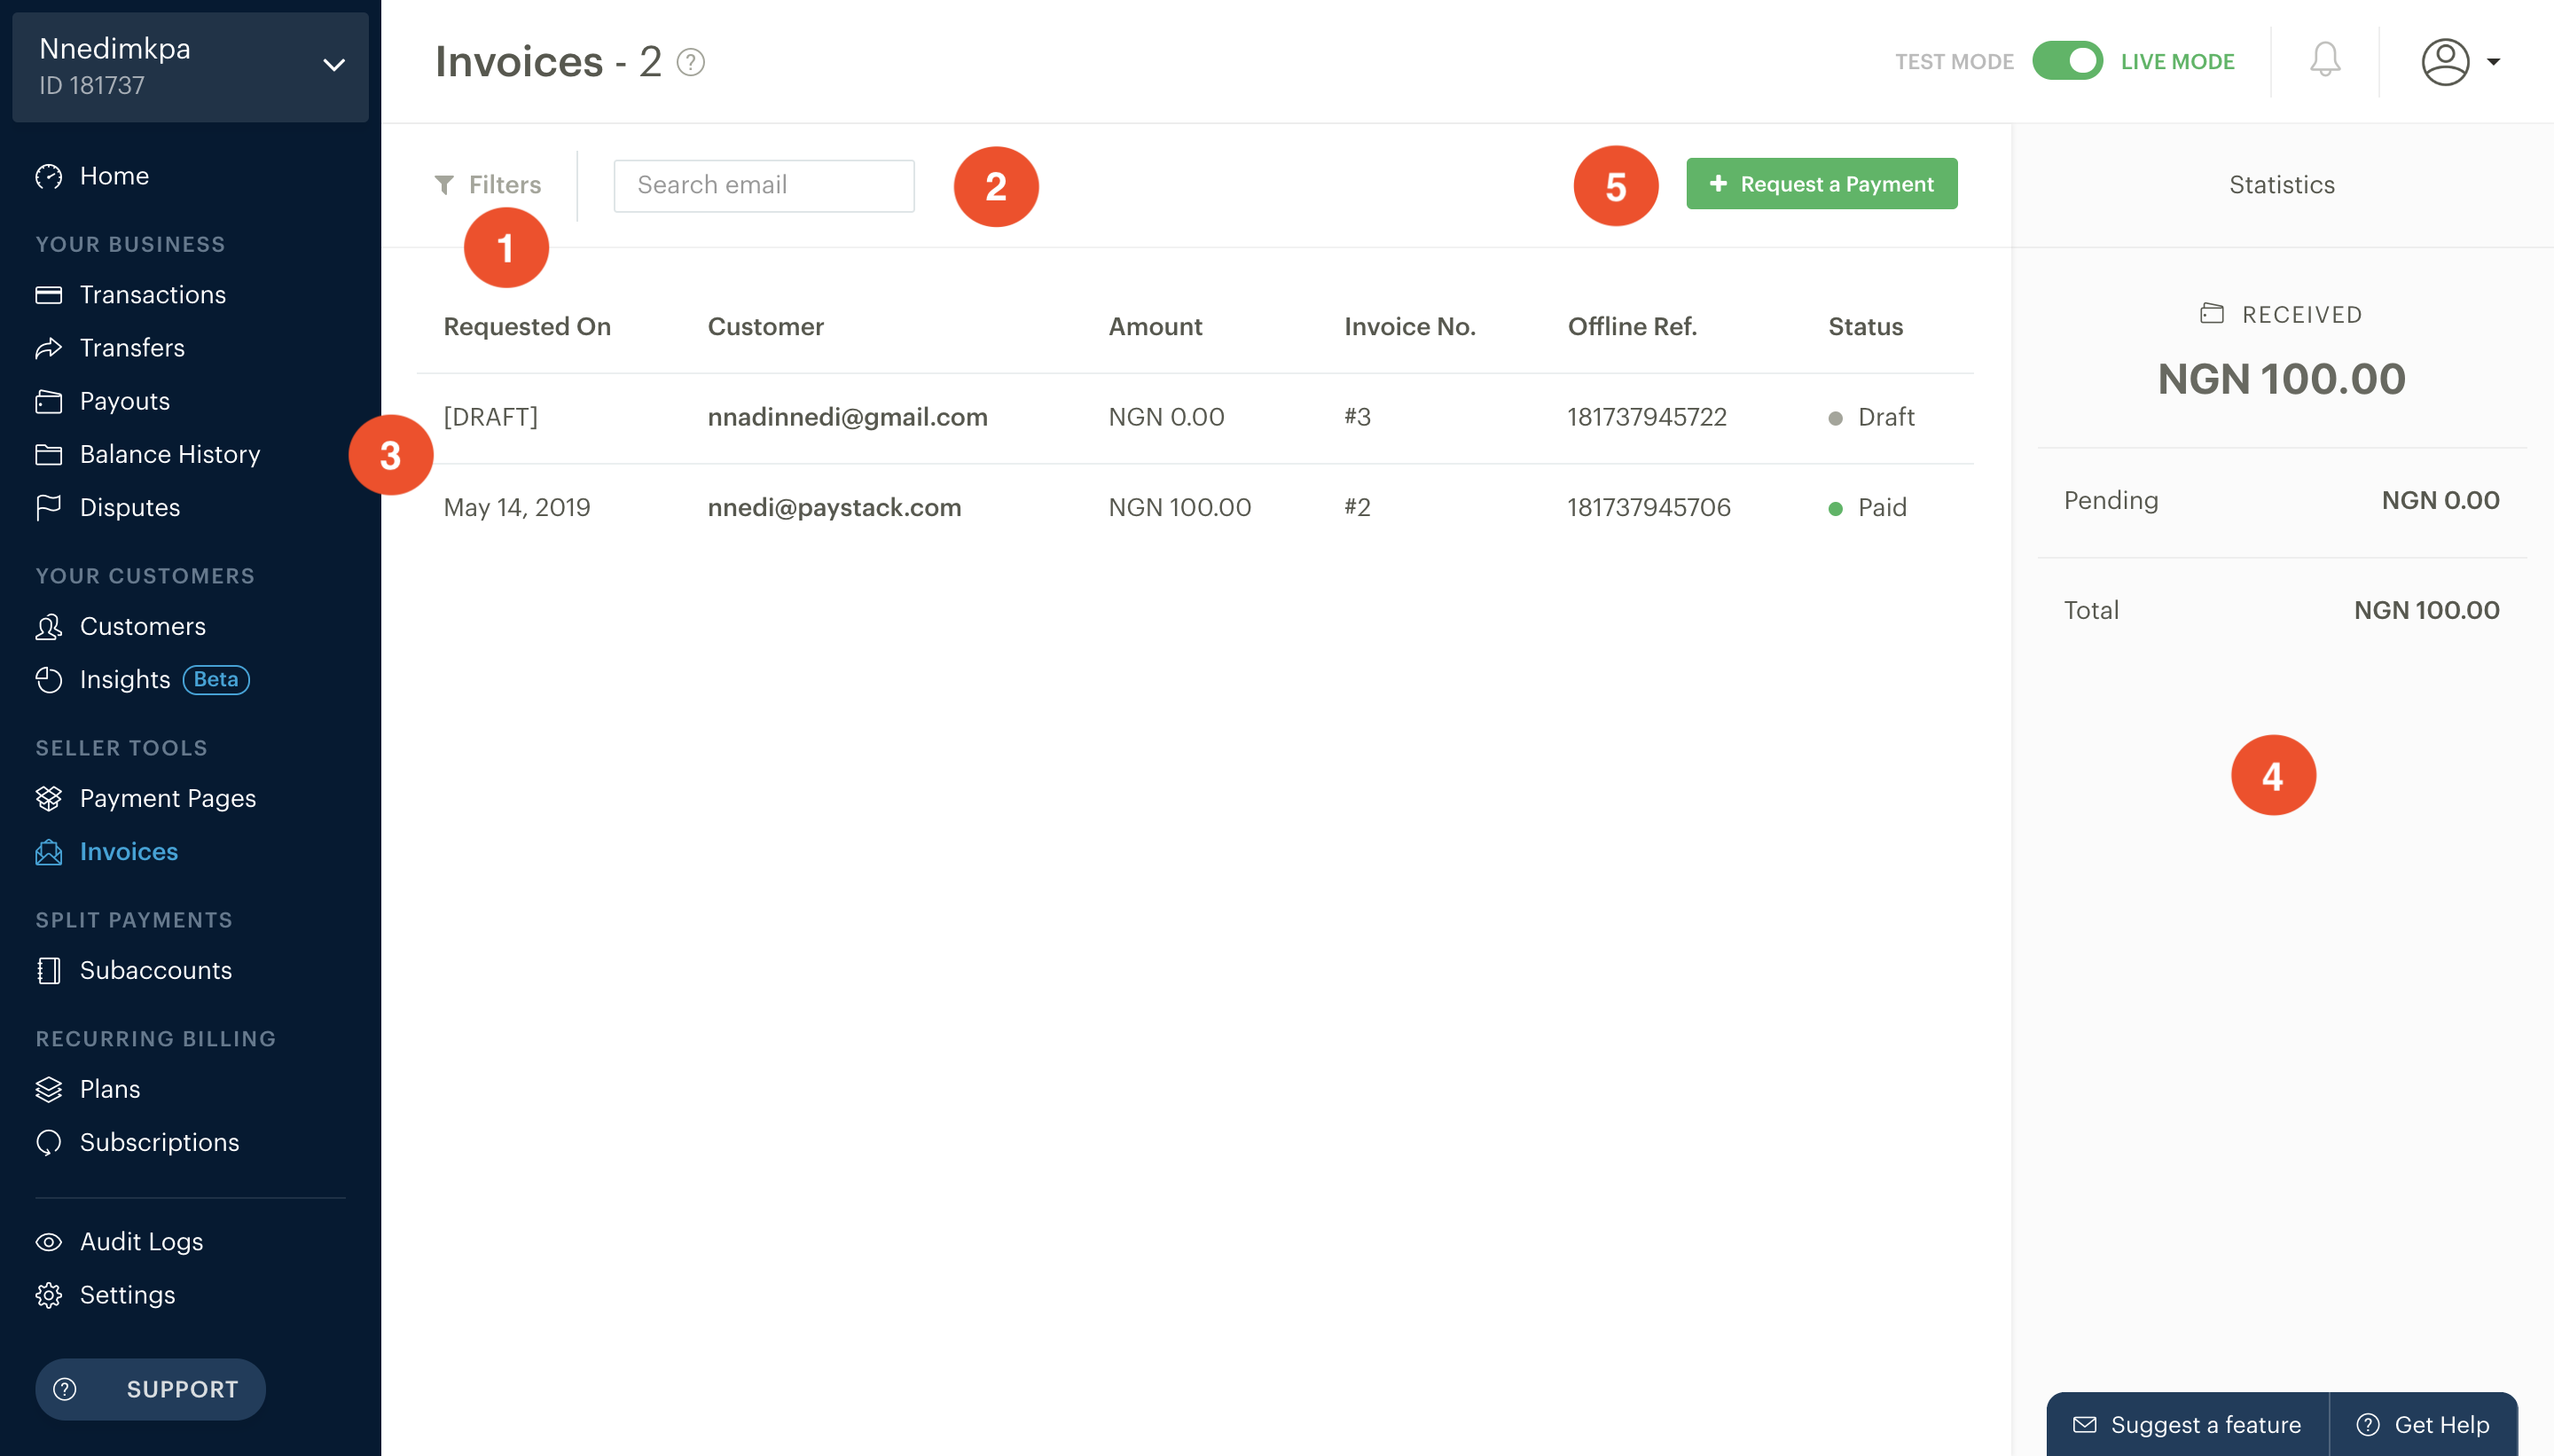
1. You can filter your list of invoices in multiple ways:
- By Status
- Draft - the invoice hasn't been sent yet
- Not Paid - the invoice has been sent and is yet to be paid
- Paid - the invoice has been paid
- By Type
- Has invoice
- Has no invoice
- By Time range
2. Search for a specific invoice using the customer's email address.
3. Here is a table showing all the invoices you've created:
- Requested on - this is the date that the payment request was made
- Customer - the email address of the person from whom payment was requested
- Amount - the amount that was requested
- Offline Ref. - in cases where the customer makes a payment offline (i.e. not on Paystack's checkout), this reference helps for tracking. You can then mark the invoices' status as Paid.
- Status - shows you whether the invoice has been paid (green dot), or whether it's in drafts/pending (grey dot)
4. This is where you can keep track of the total amount of money you're owed, and how much has been paid so far.
5. Clicking on the "Request a Payment" button creates an invoice.
How do I create an Invoice?
First, you will need to click the 'Request a Payment' button to the top right corner. A form will pop-up with the option to create two types of invoices:
- Simple Invoice - this is the fastest, simplest way to send an invoice
- Professional Invoice - this option is great if you need to include more information on the invoice such as tax and line items. The customer will be able to download the invoice as a pdf when they receive it.
How to create a Simple Invoice
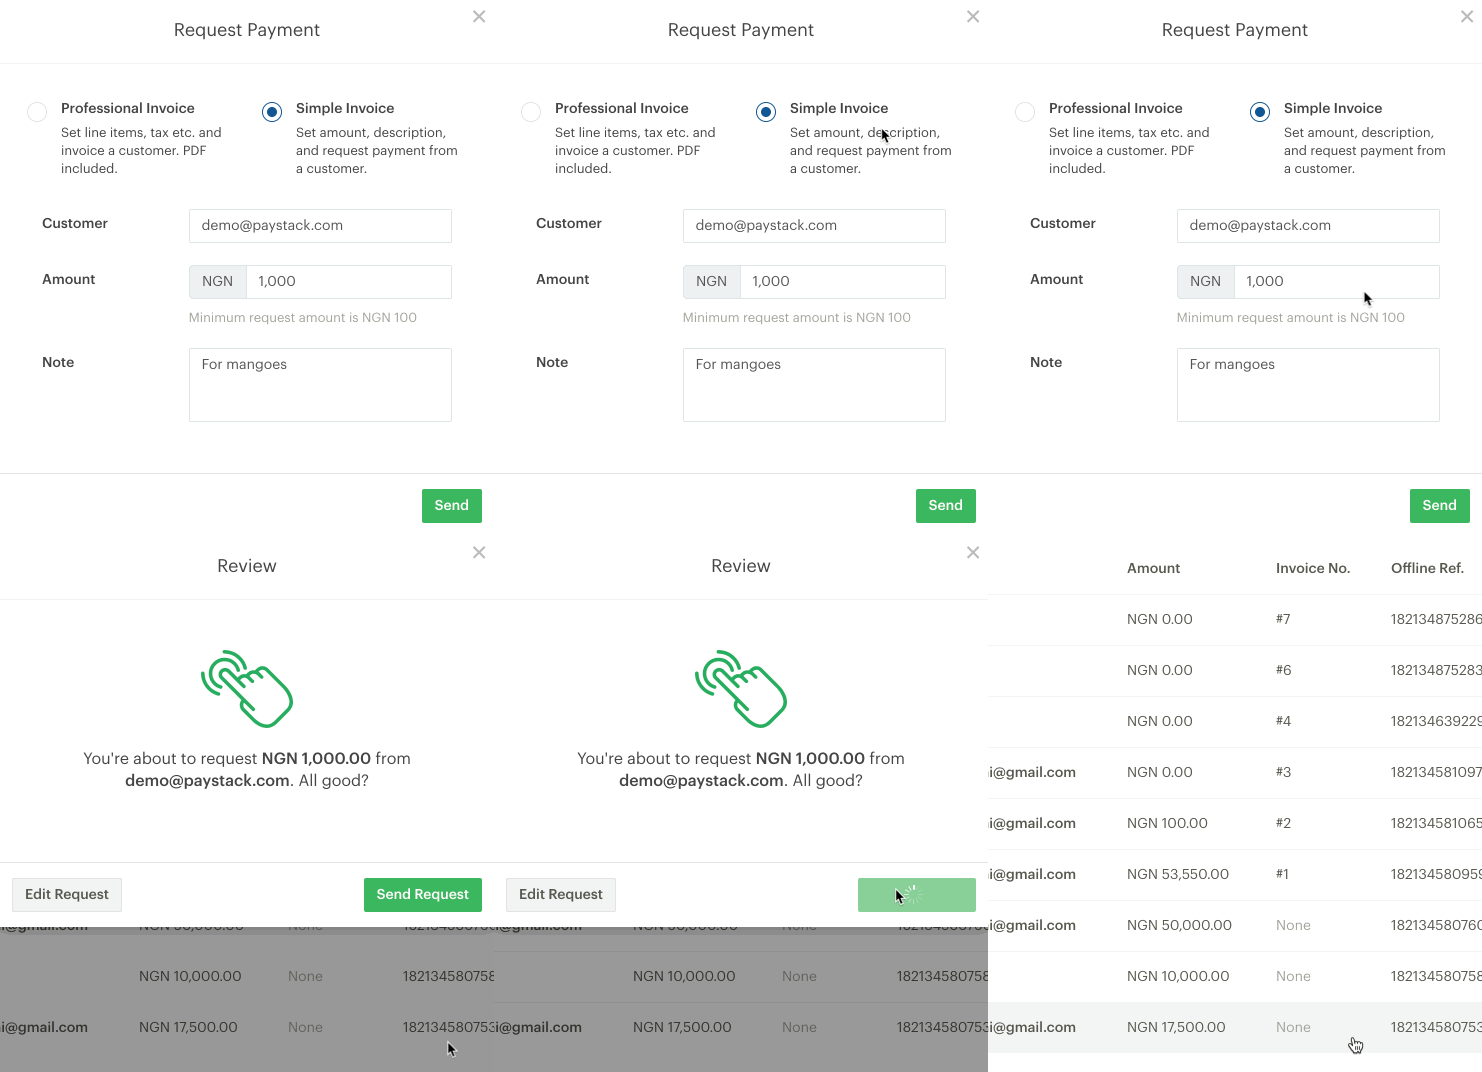
- Select the 'Simple Invoice' option, you'll then be prompted to enter the amount you're requesting. Also, you have the option to include a short note.
- Click 'Send' you'll have one chance to review the payment request. If everything looks good, hit 'Send Request' to send the invoice to the customer.
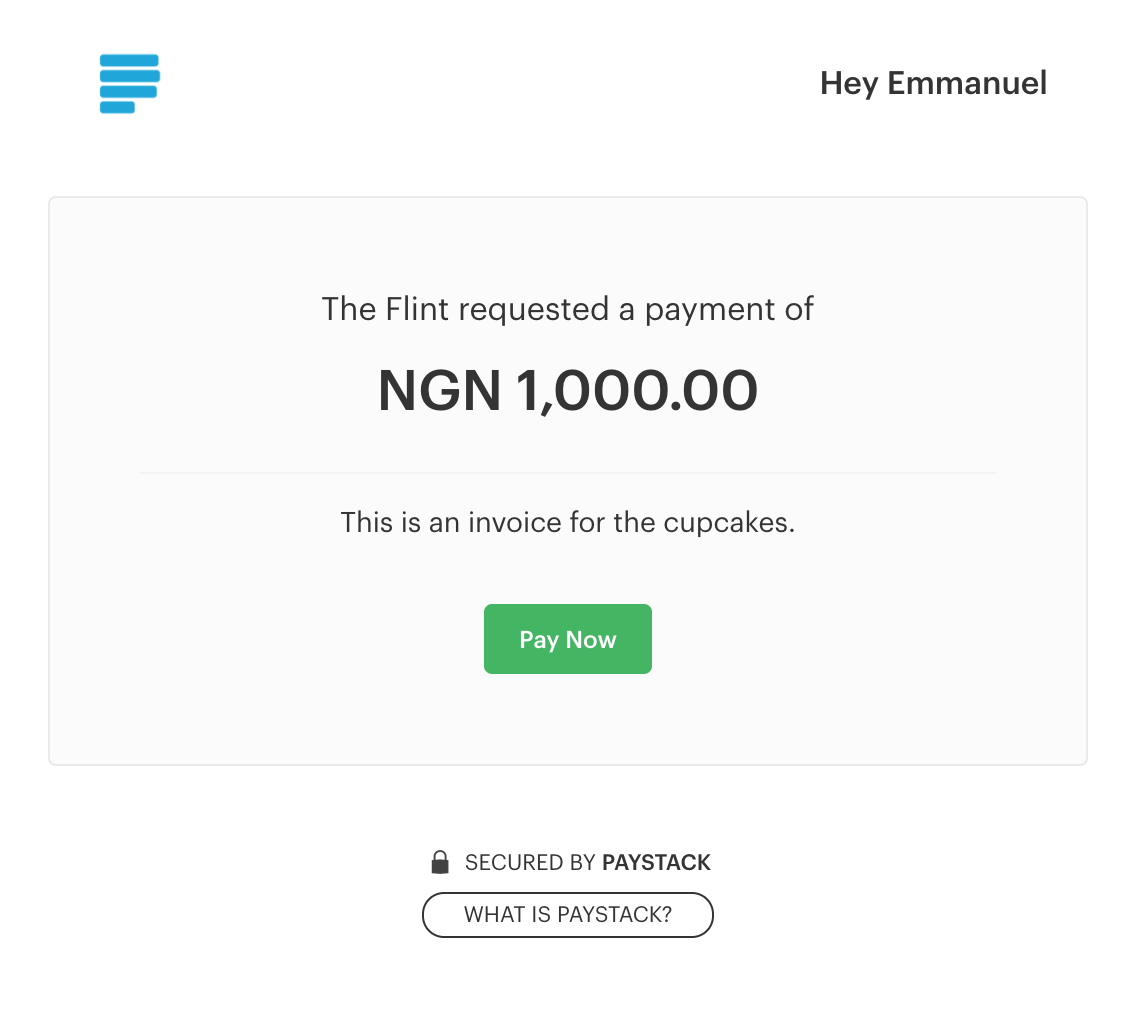
Your customer will receive a notification to their email address which looks like this:
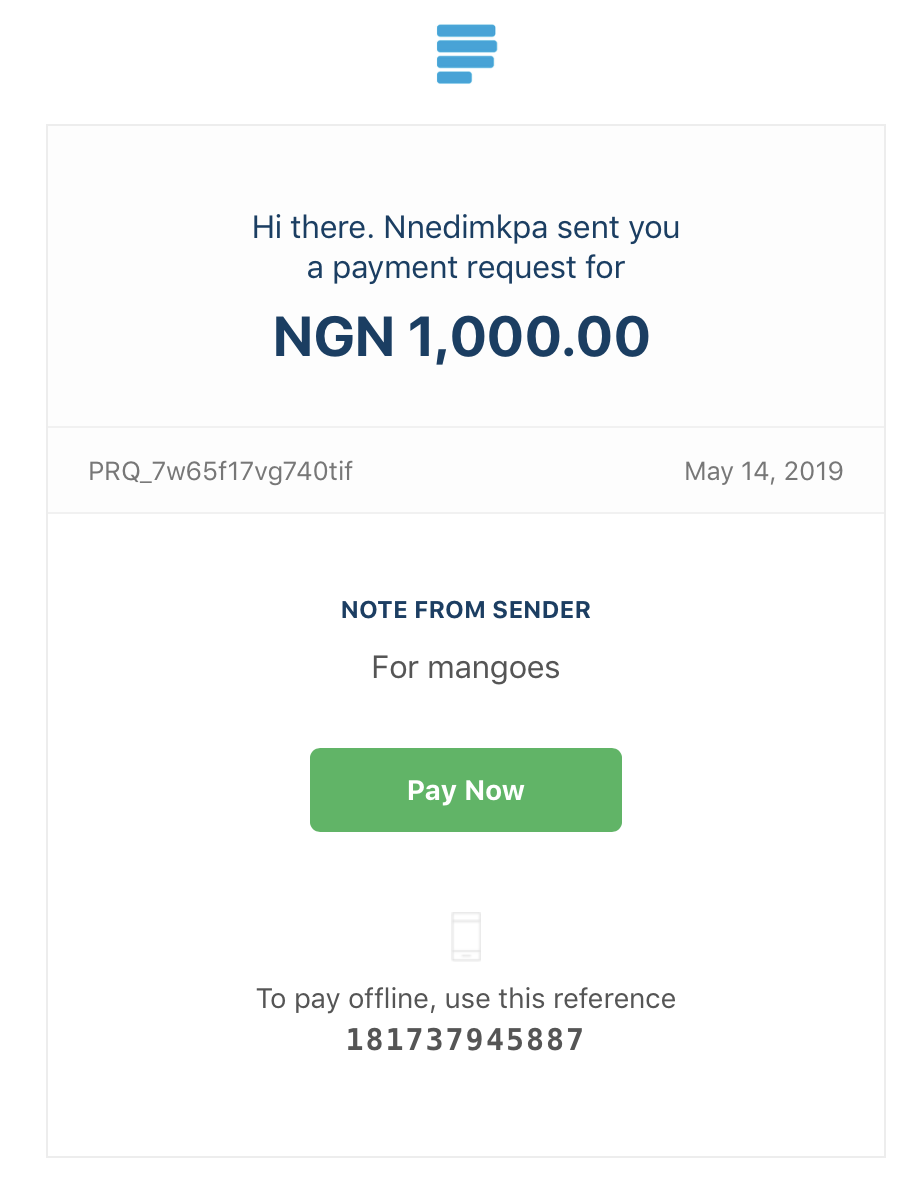
- All they have to do is click on "Pay Now" and a secure page will open on their browser where they can make payment. Naturally, you will get a notification once this payment has been completed and the payment link would expire.
How to create a Professional Invoice
If you choose the professional invoice, you'll be able to edit the contents of that invoice.
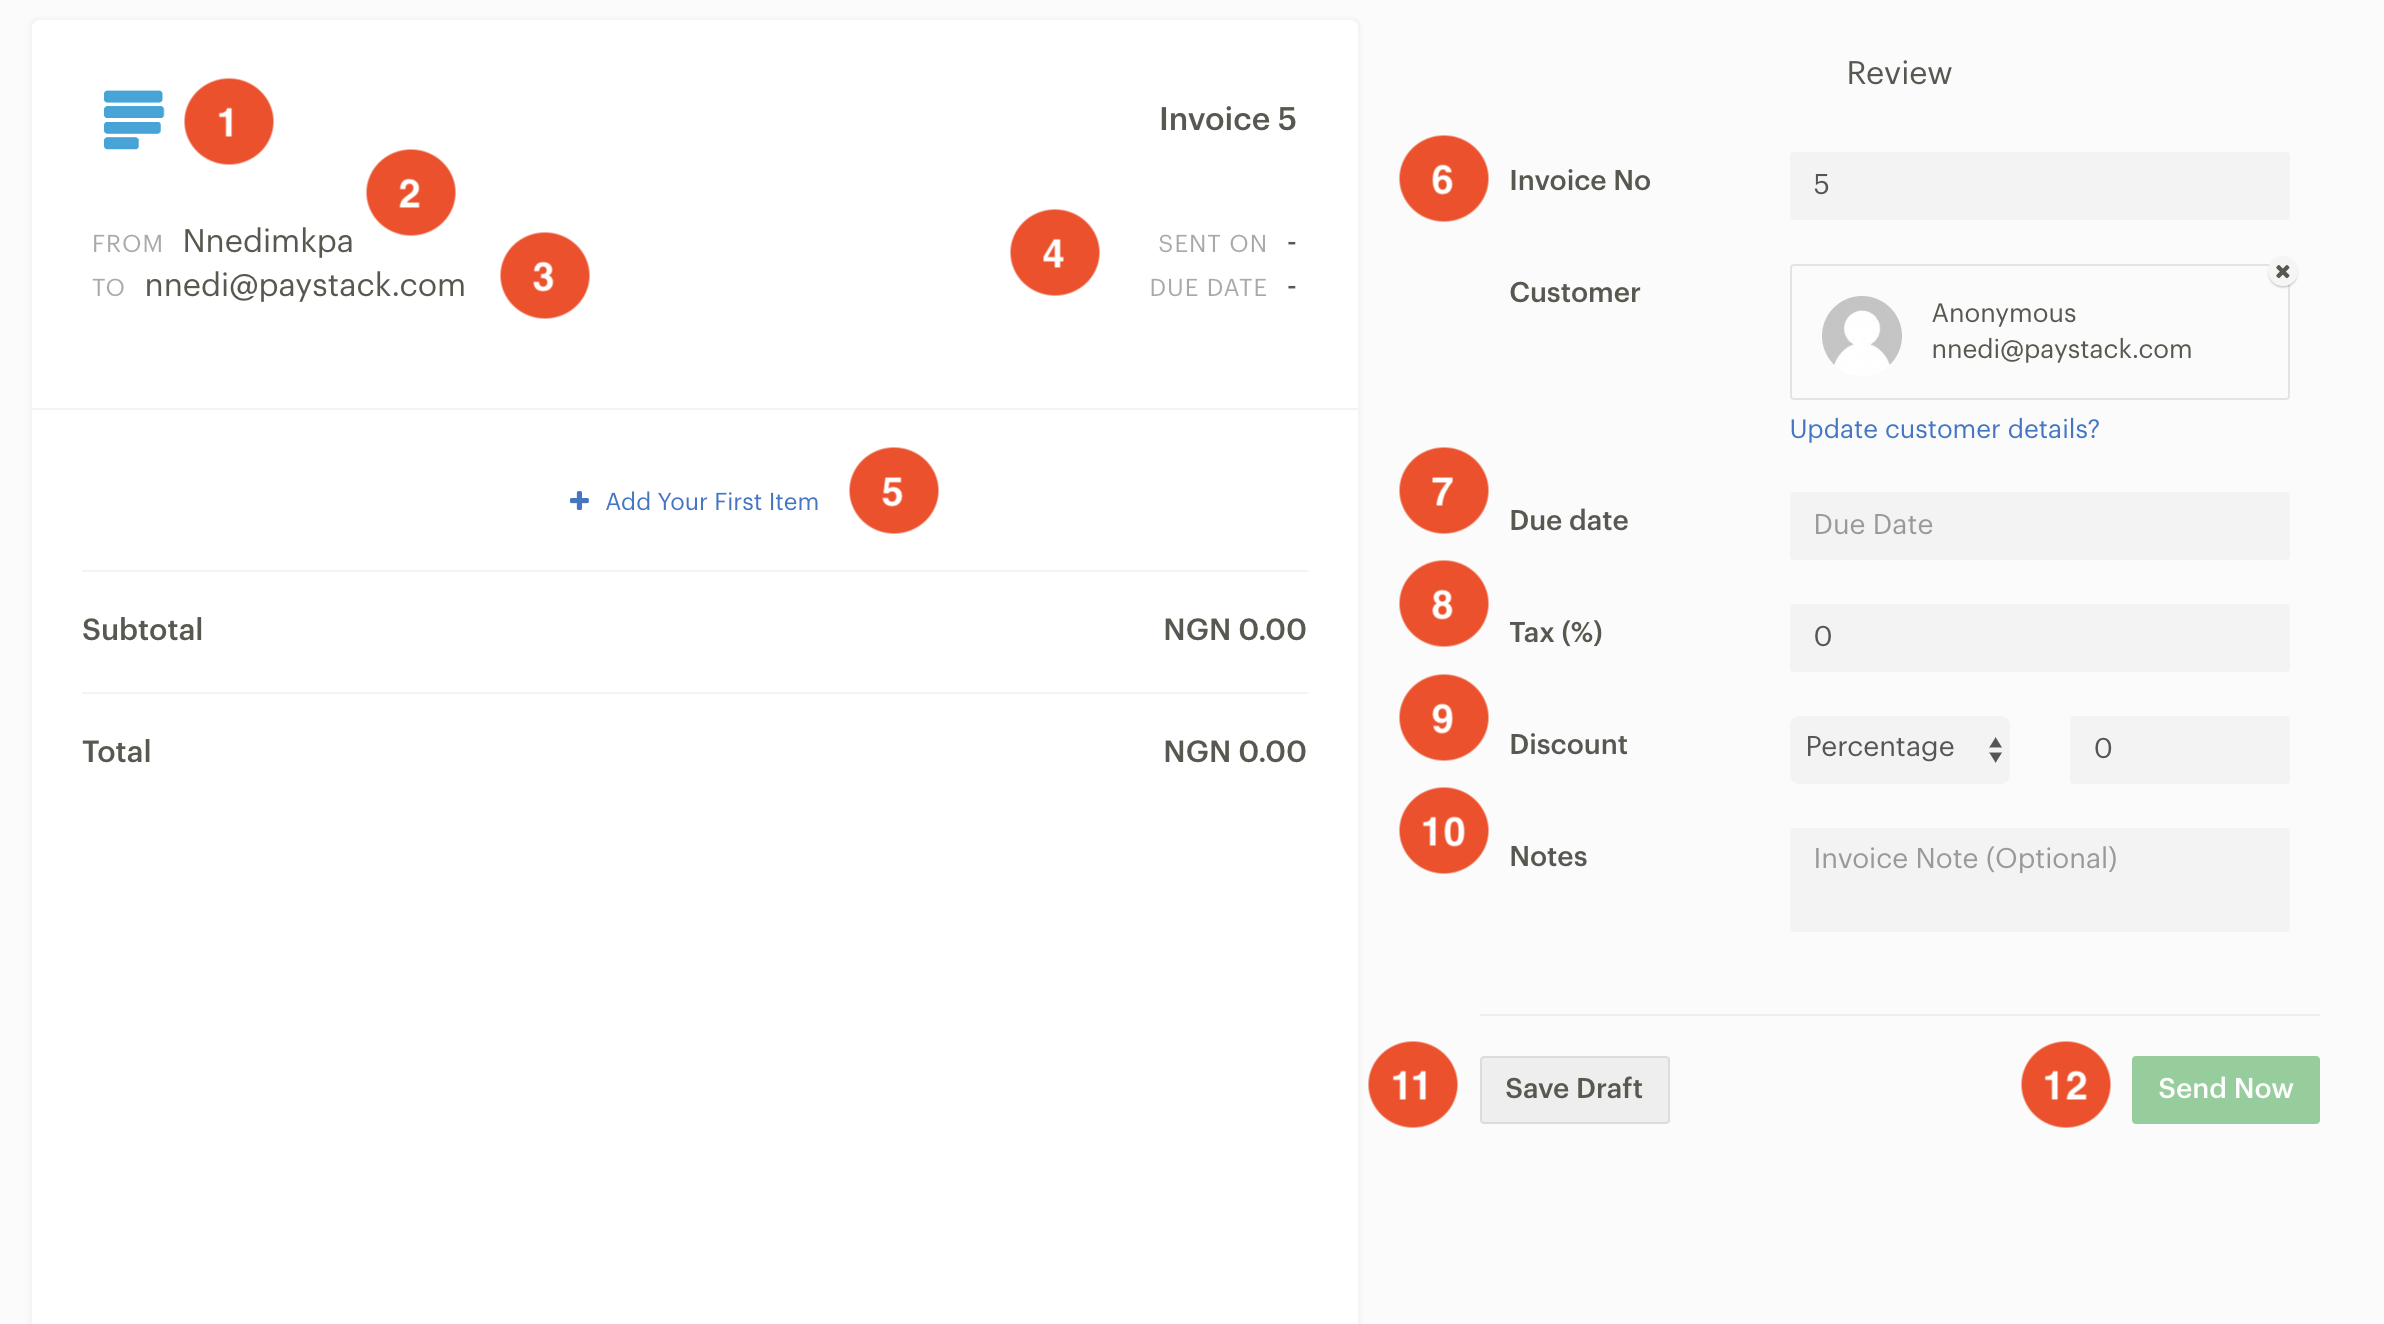
- This is the company logo that will be on the invoice PDF. If you set a logo in your business settings, it will appear here.
- The name of the business requesting payment.
- This is the email address to which the invoice will be sent.
- Information about when the invoice was sent, and when it is due.
- Here you add items and set their prices.
- Set your customer invoice number here.
- Due date is the deadline for payment.
- If you would like to add a tax percentage, such as VAT, you can do that here.
- You can set a percentage discount or flat rate discount on the total amount.
- Enter additional notes or instructions you'd like to send to the customer here.
- You can save a draft invoice and pick up where you left off later on.
- Once everything looks good, hit 'Send Now' to send the invoice.
After the invoice is sent
Once the invoice is sent, clicking it in the Invoices Summary page brings up this pop-up.
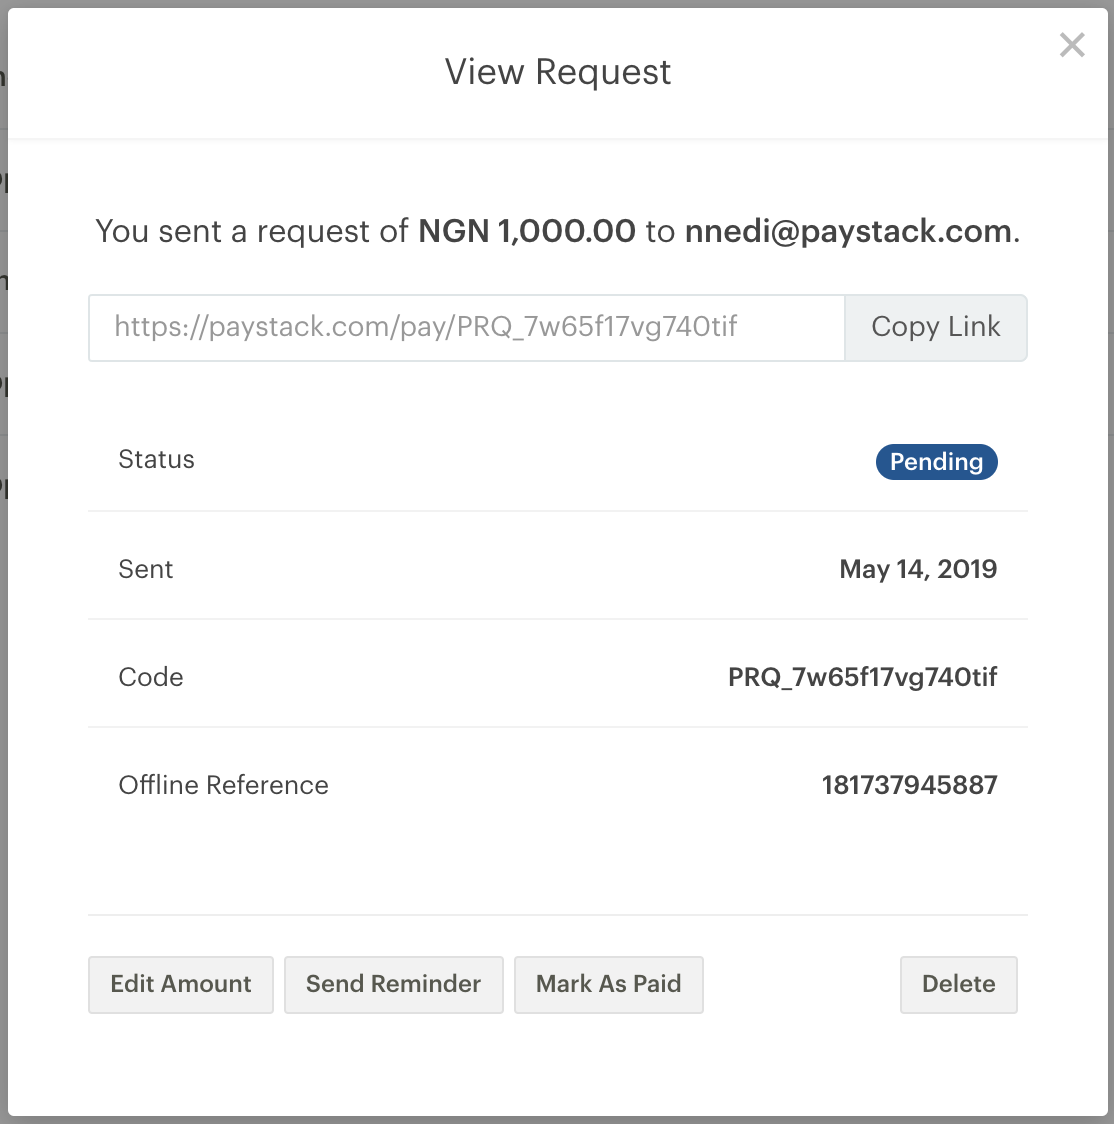
You can copy a direct link to the Invoice and send it via WhatsApp, social media, or however you're communicating with your customer.
After the invoice is sent, you can also:
- Edit the amount requested
- Send a reminder about the Payment Request
- Mark the invoice as paid if the customer pays offline
- Delete the payment request entirely
Important to Note:
Test Mode Invoices vs Live Mode Invoices
Please remember to double-check which Mode your Dashboard is on when you're creating an Invoice. Your customers can ONLY pay you actual money if they're sent Live Mode Invoices.
Test Mode Invoices are merely to help you simulate how the invoice looks and behaves before you send it. Learn more about the difference between Test Mode and Live Mode.

Comments
0 comments
Article is closed for comments.